Creative Woodworks & crafts 2000-03, страница 14
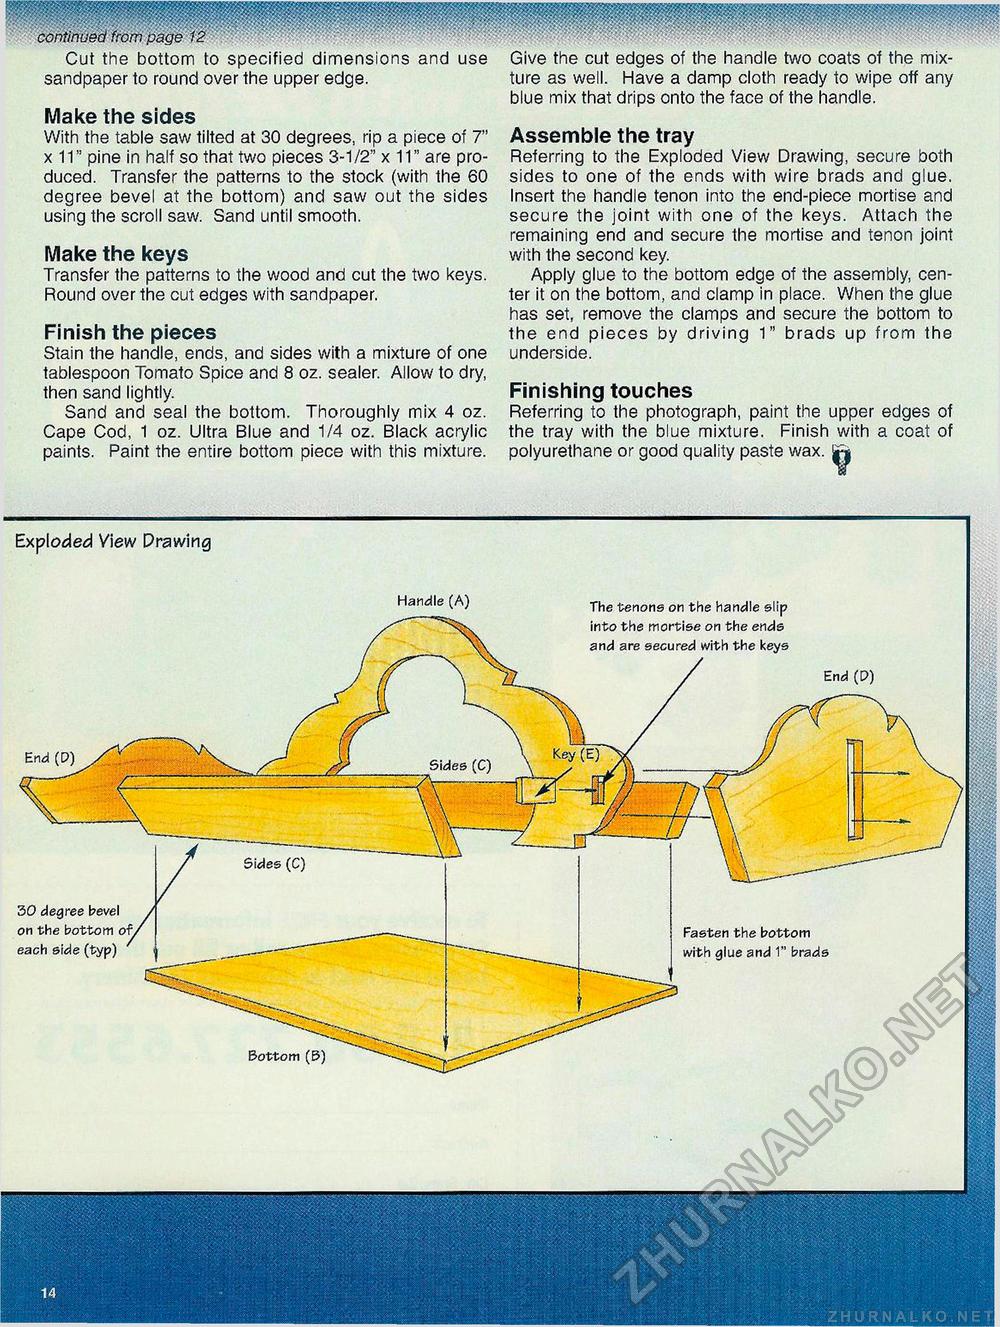
Cut the bottom to specified dimensions and use sandpaper to round over the upper edge. Make the sides With the table saw tilted at 30 degrees, rip a piece of 7" x 11" pine in half so that two pieces 3-1/2" x 11" are produced. Transfer the patterns to the stock (with the 60 degree bevel at the bottom) and saw out the sides using the scroll saw. Sand until smooth. Make the keys Transfer the patterns to the wood and cut the two keys. Round over the cut edges with sandpaper. Finish the pieces Stain the handle, ends, and sides with a mixture of one tablespoon Tomato Spice and 8 oz. sealer. Allow to dry, then sand lightly. Sand and seal the bottom. Thoroughly mix 4 oz. Cape Cod, 1 oz. Ultra Blue and 1/4 oz. Black acrylic paints. Paint the entire bottom piece with this mixture. Give the cut edges of the handle two coats of the mixture as well. Have a damp cloth ready to wipe off any blue mix that drips onto the face of the handle. Assemble the tray Referring to the Exploded View Drawing, secure both sides to one of the ends with wire brads and glue. Insert the handle tenon into the end-piece mortise and secure the joint with one of the keys. Attach the remaining end and secure the mortise and tenon joint with the second key. Apply glue to the bottom edge of the assembly, center it on the bottom, and clamp in place. When the glue has set, remove the clamps and secure the bottom to the end pieces by driving 1" brads up from the underside. Finishing touches Referring to the photograph, paint the upper edges of the tray with the blue mixture. Finish with a coat of polyurethane or good quality paste wax. |fj Exploded View Prawing End (D) End (D) Fasten the bottom with glue and 1" brads Handle (A) The tenons on the handle slip into the mortise on the ends and are secured with the keys 30 degree bevel on the bottom of/ each side (typ) Sides (C) Bottom (B) s ^ v / |


