Creative Woodworks & crafts 2000-03, страница 34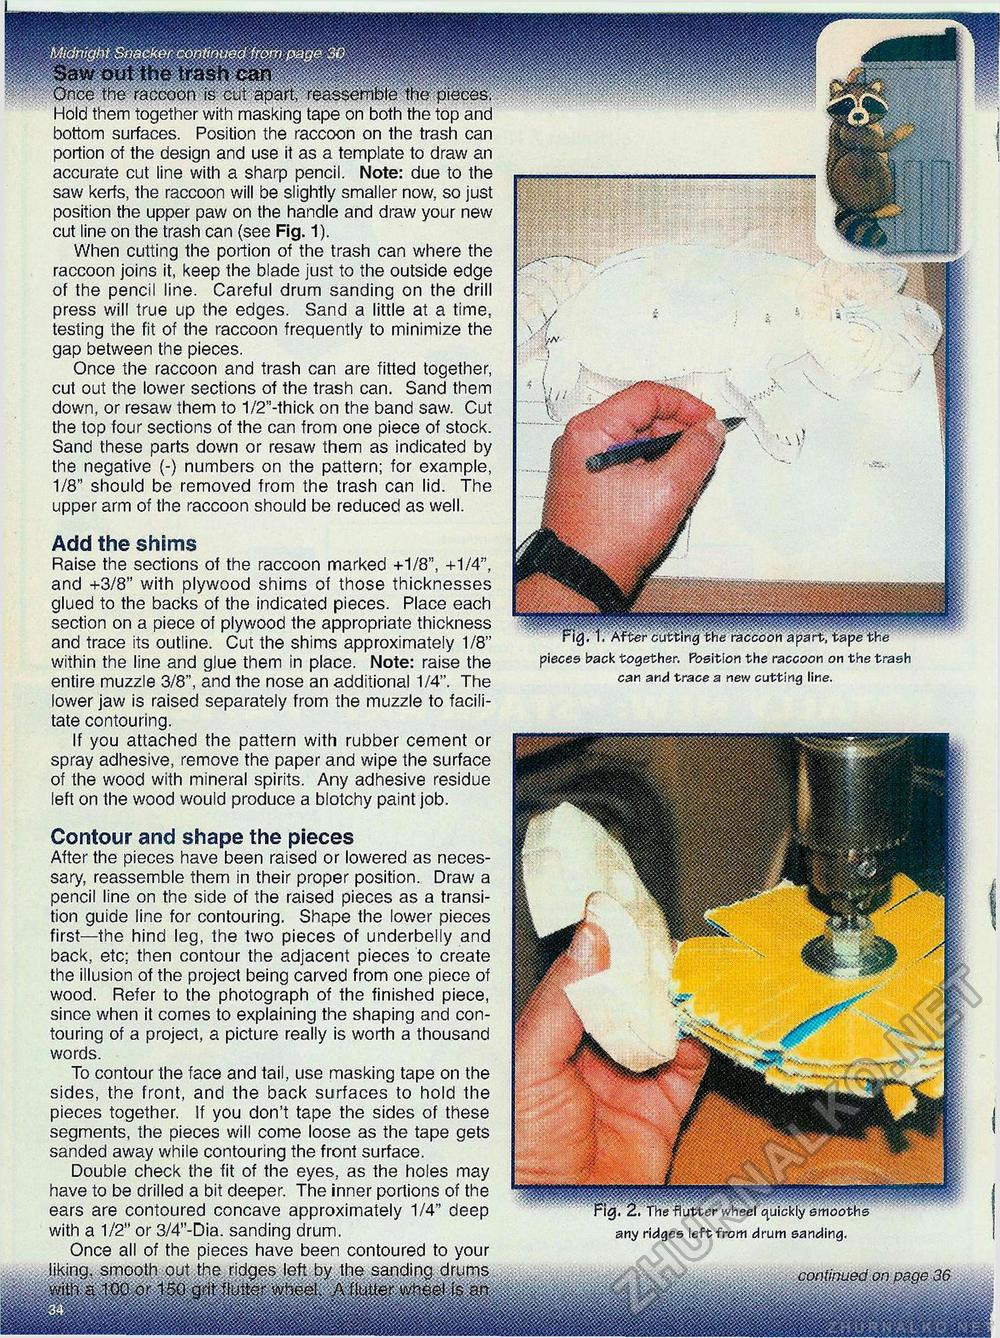
liking, smooth out the ridges left by the sanding drums con tinued on page 36 ^illillliil Contour and shape the pieces After the pieces have been raised or lowered as necessary, reassemble them in their proper position. Draw a pencil line on the side of the raised pieces as a transition guide line for contouring. Shape the lower pieces first—the hind leg, the two pieces of underbelly and back, etc; then contour the adjacent pieces to create the illusion of the project being carved from one piece of wood. Refer to the photograph of the finished piece, since when it comes to explaining the shaping and contouring of a project, a picture really is worth a thousand words. To contour the face and tail, use masking tape on the sides, the front, and the back surfaces to hold the pieces together. If you don't tape the sides of these segments, the pieces will come loose as the tape gets sanded away while contouring the front surface. Double check the fit of the eyes, as the holes may have to be drilled a bit deeper. The inner portions of the ears are contoured concave approximately 1/4" deep with a 1/2" or 3/4"-Dia. sanding drum. Once all of the pieces have been contoured to your any ridges left from drum sanding. Once the raccoon is cU apart,' reassemble the pieces; Hold them together with masking tape on both the top and bottom surfaces. Position the raccoon on the trash can portion of the design and use it as a template to draw an accurate cut line with a sharp pencil. Note: due to the saw kerfs, the raccoon will be slightly smaller now, so just position the upper paw on the handle and draw your new cut line on the trash can (see Fig. 1). When cutting the portion of the trash can where the raccoon joins it, keep the blade just to the outside edge of the pencil line. Careful drum sanding on the drill press will true up the edges. Sand a little at a time, testing the fit of the raccoon frequently to minimize the gap between the pieces. Once the raccoon and trash can are fitted together, cut out the lower sections of the trash can. Sand them down, or resaw them to 1/2"-thick on the band saw. Cut the top four sections of the can from one piece of stock. Sand these parts down or resaw them as indicated by the negative (-) numbers on the pattern; for example, 1/8" should be removed from the trash can lid. The upper arm of the raccoon should be reduced as well. Add the shims Raise the sections of the raccoon marked +1/8", +1/4", and +3/8" with plywood shims of those thicknesses glued to the backs of the indicated pieces. Place each section on a piece of plywood the appropriate thickness and trace its outline. Cut the shims approximately 1/8" within the line and glue them in place. Note: raise the entire muzzle 3/8", and the nose an additional 1/4". The lower jaw is raised separately from the muzzle to facilitate contouring. If you attached the pattern with rubber cement or spray adhesive, remove the paper and wipe the surface of the wood with mineral spirits. Any adhesive residue left on the wood would produce a blotchy paint job. ng/T; After cutting the raccoon apart, tape the pieces back together. Position the raccoon on the trash can and trace a new cutting line. |


