Creative Woodworks & crafts 2000-03, страница 36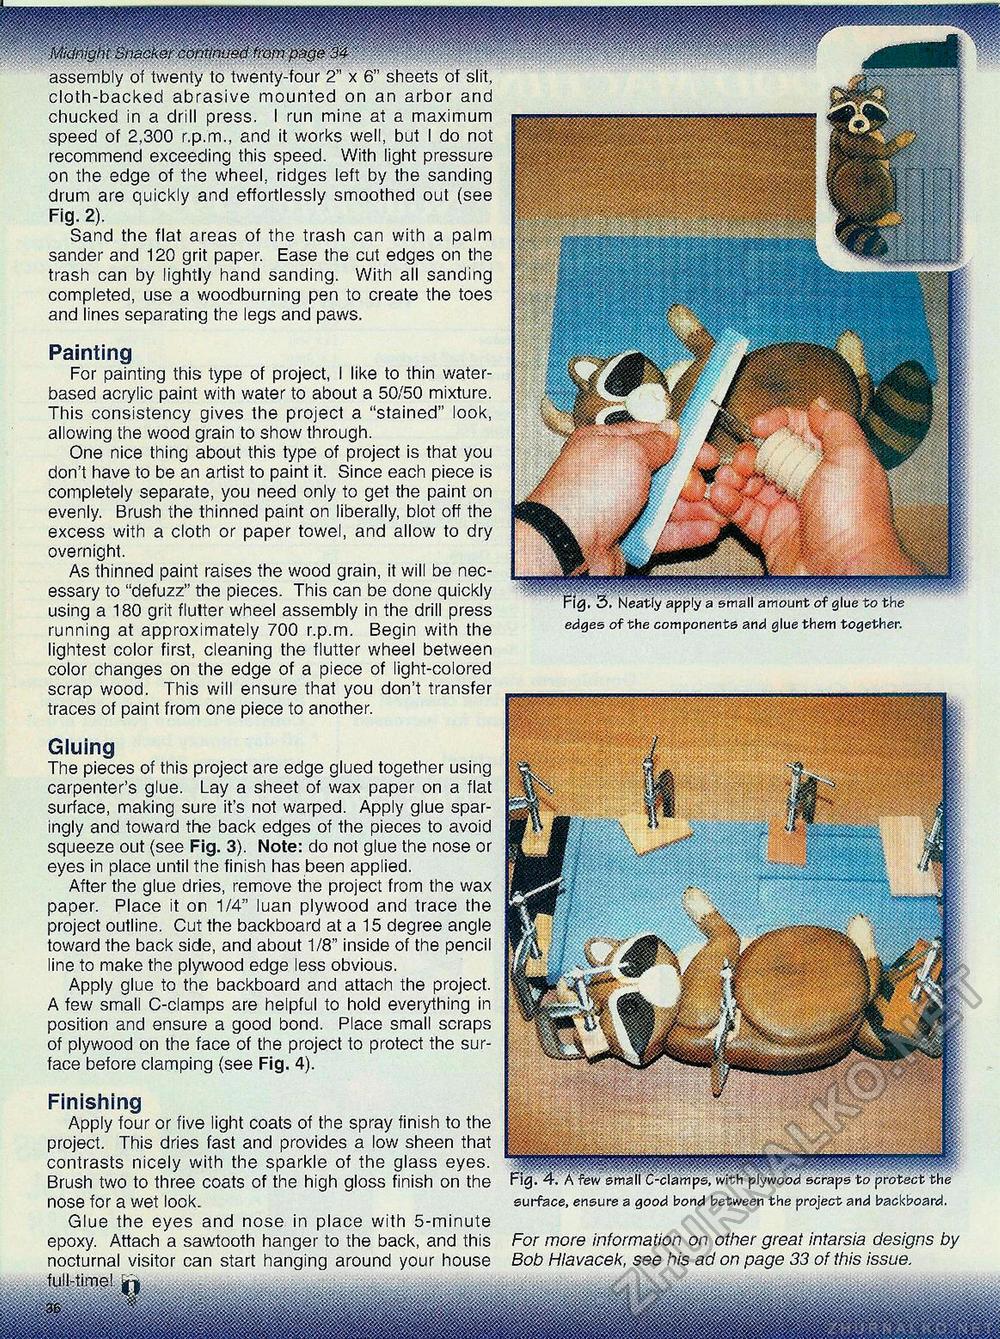
assembly of twenty to twenty-four 2" x 6" sheets of slit, cloth-backed abrasive mounted on an arbor and chucked in a drill press. I run mine at a maximum speed of 2,300 r.p.m., and it works well, but I do not recommend exceeding this speed. With light pressure on the edge of the wheel, ridges left by the sanding drum are quickly and effortlessly smoothed out (see Fig. 2). Sand the flat areas of the trash can with a palm sander and 120 grit paper. Ease the cut edges on the trash can by lightly hand sanding. With all sanding completed, use a woodburning pen to create the toes and lines separating the legs and paws. Painting For painting this type of project, I like to thin water-based acrylic paint with water to about a 50/50 mixture. This consistency gives the project a "stained" look, allowing the wood grain to show through. One nice thing about this type of project is that you don't have to be an artist to paint it. Since each piece is completely separate, you need only to get the paint on evenly. Brush the thinned paint on liberally, blot off the excess with a cloth or paper towel, and allow to dry overnight. As thinned paint raises the wood grain, it will be necessary to "defuzz" the pieces. This can be done quickly using a 180 grit flutter wheel assembly in the drill press running at approximately 700 r.p.m. Begin with the lightest color first, cleaning the flutter wheel between color changes on the edge of a piece of light-colored scrap wood. This will ensure that you don't transfer traces of paint from one piece to another. Fig, 3. Neatly apply a small amount of glue to the edges of the components and glue them together. Gluing The pieces of this project are edge glued together using carpenter's glue. Lay a sheet of wax paper on a flat surface, making sure it's not warped. Apply glue sparingly and toward the back edges of the pieces to avoid squeeze out (see Fig. 3). Note: do not glue the nose or eyes in place until the finish has been applied. After the glue dries, remove the project from the wax paper. Place it on 1/4" luan plywood and trace the project outline. Cut the backboard at a 15 degree angle toward the back side, and about 1/8" inside of the pencil line to make the plywood edge less obvious. Apply glue to the backboard and attach the project. A few small C-clamps are helpful to hold everything in position and ensure a good bond. Place small scraps of plywood on the face of the project to protect the surface before clamping (see Fig. 4). Finishing Apply four or five light coats of the spray finish to the project. This dries fast and provides a low sheen that contrasts nicely with the sparkle of the glass eyes. Brush two to three coats of the high gloss finish on the nose for a wet look. Glue the eyes and nose in place with 5-minute epoxy. Attach a sawtooth hanger to the back, and this nocturnal visitor can start hanging around your house surface, ensure a good bond between the project and backboard. For more information on other great intarsia designs by Bob Hiavacek, see his ad on page 33 of this issue. |


