Creative Woodworks & crafts 2000-03, страница 8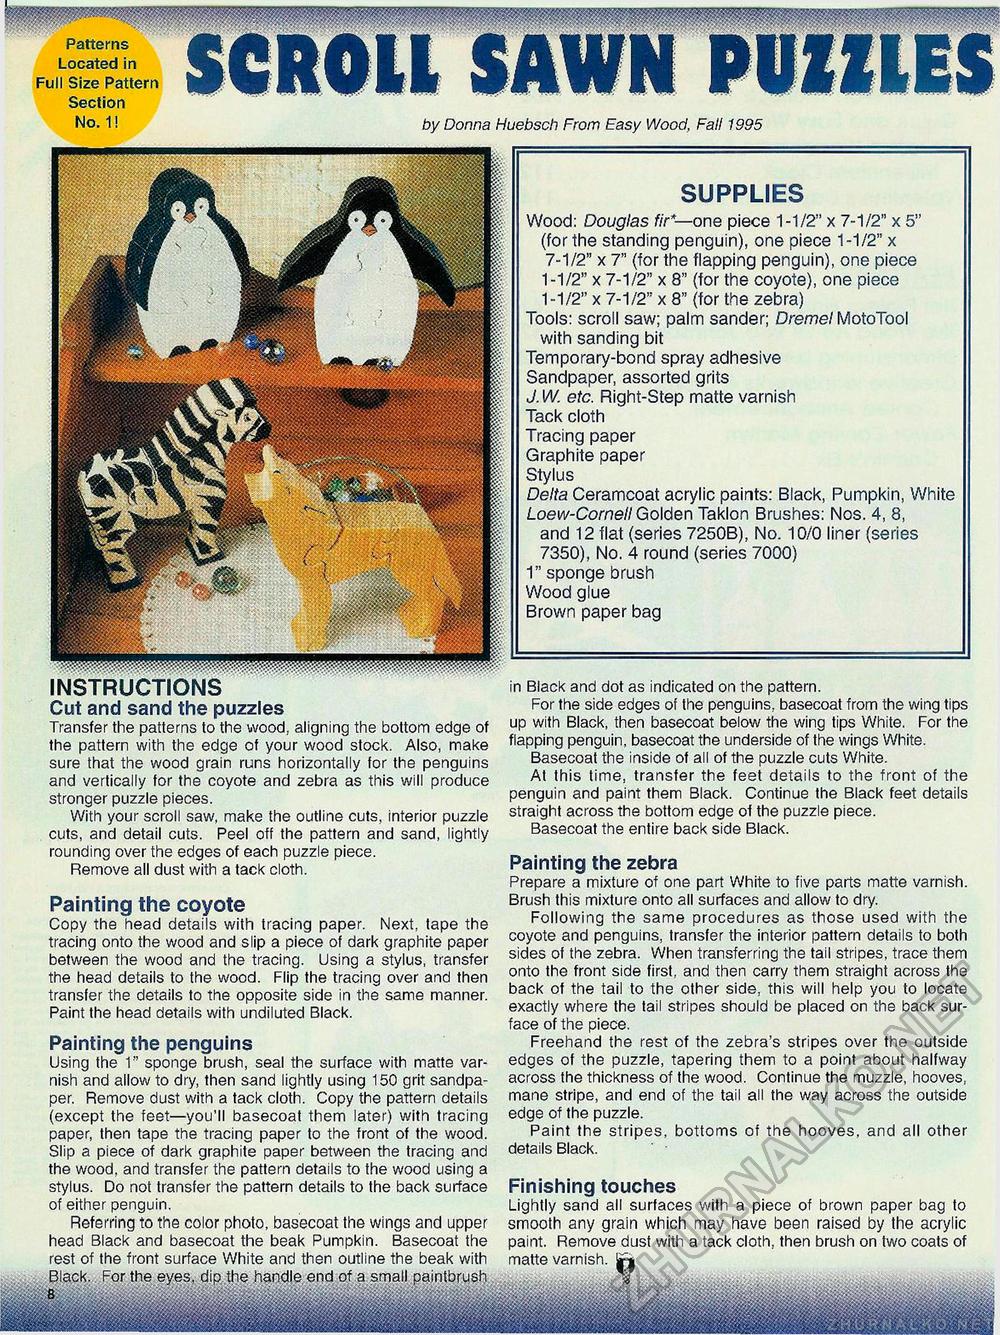
SUPPLIES Wood: Douglas fir*—one piece 1-1/2" x 7-1/2" x 5" (for the standing penguin), one piece 1-1/2" x 7-1/2" x 7" (for the flapping penguin), one piece 1-1/2" x 7-1/2" x 8" (for the coyote), one piece 1-1/2" x 7-1/2" x 8" (for the zebra) Tools: scroll saw; palm sander; Dremel MotoTool with sanding bit Temporary-bond spray adhesive Sandpaper, assorted grits J. W. etc. Right-Step matte varnish Tack cloth Tracing paper Graphite paper Stylus Delta Ceramcoat acrylic paints: Black, Pumpkin, White Loew-Cornell Golden Taklon Brushes: Nos. 4, 8, and 12 flat (series 7250B), No. 10/0 liner (series 7350), No. 4 round (series 7000) 1"sponge brush Wood glue Brown paper bag No. 1! by Donna Huebsch From Easy Wood, Fall 1995 in Black and dot as indicated on the pattern. For the side edges of the penguins, basecoat from the wing tips up with Black, then basecoat below the wing tips White. For the flapping penguin, basecoat the underside of the wings White. Basecoat the inside of all of the puzzle cuts White. At this time, transfer the feet details to the front of the penguin and paint them Black. Continue the Black feet details straight across the bottom edge of the puzzle piece. Basecoat the entire back side Black. Painting the zebra Prepare a mixture of one part White to five parts matte varnish. Brush this mixture onto all surfaces and allow to dry. Following the same procedures as those used with the coyote and penguins, transfer the interior pattern details to both sides of the zebra. When transferring the tail stripes, trace them onto the front side first, and then carry them straight across the back of the tail to the other side, this will help you to locate exactly where the tail stripes should be placed on the back surface of the piece. Freehand the rest of the zebra's stripes over the outside edges of the puzzle, tapering them to a point about halfway across the thickness of the wood. Continue the muzzle, hooves, mane stripe, and end of the tail all the way across the outside edge of the puzzle. Paint the stripes, bottoms of the hooves, and all other details Black. Finishing touches Lightly sand all surfaces with a piece of brown paper bag to smooth any grain which may have been raised by the acrylic paint. Remove dust with a tack cloth, then brush on two coats of matte varnish. INSTRUCTIONS Cut and sand the puzzles Transfer the patterns to the wood, aligning the bottom edge of the pattern with the edge of your wood stock. Also, make sure that the wood grain runs horizontally for the penguins and vertically for the coyote and zebra as this will produce stronger puzzle pieces. With your scroll saw, make the outline cuts, interior puzzle cuts, and detail cuts. Peel off the pattern and sand, lightly rounding over the edges of each puzzle piece. Remove all dust with a tack cloth. Painting the coyote Copy the head details with tracing paper. Next, tape the tracing onto the wood and slip a piece of dark graphite paper between the wood and the tracing. Using a stylus, transfer the head details to the wood. Flip the tracing over and then transfer the details to the opposite side in the same manner. Paint the head details with undiluted Black. Painting the penguins Using the 1" sponge brush, seal the surface with matte varnish and allow to dry, then sand lightly using 150 grit sandpaper. Remove dust with a tack cloth. Copy the pattern details (except the feet—you'll basecoat them later) with tracing paper, then tape the tracing paper to the front of the wood. Slip a piece of dark graphite paper between the tracing and the wood, and transfer the pattern details to the wood using a stylus. Do not transfer the pattern details to the back surface of either penguin. Referring to the color photo, basecoat the wings and upper head Black and basecoat the beak Pumpkin. Basecoat the rest of the front surface White and then outline the beak with |


