Creative Woodworks & crafts 2000-04, страница 24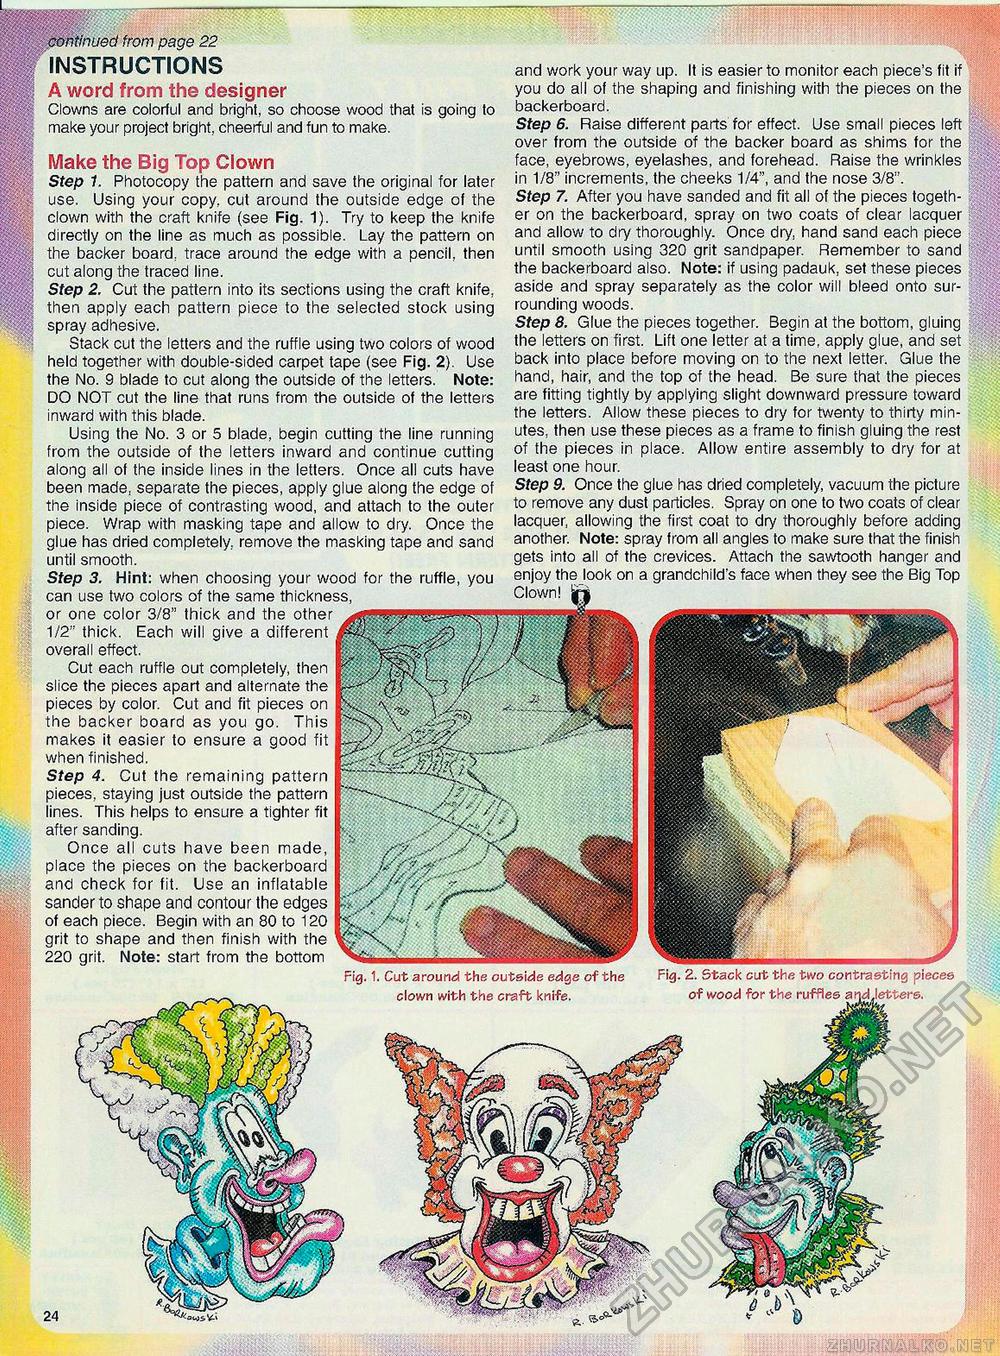
continued from page 22 INSTRUCTIONS A word from the designer Clowns are colorful and bright, so choose wood that is going to make your project bright, cheerful and fun to make. Make the Big Top Clown Step 1. Photocopy the pattern and save the original for later use. Using your copy, cut around the outside edge of the clown with the craft knife (see Fig. 1). Try to keep the knife directly on the line as much as possible. Lay the pattern on the backer board, trace around the edge with a pencil, then cut along the traced line. Step 2. Cut the pattern into its sections using the craft knife, then apply each pattern piece to the selected stock using spray adhesive. Stack cut the letters and the ruffle using two colors of wood held together with double-sided carpet tape (see Fig. 2). Use the No. 9 blade to cut along the outside of the letters. Note: DO NOT cut the line that runs from the outside of the letters inward with this blade. Using the No. 3 or 5 blade, begin cutting the line running from the outside of the letters inward and continue cutting along ail of the inside lines in the letters. Once all cuts have been made, separate the pieces, apply glue along the edge of the inside piece of contrasting wood, and attach to the outer piece. Wrap with masking tape and allow to dry. Once the glue has dried completely, remove the masking tape and sand until smooth. Step 3. Hint: when choosing your wood for the ruffle, you can use two colors of the same thickness, or one color 3/8" thick and the other 1/2" thick. Each will give a different overall effect. Cut each ruffle out completely, then slice the pieces apart and alternate the pieces by color. Cut and fit pieces on the backer board as you go. This makes it easier to ensure a good fit when finished. Step 4. Cut the remaining pattern pieces, staying just outside the pattern lines. This helps to ensure a tighter fit after sanding. Once all cuts have been made, place the pieces on the backerboard and check for fit. Use an inflatable sander to shape and contour the edges of each piece. Begin with an 80 to 120 grit to shape and then finish with the 220 grit. Note: start from the bottom and work your way up. It is easier to monitor each piece's fit if you do all of the shaping and finishing with the pieces on the backerboard. Step 6. Raise different parts for effect. Use small pieces left over from the outside of the backer board as shims for the face, eyebrows, eyelashes, and forehead. Raise the wrinkles in 1/8" increments, the cheeks 1/4", and the nose 3/8". Step 7. After you have sanded and fit all of the pieces together on the backerboard, spray on two coats of clear lacquer and allow to dry thoroughly. Once dry, hand sand each piece until smooth using 320 grit sandpaper Remember to sand the backerboard also. Note: if using padauk, set these pieces aside and spray separately as the color will bleed onto surrounding woods. Step 8. Glue the pieces together. Begin at the bottom, gluing the letters on first. Lift one letter at a time, apply glue, and set back into place before moving on to the next letter. Glue the hand, hair, and the top of the head. Be sure that the pieces are fitting tightly by applying slight downward pressure toward the letters. Allow these pieces to dry for twenty to thirty minutes, then use these pieces as a frame to finish gluing the rest of the pieces in place. Allow entire assembly to dry for at least one hour. Step 9. Once the glue has dried completely, vacuum the picture to remove any dust particles. Spray on one to two coats of clear lacquer, allowing the first coat to dry thoroughly before adding another. Note: spray from all angles to make sure that the finish gets into all of the crevices. Attach the sawtooth hanger and enjoy the look on a grandchild's face when they see the Big Top Clown! , Cut around the outside edge of the clown with the craft knife. Fig. 2. Stack cut the two contrasting pieces of wood for the ruffles and .letters. |


