Creative Woodworks & crafts 2000-04, страница 8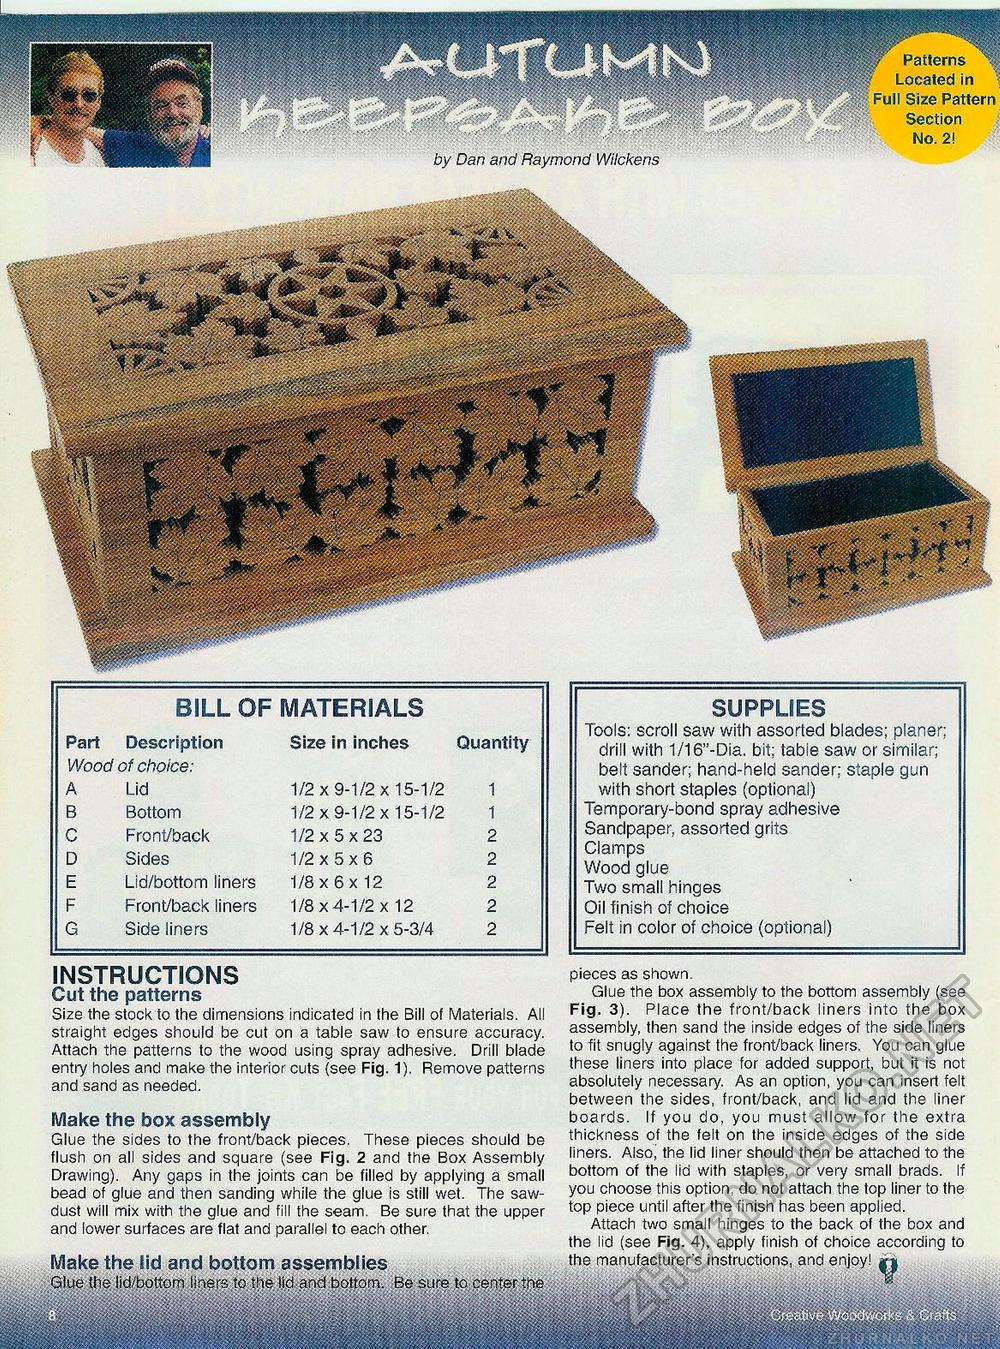
Full Size Pattern Section No. 2! BILL OF MATERIALS Part Description Wood of choice:
Size in inches Quantity 1/2x9-1/2x15-1/2 1 1/2x9-1/2x15-1/2 1 1/2x5x23 2 1/2x5x6 2 1/8x6x12 2 1/8x4-1/2x12 2 1/8x4-1/2x5-3/4 2 SUPPLIES Tools: scroll saw with assorted blades; planer; drill with 1/16"-Dia. bit: tabie saw or similar; belt sander; hand-held sander; staple gun with short staples (optional) Temporary-bond spray adhesive Sandpaper, assorted grits Clamps Wood glue Two small hinges Oil finish of choice Felt in color of choice (optional) INSTRUCTIONS Cut the patterns Size the stock to the dimensions indicated in the Bill of Materials. All straight edges should be cut on a table saw to ensure accuracy. Attach the patterns to the wood using spray adhesive. Drill blade entry holes and make the interior cuts (see Fig. 1). Remove patterns and sand as needed. Make the box assembly Glue the sides to the front/back pieces. These pieces should be flush on all sides and square (see Fig. 2 and the Box Assembly Drawing). Any gaps in the joints can be filled by applying a small bead of glue and then sanding while the glue is still wet. The sawdust will mix with the glue and fill the seam. Be sure that the upper and lower surfaces are flat and parallel to each other. Make the lid and bottom assemblies Glue the lid/bottom liners to the lid and bottom. Be sure to cents pieces as shown. Glue the box assembly to the bottom assembly (see Fig. 3). Place the front/back liners into the box assembly, then sand the inside edges of the side liners to fit snugly against the front/back liners. You can glue these liners into place for added support, but it is not absolutely necessary. As an option, you can insert felt between the sides, front/back, and lid and the liner boards. If you do, you must allow for the extra thickness of the felt on the inside edges of the side liners. Also| the lid liner should then be attached to the bottom of the lid with staples, or very small brads. If you choose this option, do not attach the top liner to the top piece until after the finish has been applied. Attach two small hinges to the back of the box and the lid (see Fig. 4), apply finish of choice according to the manufacturer's instructions, and enjoy! |


