Creative Woodworks & crafts 2000-06, страница 10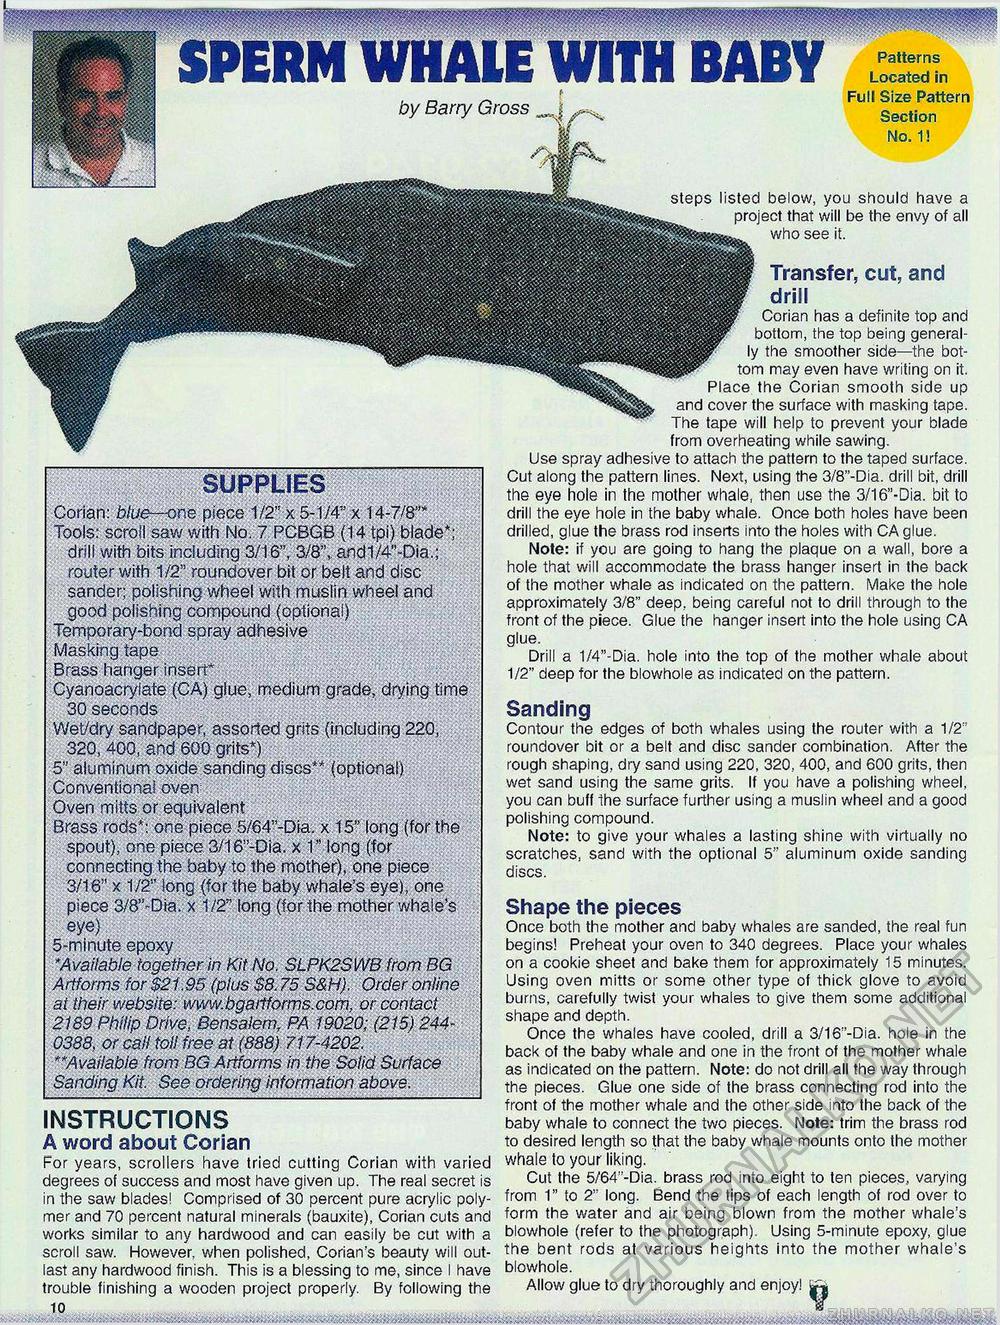
SUPPLIES Corian: blue—one piece 1/2" x 5-1/4" x 14-7/8"* Tools: scroll saw with No. 7 PCBGB (14 tpi) blade*; drill with bits including 3/16", 3/8", and1/4"-Dia.; router with 1/2" roundover bit or belt and disc sander; polishing wheel with muslin wheel and good polishing compound (optional) Temporary-bond spray adhesive Masking tape Brass hanger insert* Cyanoacrylate (CA) glue, medium grade, drying time 30 seconds Wet/dry sandpaper, assorted grits (including 220, 320, 400, and 600 grits*) 5" aluminum oxide sanding discs** (optional) Conventional oven Oven mitts or equivalent Brass rods*: one piece 5/64"-Dia. x 15" long (for the spout), one piece 3/16"-Dia. x 1" long (for connecting the baby to the mother), one piece 3/16" x 1/2" long (for the baby whale's eye), one piece 3/8"~Dia. x 112" long (for the mother whale's eye) 5-minute epoxy 'Available together in Kit No. SLPK2SWB from EG Artforms for $21.95 (plus$8.75 S&H). Order online at their website: www.bgartforms.com, or contact 2189 Phitip Drive, Bensaiem, PA 19020; (215) 244-0388, or call toll free at (888) 717-4202. **Available fromBG Artforms in the Solid Surface Sanding Kit. See ordering information above. INSTRUCTIONS A word about Corian For years, scrollers have tried cutting Corian with varied degrees of success and most have given up. The real secret is in the saw blades! Comprised of 30 percent pure acrylic polymer and 70 percent natural minerals (bauxite), Corian cuts and works similar to any hardwood and can easily be cut with a scroll saw. However when polished, Corian's beauty will outlast any hardwood finish. This is a blessing to me, since I have trouble finishing a wooden project properly. By following the . 10 .........„,,...,„,.„,.. ..... .,..„ ............................... Transfer, cut, and drill Corian has a definite top and bottom, the top being generally the smoother side—the bottom may even have writing on it. Place the Corian smooth side up and cover the surface with masking tape. The tape will help to prevent your blade from overheating while sawing. Use spray adhesive to attach the pattern to the taped surface. Cut along the pattern lines. Next, using the 3/8"-Dia. drill bit, drill the eye hole in the mother whale, then use the 3/16"-Dia. bit to drill the eye hole in the baby whale. Once both holes have been drilled, glue the brass rod inserts into the holes with CA glue. Note: if you are going to hang the plaque on a wall, bore a hole that will accommodate the brass hanger insert in the back of the mother whale as indicated on the pattern. Make the hole approximately 3/8" deep, being careful not to drill through to the front of the piece. Glue the hanger insert into the hole using CA glue. Drill a 1/4"-Dia. hole into the top of the mother whale about 1/2" deep for the blowhole as indicated on the pattern. Sanding Contour the edges of both whales using the router with a 1/2" roundover bit or a belt and disc sander combination. After the rough shaping, dry sand using 220, 320, 400, and 600 grits, then wet sand using the same grits. If you have a polishing wheel, you can buff the surface further using a muslin wheel and a good polishing compound. Note: to give your whales a lasting shine with virtually no scratches, sand with the optional 5" aluminum oxide sanding discs. Shape the pieces Once both the mother and baby whales are sanded, the real fun begins! Preheat your oven to 340 degrees. Place your whales on a cookie sheet and bake them for approximately 15 minutes. Using oven mitts or some other type of thick glove to avoid bums, carefully twist your whales to give them some additional shape and depth. Once the whales have cooled, drill a 3/16"-Dia. hole in the back of the baby whale and one in the front of the mother whale as indicated on the pattern. Note: do not drill all the way through the pieces. Glue one side of the brass connecting rod into the front of the mother whale and the other side into the back of the baby whale to connect the two pieces. Note: trim the brass rod to desired length so that the baby whale mounts onto the mother whale to your liking. Cut the 5/64"-Dia. brass rod into eight to ten pieces, varying from 1" to 2" long. Bend the tips of each length of rod over to form the water and air being blown from the mother whale's blowhole (refer to the photograph). Using 5-minute epoxy, glue the bent rods at various heights into the mother whale's blowhole. Allow glue to dry thoroughly and enjoy! ^ Patterns Located in steps listed below, you should have a project that will be the envy of all who see it. by Barry Gross Full Size Pattern Section No. 1! |


