Creative Woodworks & crafts 2000-06, страница 18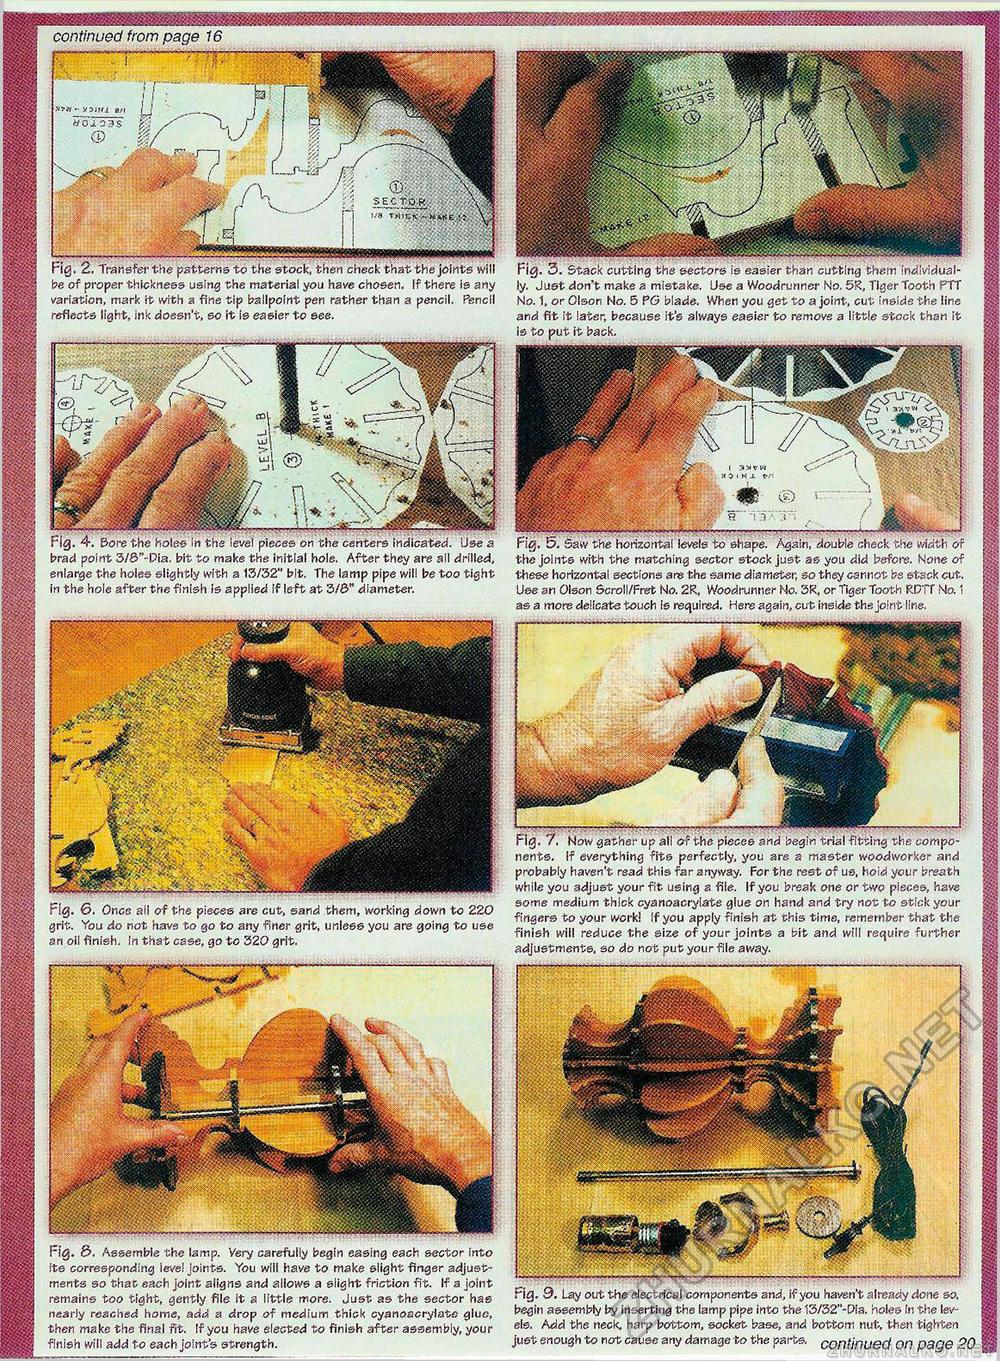
M continued from page 16 SEC TO R-thick-'taiiie _____;__ Fig. 2. Transfer the patterns to the stock, then check that the joints will be of proper thickness using the material you have chosen. If there is any variation, mark it with a fine tip ballpoint pen rather than a pencil. Pencil reflects light, ink doesn't, so it is easier to see. Fig. 3. Stack cutting the sectors is easier than cutting them individually. Just don't make a mistake. Use a Woodrunner No, 5K, Tiger Tooth PTT No. 1, or Olson No. 5 PO blade. When you get to a joint, cut inside the line and fit it later, because it's always easier to remove a little stock than it is to put it back. Fig. 4. Bore the holes in the level pieces on the centers indicated. Use a brad point 3/0"-Dia. bit to make the initial hole. After they are all drilled, enlarge the holes slightly with a 13/32" bit. The lamp pipe will be too tight in the hole after the finish is applied if left at 3/0" diameter. Fig. 5. Saw the horizontal levels to shape. Again, double check the width of the joints with the matching sector stock just as you did before. None of these horizontal sections are the same diameter, so they cannot be stack cut. Use an Olson Scroll/Fret No. 2R, Woodrunner No. 3R, or Tiger Tooth RDTT No. 1 as a more delicate touch is required. Here again, cut inside the joint line. Fig. 7. Now gather up all of the pieces and begin -trial fitting the components. If everything fits perfectly, you are a master woodworker and probably haven't read this far anyway. For the rest of us, hold your breath while you adjust your fit using a file. If you break one or two pieces, have some medium thick cyanoacrylate glue on hand and try not to stick your fingers to your work! If you apply finish at this time, remember that the finish will reduce the size of your joints a bit and will require further adjustments, so do not put your file away. Fig. &. Once all of the pieces are cut, sand them, working down to 220 grit. You do not have to go to any finer grit, unless you are going to use an oil finish. In that case, go to 320 grit. Fig. &. Assemble the lamp. Very carefully begin easing each sector into its corresponding level joints. You will have to make slight finger adjustments so that each joint aligns and allows a slight friction fit. If a joint remains too tight, gently file it a little more. Just as the sector has nearly reached home, add a drop of medium thick cyanoacrylate glue, then make the final fit. If you have elected to finish after assembly, your finish will add to each joint's strength. Fig. 9. Lay out the electrical components and, if you haven't already done so, begin assembly by inserting the lamp pipe into the 13/32"-Pia. holes in the levels. Add the neck, harp bottom, socket base, arid bottom nut, then tighten just enough to not cause any damage to the parts, continued On page 20 |


