Creative Woodworks & crafts 2000-10, страница 32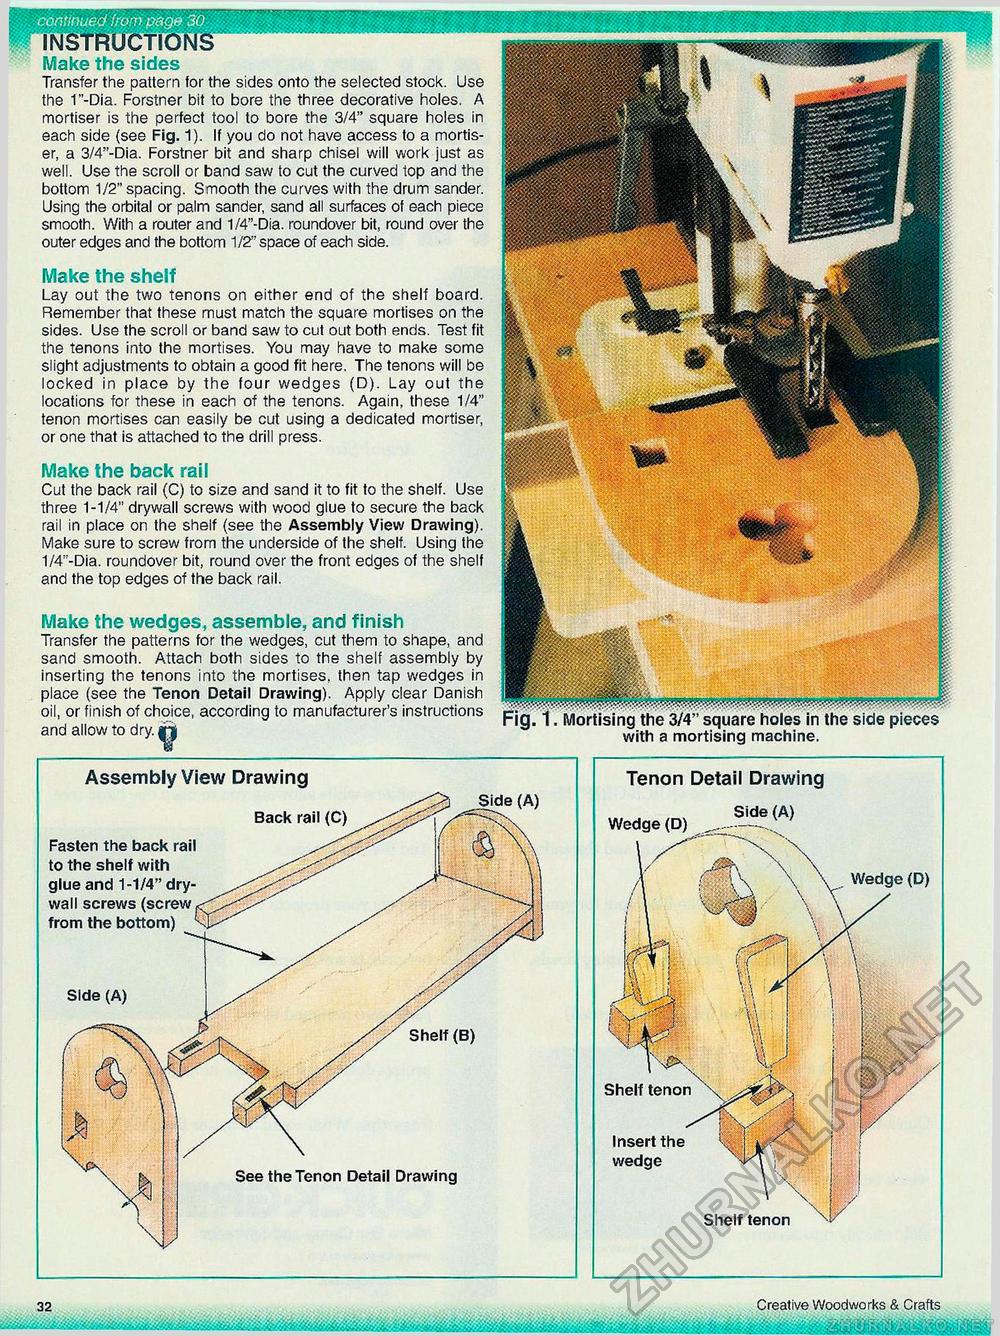
See the Tenon Detail Drawing Tenon Detail Drawing Side (A) Wedge (D) _______... Wedge (D) Make the sides Transfer the pattern for the sides onto the selected stock. Use the 1"-Dia. Forstner bit to bore the three decorative holes. A mortiser is the perfect tool to bore the 3/4" square holes in each side (see Fig. 1). If you do not have access to a mortiser, a 3/4"-Dia. Forstner bit and sharp chisel will work just as well. Use the scroll or band saw to cut the curved top and the bottom 1/2" spacing. Smooth the curves with the drum sander. Using the orbital or palm sander, sand all surfaces of each piece smooth. With a router and 1/4"-Dia. roundover bit, round over the outer edges and the bottom 1/2" space of each side. Make the shelf Lay out the two tenons on either end of the shelf board. Remember that these must match the square mortises on the sides. Use the scroll or band saw to cut out both ends. Test fit the tenons into the mortises. You may have to make some slight adjustments to obtain a good fit here. The tenons will be locked in place by the four wedges (D). Lay out the locations for these in each of the tenons. Again, these 1/4" tenon mortises can easily be cut using a dedicated mortiser, or one that is attached to the drill press. Make the back rail Cut the back rail (C) to size and sand it to fit to the shelf. Use three 1-1/4" drywall screws with wood glue to secure the back rail in place on the shelf (see the Assembly View Drawing). Make sure to screw from the underside of the shelf. Using the 1/4"-Dia. roundover bit, round over the front edges of the shelf and the top edges of the back rail. Make the wedges, assemble, and finish Transfer the patterns for the wedges, cut them to shape, and sand smooth. Attach both sides to the shelf assembly by inserting the tenons into the mortises, then tap wedges in place (see the Tenon Detail Drawing). Apply clear Danish oil, or finish of choice, according to manufacturer's instructions and allow to dry. n Side (A) Shelf (B) Assembly View Drawing Back rail (C) Fasten the back rail to the shelf with glue and 1-1/4" dry-wall screws (screw from the bottom) Insert the wedge Shelf tenon Fig. 1. Mortising the 3/4" square holes in the side pieces with a mortising machine. 32 Creative Woodworks & Crafts |


