Creative Woodworks & crafts 2000-11, страница 56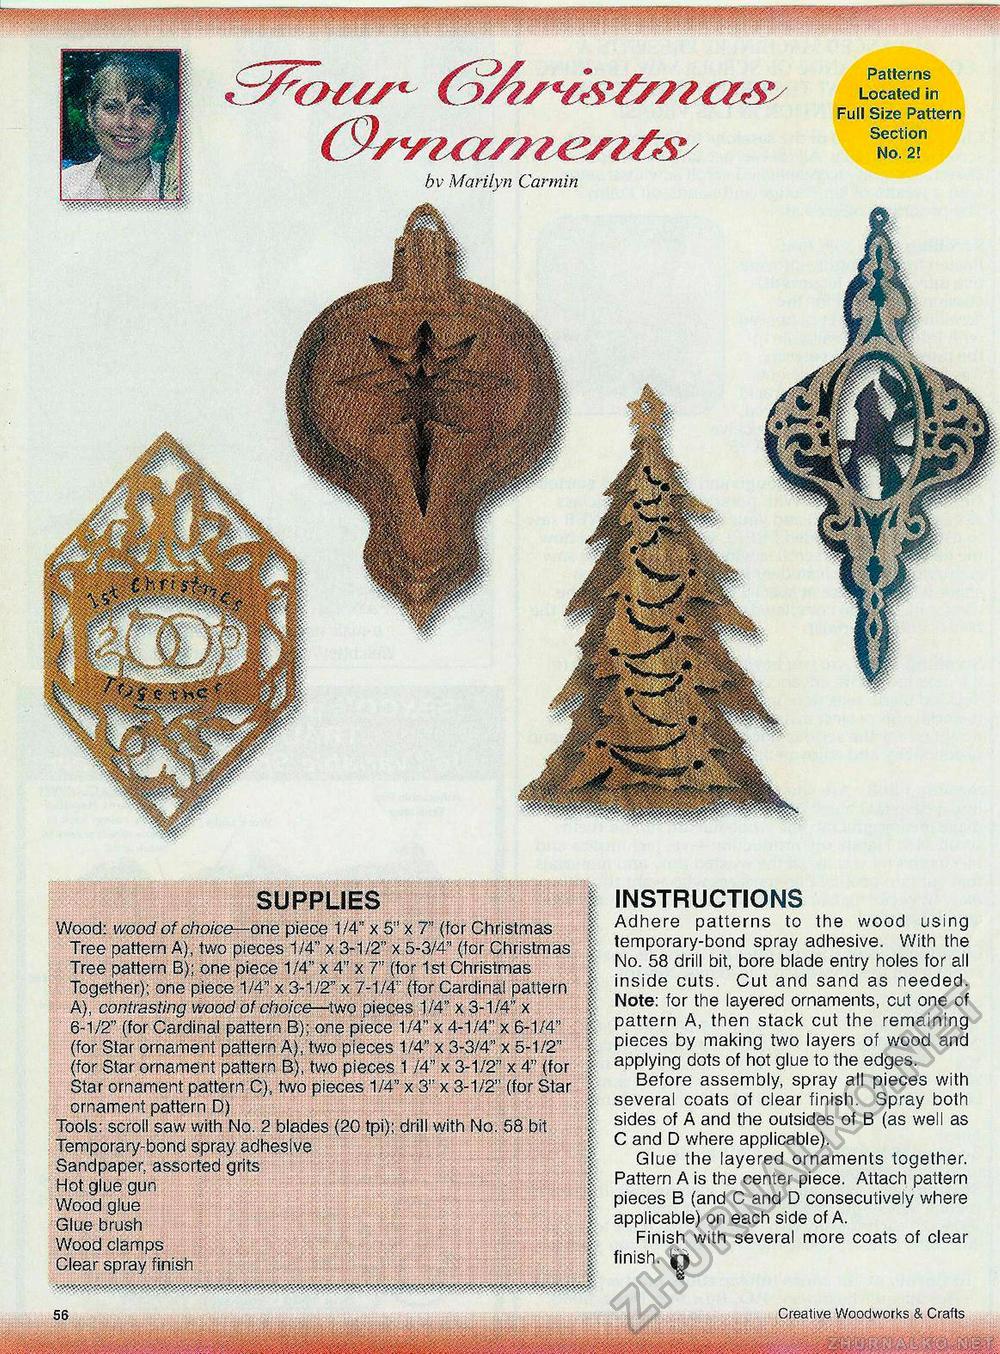
Patterns Located in Full Size Pattern Section No. 2! armin SUPPLIES Wood: wood of choice—one piece 1/4" x 5' x 7" (for Christmas Tree pattern A), two pieces 1/4" x 3-1/2" x 5-3/4" (for Christmas Tree pattern B); one piece 1 /4" x 4" x 7" (for 1 st Christmas Together); one piece 1/4" x 3-1/2" x 7-1/4" (for Cardinal pattern A), contrasting wood of choice—xwo pieces 1/4" x 3-1/4" x 6-1/2" (for Cardinal pattern B); one piece 1/4" x 4-1/4" x 6-1/4" (for Star ornament pattern A), two pieces 1/4" x 3-3/4" x 5-1/2" (for Star ornament pattern B), two pieces 1 /4" x 3-1/2" x 4" (for Star ornament pattern C), two pieces 1/4" x 3" x 3-1/2" (for Star ornament pattern D) Tools: scroll saw with No. 2 blades (20 tpi); drill with No. 58 bit Temporary-bond spray adhesive Sandpaper assorted grits Hot glue gun Wood glue Glue brush Wood clamps Clear spray finish INSTRUCTIONS Adhere patterns to the wood using temporary-bond spray adhesive. With the No. 58 drill bit, bore blade entry holes for all inside cuts. Cut and sand as needed. Note: for the layered ornaments, cut one of pattern A, then stack cut the remaining pieces by making two layers of wood and applying dots of hot glue to the edges. Before assembly, spray all pieces with several coats of clear finish. Spray both sides of A and the outsides of B (as well as C and D where applicable). Glue the layered ornaments together. Pattern A is the center piece. Attach pattern pieces B (and C and D consecutively where applicable) on each side of A. Finish with several more coats of clear finish. Sri 56 ® Creative Woodworks & Crafts |


