Creative Woodworks & crafts 2000-11, страница 6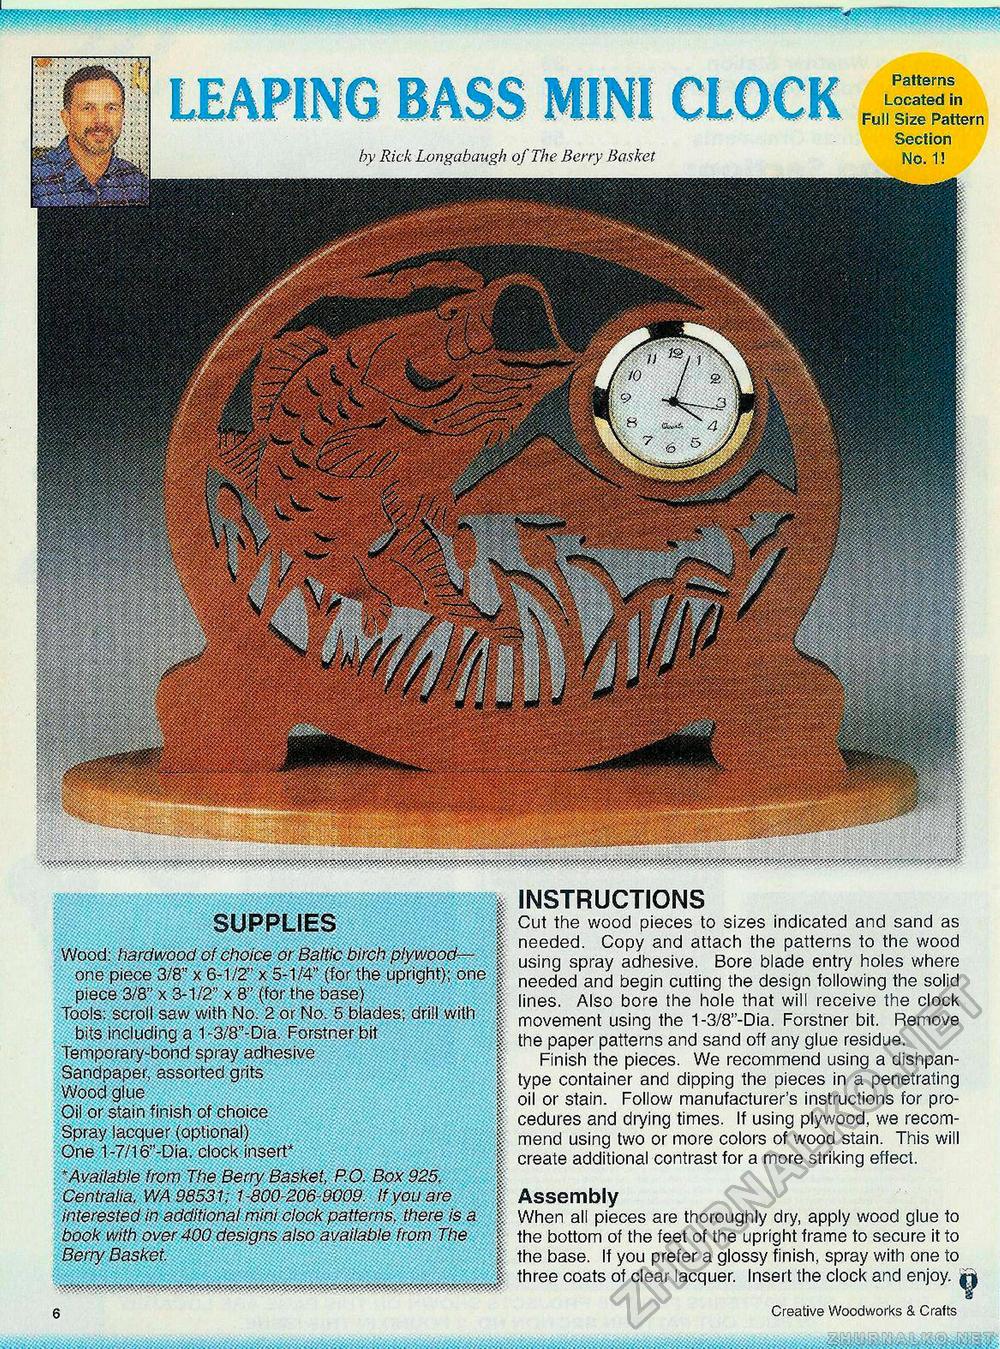
Patterns Located in Full Size Pattern Section No. 1! by Rick Longabaugh of The Berry Basket SUPPLIES Wood: hardwood of choice or Baltic birch plywood$ one piece 3/8" x 6-1/2" x 5-1/4" (for the upright); one | piece 3/8" x 3-1/2" x 8" (for the base) | Tools: scroll saw with No. 2 or No. 5 blades; drill with | bits including a 1 -3/8"-Dia. Forstner bit § Temporary-bond spray adhesive f Sandpaper, assorted grits | Wood glue f Oil or stain finish of choice f Spray lacquer (optional) f One 1-7/16"-Dia. clock insert* § * Available from The Berry Basket, RO. Box 925, Centralia. WA 98531; 1-800-206-9009. If you are f interested in additional mini clock patterns, there is a | book with over 400 designs also available from The Berry Basket. f ■•y'k'^y/^ 6 ® INSTRUCTIONS Cut the wood pieces to sizes indicated and sand as needed. Copy and attach the patterns to the wood using spray adhesive. Bore blade entry holes where needed and begin cutting the design following the solid lines. Also bore the hole that will receive the clock movement using the 1-3/8"-Dia. Forstner bit. Remove the paper patterns and sand off any glue residue. Finish the pieces. We recommend using a dishpan-type container and dipping the pieces in a penetrating oil or stain. Follow manufacturer's instructions for procedures and drying times. If using plywood, we recommend using two or more colors of wood stain. This will create additional contrast for a more striking effect. Assembly When all pieces are thoroughly dry, apply wood glue to the bottom of the feet of the upright frame to secure it to the base. If you prefer a glossy finish, spray with one to three coats of clear lacquer. Insert the clock and enjoy. ^ Creative Woodworks & Crafts |


