Creative Woodworks & crafts 2001-01, страница 14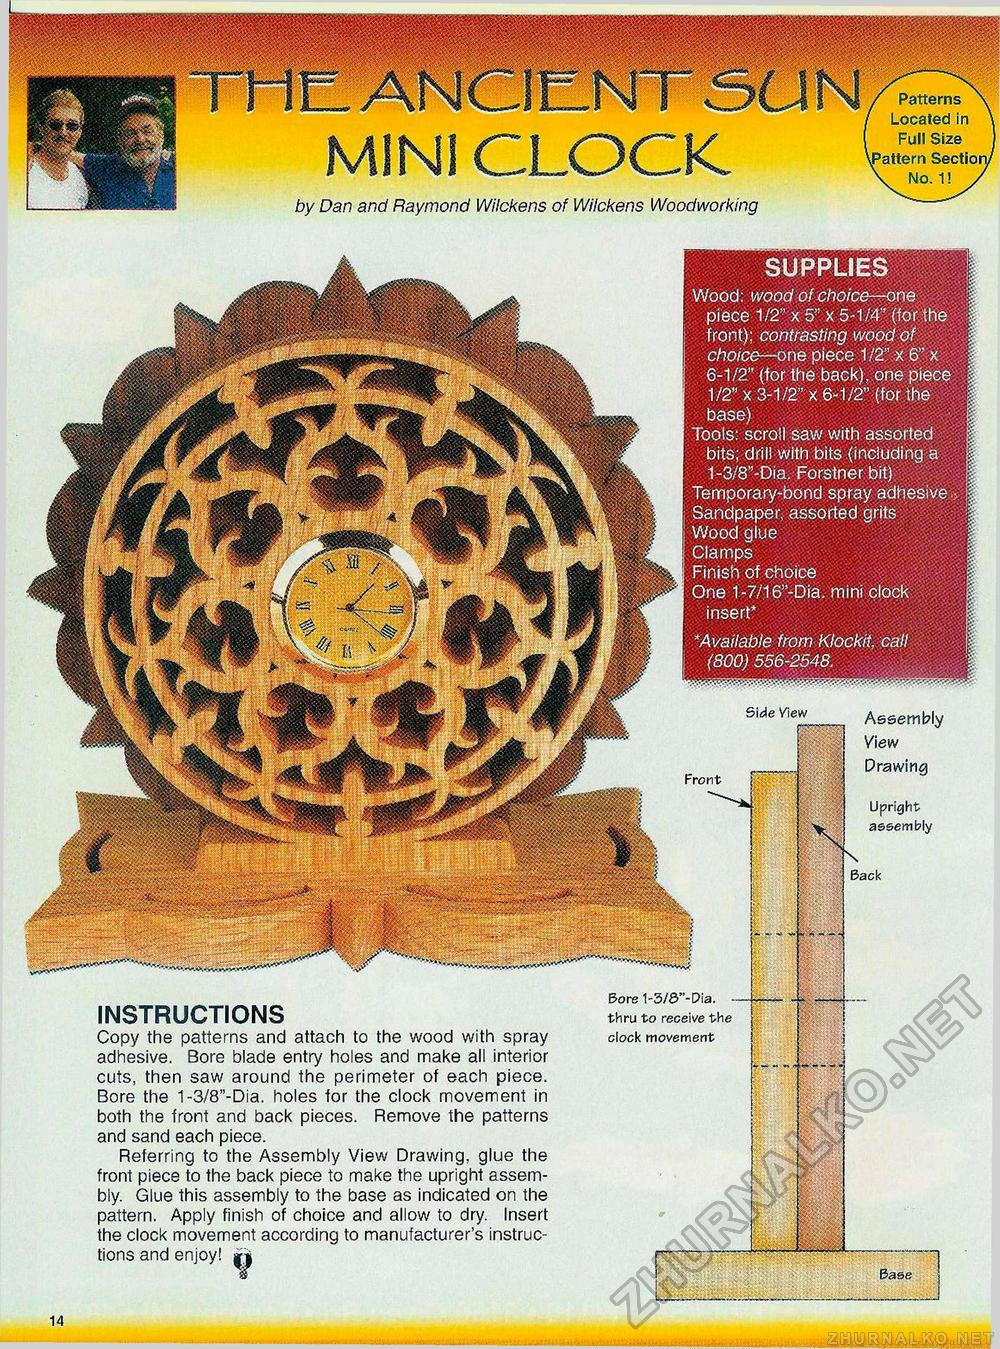
Patterns Located in Full Size attern Sectioi V No. 1! y by Dan and Raymond Wilckens of Wilckens Woodworking SUPPLIES Wood: wood of choice—one piece 1/2" x 5" x 5-1/4" (for the front); contrasting wood of choice—one piece 1/2" x 6" x 6-1/2" {for the back), one piece 1/2" x 3-1/2" x 6-1/2" (for the base) Tools: scroll saw with assorted bits; drill with bits (including a 1 -3/8"-Dia. Forstner bit) Temporary-bond spray adhesive. Sandpaper, assorted grits Wood glue Clamps Finish of choice One 1-7/16"-Dia. mini clock insert* *Available from Klockit, call (800) 556-2548. INSTRUCTIONS Copy the patterns and attach to the wood with spray adhesive. Bore blade entry holes and make all interior cuts, then saw around the perimeter of each piece. Bore the 1-3/8"-Dia. holes for the clock movement in both the front and back pieces. Remove the patterns and sand each piece. Referring to the Assembly View Drawing, glue the front piece to the back piece to make the upright assembly. Glue this assembly to the base as indicated on the pattern. Apply finish of choice and allow to dry. Insert the clock movement according to manufacturer's instructions and enjoy! || Front Side View Assembly View Drawing Upright assembly Back Bore 1-3/8"- Dia. thru to receive the clock movement 14 |


