Creative Woodworks & crafts 2001-03, страница 46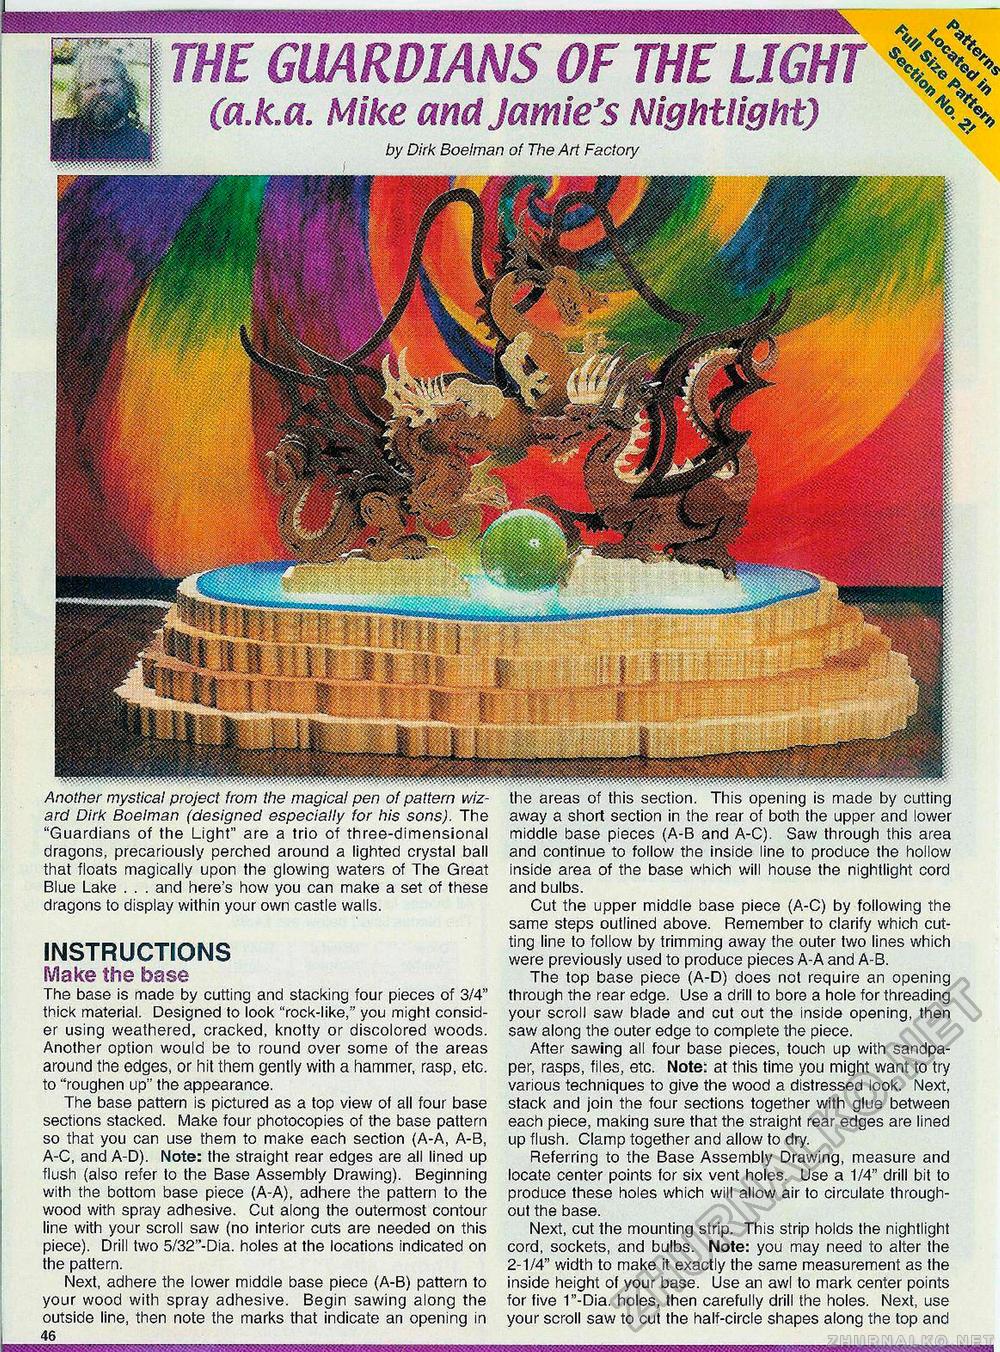
Another mystical project from the magical pen of pattern wizard Dirk Boelman (designed especially for his sons). The "Guardians of the Light" are a trio of three-dimensional dragons, precariously perched around a lighted crystal ball that floats magically upon the glowing waters of The Great Blue Lake . . . and here's how you can make a set of these dragons to display within your own castle walls. INSTRUCTIONS Make the base The base is made by cutting and stacking four pieces of 3/4" thick material. Designed to look "rock-like," you might consider using weathered, cracked, knotty or discolored woods. Another option would be to round over some of the areas around the edges, or hit them gently with a hammer, rasp, etc. to "roughen up" the appearance. The base pattern is pictured as a top view of all four base sections stacked. Make four photocopies of the base pattern so that you can use them to make each section (A-A, A-B, A-C, and A-D). Note: the straight rear edges are all lined up flush (also refer to the Base Assembly Drawing). Beginning with the bottom base piece (A-A), adhere the pattern to the wood with spray adhesive. Cut along the outermost contour line with your scroll saw (no interior cuts are needed on this piece). Drill two 5/32"-Dia. holes at the locations indicated on the pattern. Next, adhere the lower middle base piece (A-B) pattern to your wood with spray adhesive. Begin sawing along the outside line, then note the marks that indicate an opening in 46 the areas of this section. This opening is made by cutting away a short section in the rear of both the upper and lower middle base pieces (A-B and A-C). Saw through this area and continue to follow the inside line to produce the hollow inside area of the base which will house the nightlight cord and bulbs. Cut the upper middle base piece (A-C) by following the same steps outlined above. Remember to clarify which cutting line to follow by trimming away the outer two lines which were previously used to produce pieces A-A and A-B. The top base piece (A-D) does not require an opening through the rear edge. Use a drill to bore a hole for threading your scroll saw blade and cut out the inside opening, then saw along the outer edge to complete the piece. After sawing all four base pieces, touch up with sandpaper, rasps, files, etc. Note: at this time you might want to try various techniques to give the wood a distressed look. Next, stack and join the four sections together with glue between each piece, making sure that the straight rear edges are lined up flush. Clamp together and allow to dry. Referring to the Base Assembly Drawing, measure and locate center points for six vent holes. Use a 1/4" drill bit to produce these holes which will allow air to circulate throughout the base. Next, cut the mounting strip. This strip holds the nightlight cord, sockets, and bulbs. Note: you may need to alter the 2-1/4" width to make it exactly the same measurement as the inside height of your base. Use an awl to mark center points for five T'-Dia. holes, then carefully drill the holes. Next, use your scroll saw to cut the half-circle shapes along the top and (a.k.a. Mike and Jamie's Nightlight) by Dirk Boelman of The Art Factory |


