Creative Woodworks & crafts 2001-03, страница 48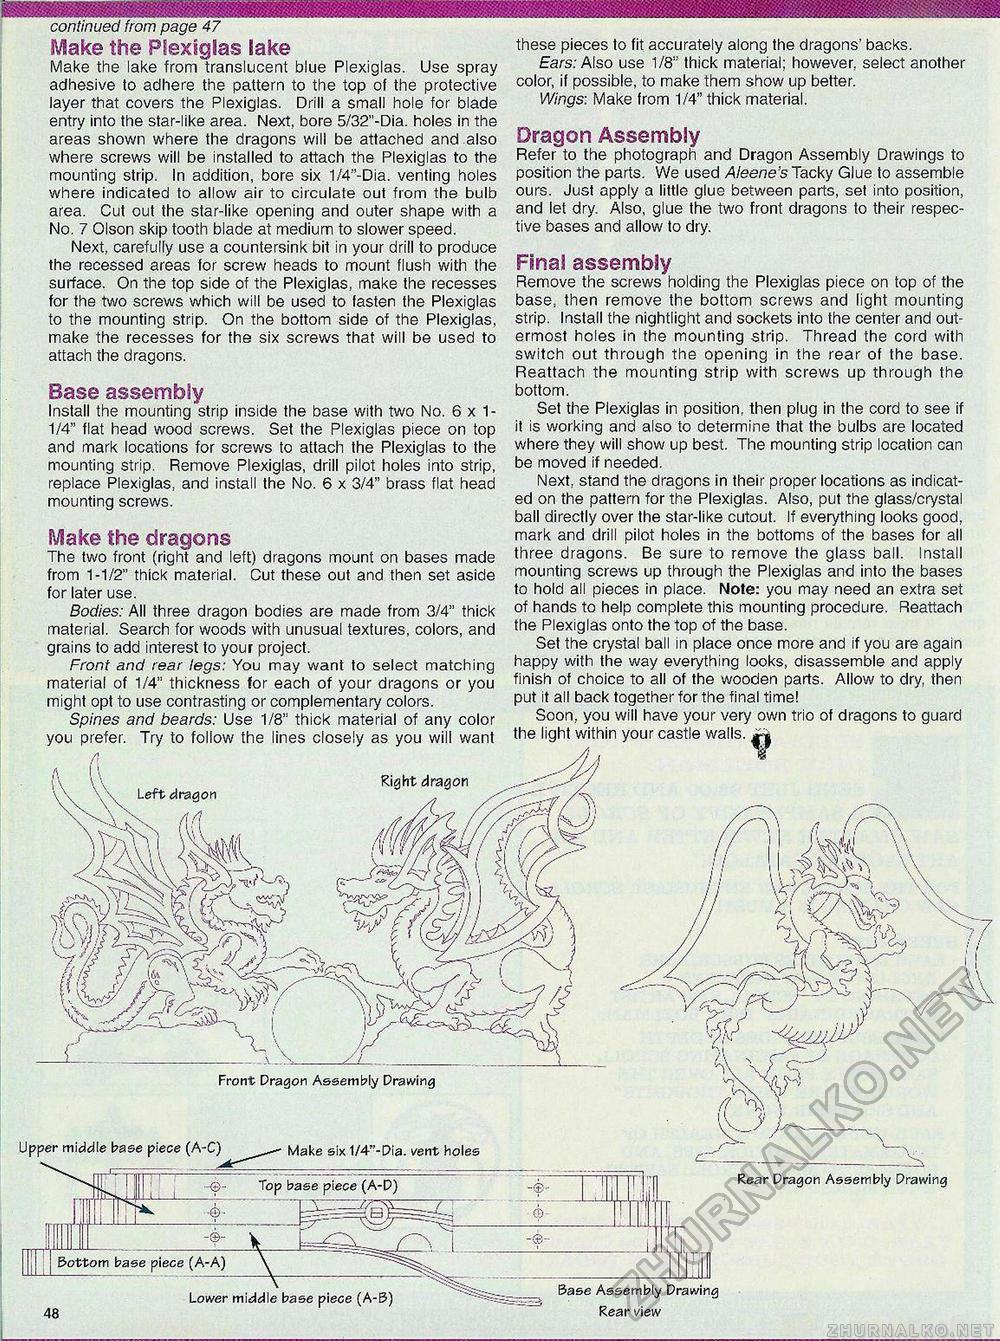
continued from page 47 Make the Plexiglas lake Make the lake from translucent blue Plexiglas. Use spray adhesive to adhere the pattern to the top of the protective layer that covers the Plexiglas. Drill a small hole for blade entry into the star-like area. Next, bore 5/32"-Dia. holes in the areas shown where the dragons will be attached and also where screws will be installed to attach the Plexiglas to the mounting strip. In addition, bore six 1/4"-Dia. venting holes where indicated to allow air to circulate out from the bulb area. Cut out the star-like opening and outer shape with a No. 7 Olson skip tooth blade at medium to slower speed. Next, carefully use a countersink bit in your drill to produce the recessed areas for screw heads to mount flush with the surface. On the top side of the Plexiglas, make the recesses for the two screws which will be used to fasten the Plexiglas to the mounting strip. On the bottom side of the Plexiglas, make the recesses for the six screws that will be used to attach the dragons. Base assembly Install the mounting strip inside the base with two No. 6x1-1/4" flat head wood screws. Set the Plexiglas piece on top and mark locations for screws to attach the Plexiglas to the mounting strip. Remove Plexiglas, drill pilot holes into strip, replace Plexiglas, and install the No. 6 x 3/4" brass flat head mounting screws. Make the dragons The two front (right and left) dragons mount on bases made from 1-1/2" thick material. Cut these out and then set aside for later use. Bodies: All three dragon bodies are made from 3/4" thick material. Search for woods with unusual textures, colors, and grains to add interest to your project. Front and rear legs: You may want to select matching material of 1/4" thickness for each of your dragons or you might opt to use contrasting or complementary colors. Spines and beards: Use 1/8" thick material of any color you prefer. Try to follow the lines closely as you will want these pieces to fit accurately along the dragons' backs. Ears: Also use 1/8" thick material; however, select another color, if possible, to make them show up better. Wings: Make from 1/4" thick material. Dragon Assembly Refer to the photograph and Dragon Assembly Drawings to position the parts. We used Aleene's Tacky Glue to assemble ours. Just apply a little glue between parts, set into position, and let dry. Also, glue the two front dragons to their respective bases and allow to dry. Final assembly Remove the screws holding the Plexiglas piece on top of the base, then remove the bottom screws and light mounting strip. Install the nightlight and sockets into the center and outermost holes in the mounting strip. Thread the cord with switch out through the opening in the rear of the base. Reattach the mounting strip with screws up through the bottom. Set the Plexiglas in position, then plug in the cord to see if it is working and also to determine that the bulbs are located where they will show up best. The mounting strip location can be moved if needed. Next, stand the dragons in their proper locations as indicated on the pattern for the Plexiglas. Also, put the glass/crystal ball directly over the star-like cutout. If everything looks good, mark and drill pilot holes in the bottoms of the bases for all three dragons. Be sure to remove the glass ball. Install mounting screws up through the Plexiglas and into the bases to hold all pieces in place. Note: you may need an extra set of hands to help complete this mounting procedure. Reattach the Plexiglas onto the top of the base. Set the crystal ball in place once more and if you are again happy with the way everything looks, disassemble and apply finish of choice to all of the wooden parts. Allow to dry, then put it all back together for the final time! Soon, you will have your very own trio of dragons to guard the light within your castle walls. Base Assembly Drawing Rear view |


