Creative Woodworks & crafts 2001-03, страница 54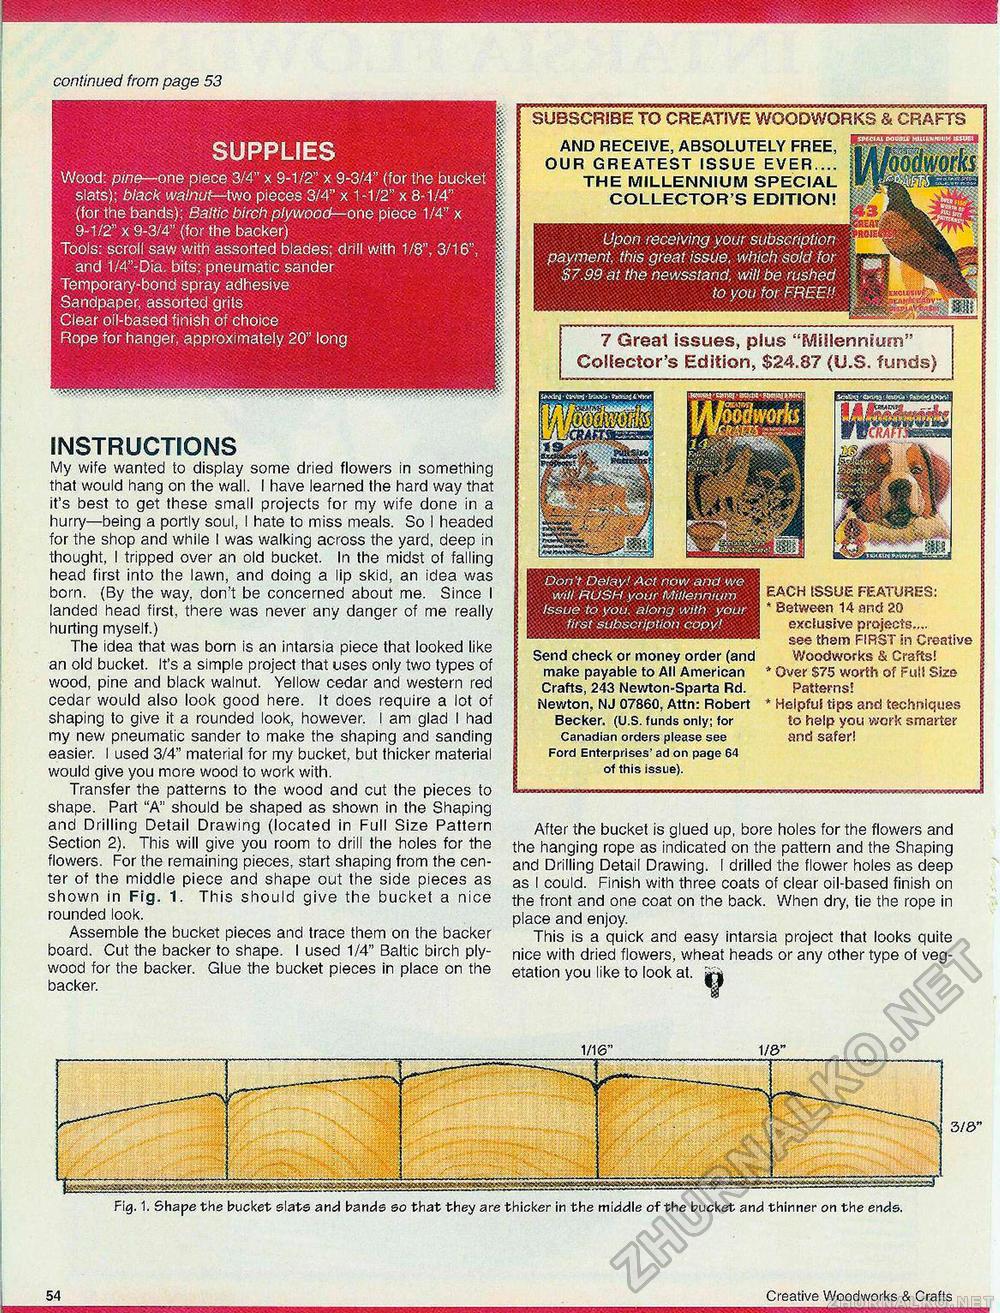
continued from page 53 SUPPLIES Wood: pine—one piece 3/4" x 9-1/2" x 9-3/4" (for the bucket slats); black walnut— two pieces 3/4" x 1 -1/2" x 8-1/4" (for the bands); Baltic birch plywood—one piece 1/4" x 9-1/2" x 9-3/4" (tor the backer) Tools: scroll saw with assorted blades; drill with 1/8", 3/16", and 1/4"-Dia. bits; pneumatic sander Temporary-bond spray adhesive Sandpaper, assorted grits Clear oil-based finish of choice Rope for hanger, approximately 20" long INSTRUCTIONS My wife wanted to display some dried flowers in something that would hang on the wall. I have learned the hard way that it's best to get these small projects for my wife done in a hurry—being a portly soul, I hate to miss meals. So I headed for the shop and while I was walking across the yard, deep in thought, I tripped over an old bucket. In the midst of falling head first into the lawn, and doing a lip skid, an idea was born. (By the way, don't be concerned about me. Since I landed head first, there was never any danger of me really hurting myself.) The idea that was born is an intarsia piece that looked like an old bucket. It's a simple project that uses only two types of wood, pine and black walnut. Yellow cedar and western red cedar would also look good here. It does require a lot of shaping to give it a rounded look, however. I am glad I had my new pneumatic sander to make the shaping and sanding easier. I used 3/4" material for my bucket, but thicker material would give you more wood to work with. Transfer the patterns to the wood and cut the pieces to shape. Part "A" should be shaped as shown in the Shaping and Drilling Detail Drawing (located in Full Size Pattern Section 2). This will give you room to drill the holes for the flowers. For the remaining pieces, start shaping from the center of the middle piece and shape out the side pieces as shown in Fig. 1. This should give the bucket a nice rounded look. Assemble the bucket pieces and trace them on the backer board. Cut the backer to shape. I used 1/4" Baltic birch plywood for the backer. Glue the bucket pieces in place on the backer. SUBSCRIBE TO CREATIVE WOODWORKS & CRAFTS AND RECEIVE, ABSOLUTELY FREE, OUR GREATEST ISSUE EVER.... THE MILLENNIUM SPECIAL COLLECTOR S EDITION! Upon receiving your subscription payment, this great issue, which sold for $7.99 at the newsstand, will be rushed to you for FREEH 7 Great issues, plus "Millennium" Collector's Edition, $24.87 (U.S. funds) Don't Delay! Act now and we will. RUSH your Millennium Issue to you. along with your first subscription copy! Send check or money order (and make payable to All American Crafts, 243 Newton-Sparta Rd. Newton, NJ 07860, Attn: Robert Becker. (U.S. funds only; for Canadian orders please see Ford Enterprises' ad on page 64 of this issue). EACH ISSUE FEATURES: * Between 14 and 20 exclusive projects.... see them FIRST in Creative Woodworks & Crafts! * Over $75 worth of Full Size Patterns! * Helpful tips and techniques to help you work smarter and safer! After the bucket is glued up, bore holes for the flowers and the hanging rope as indicated on the pattern and the Shaping and Drilling Detail Drawing. I drilled the flower holes as deep as I could. Finish with three coats of clear oil-based finish on the front and one coat on the back. When dry, tie the rope in place and enjoy. This is a quick and easy intarsia project that looks quite nice with dried flowers, wheat heads or any other type of vegetation you like to look at. 313" Fig. 1. Shape the bucket slats and bands so that they are thicker in the middle of the bucket and thinner on the ends. 54 Creative Woodworks & Crafts |


