Creative Woodworks & crafts 2001-04, страница 18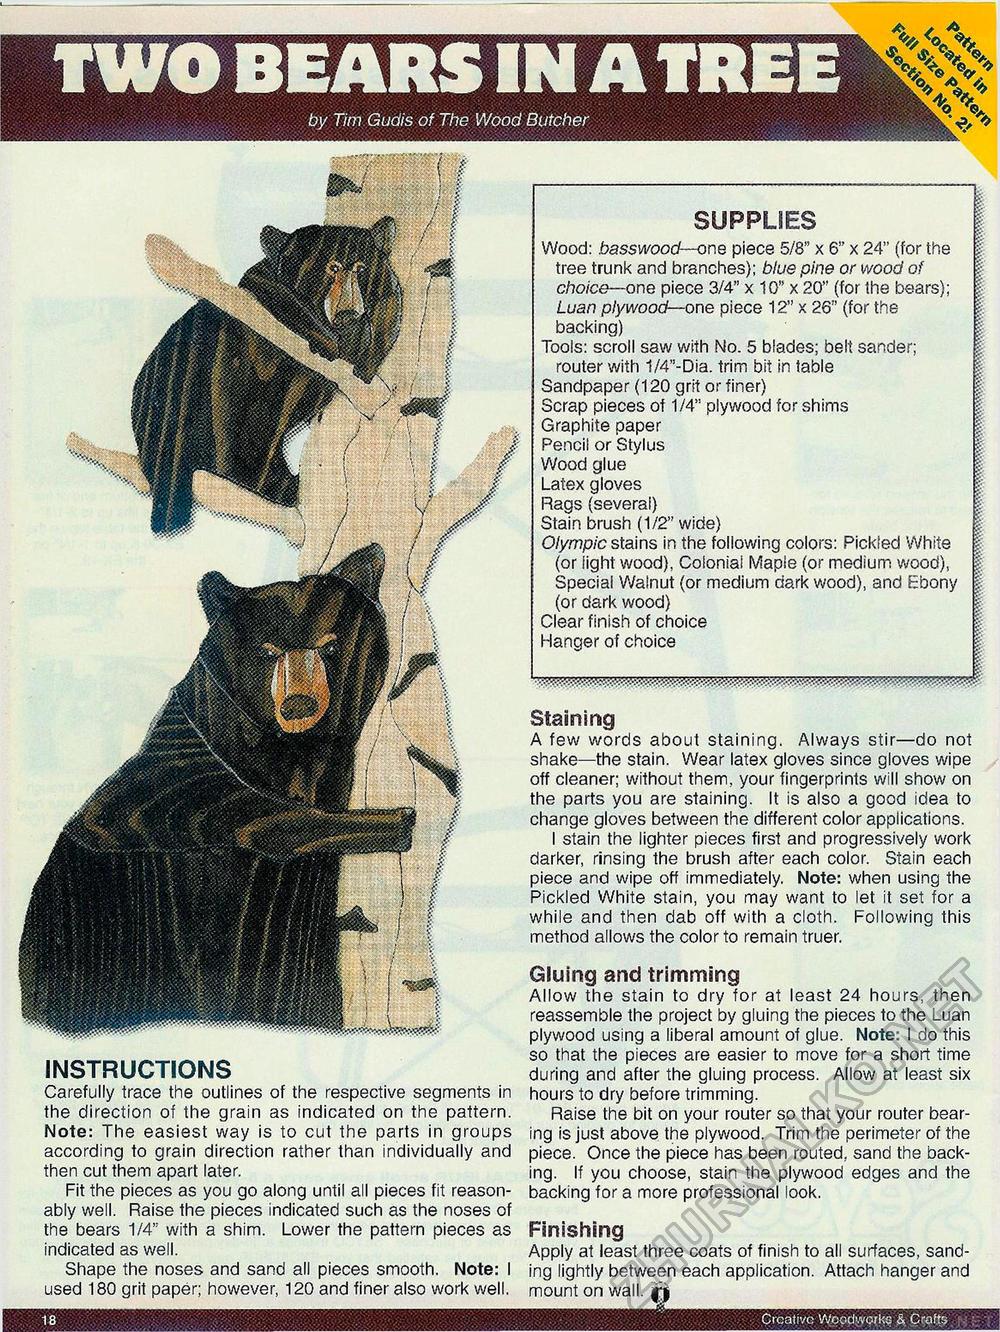
TWO BEARS IN A TREE by Tim Gudis of The Wood Butcher 18 Creative Woodworks & Crafts SUPPLIES Wood: basswood—one piece 5/8" x 6" x 24" (for the tree trunk and branches); blue pine or wood of choice—one piece 3/4" x 10" x 20" (for the bears); Luan plywood— one piece 12" x 26" (for the backing) Tools: scroll saw with No. 5 blades; belt sander; router with 1/4"-Dia. trim bit in fable Sandpaper (120 grit or finer) Scrap pieces of 1/4" plywood for shims Graphite paper Pencil or Stylus Wood glue Latex gloves Rags (several) Stain brush (1/2" wide) Olympic stains in the following colors: Pickled White (or iight wood), Colonial Maple (or medium wood), Special Walnut (or medium dark wood), and Ebony (or dark wood) Clear finish of choice Hanger of choice ppMBPawaqpinwegBWmropegset .■.»- .■.- swapmgcggBBgcggswiaiB^ instructions Carefully trace the outlines of the respective segments in the direction of the grain as indicated on the pattern. Note: The easiest way is to cut the parts in groups according to grain direction rather than individually and then cut them apart later. Fit the pieces as you go along until all pieces fit reasonably well. Raise the pieces indicated such as the noses of the bears 1/4" with a shim. Lower the pattern pieces as indicated as well. Shape the noses and sand all pieces smooth. Note: I used 180 grit paper; however, 120 and finer also work well. Staining A few words about staining. Always stir—do not shake—the stain. Wear latex gloves since gloves wipe off cleaner; without them, your fingerprints will show on the parts you are staining. It is also a good idea to change gloves between the different color applications. I stain the lighter pieces first and progressively work darker, rinsing the brush after each color. Stain each piece and wipe off immediately. Note: when using the Pickled White stain, you may want to let it set for a while and then dab off with a cloth. Following this method allows the color to remain truer. Gluing and trimming Allow the stain to dry for at least 24 hours, then reassemble the project by gluing the pieces to the Luan plywood using a liberal amount of glue. Note: I do this so that the pieces are easier to move for a short time during and after the gluing process. Allow at least six hours to dry before trimming. Raise the bit on your router so that your router bearing is just above the plywood. Trim the perimeter of the piece. Once the piece has been routed, sand the backing. If you choose, stain the plywood edges and the backing for a more professional look. Finishing Apply at least three coats of finish to all surfaces, sanding lightly between each application. Attach hanger and mount on wall, ri |


