Creative Woodworks & crafts 2001-04, страница 20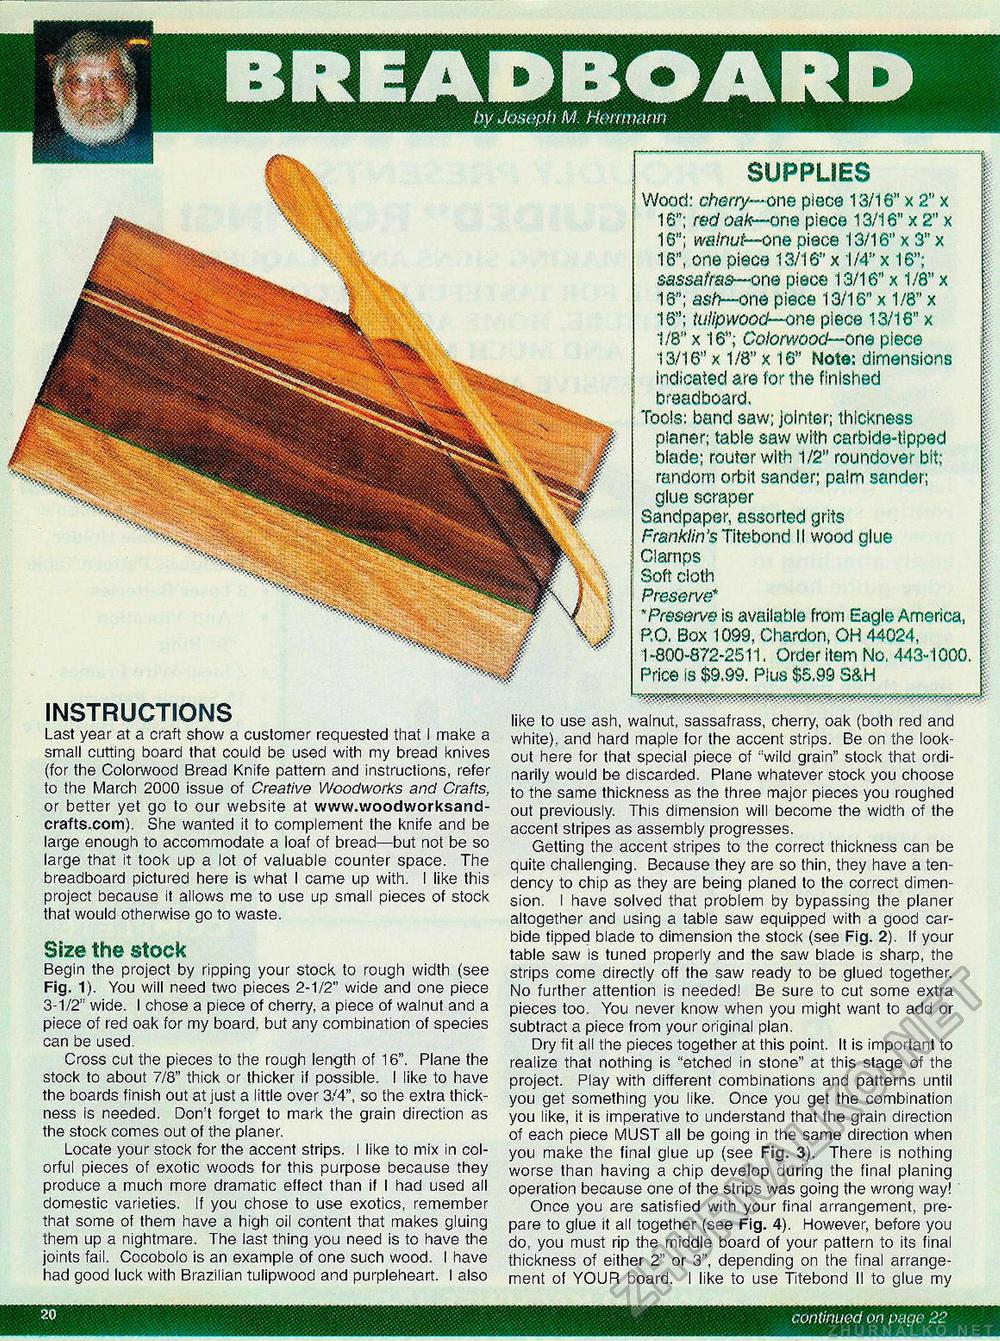
instructions Last year at a craft show a customer requested that I make a small cutting board that could be used with my bread knives (for the Colorwood Bread Knife pattern and instructions, refer to the March 2000 issue of Creative Woodworks and Crafts, or better yet go to our website at www.woodworksand-crafts.com). She wanted it to complement the knife and be large enough to accommodate a loaf of bread—but not be so large that it took up a lot of valuable counter space. The breadboard pictured here is what I came up with. I like this project because it allows me to use up small pieces of stock that would otherwise go to waste. Size the stock Begin the project by ripping your stock to rough width (see Fig. 1). You will need two pieces 2-1/2" wide and one piece 3-1/2" wide. I chose a piece of cherry, a piece of walnut and a piece of red oak for my board, but any combination of species can be used. Cross cut the pieces to the rough length of 16". Plane the stock to about 7/8" thick or thicker if possible. I like to have the boards finish out at just a little over 3/4", so the extra thickness is needed. Don't forget to mark the grain direction as the stock comes out of the planer. Locate your stock for the accent strips. I like to mix in colorful pieces of exotic woods for this purpose because they produce a much more dramatic effect than if I had used all domestic varieties. If you chose to use exotics, remember that some of them have a high oil content that makes gluing them up a nightmare. The last thing you need is to have the joints fail. Cocobolo is an example of one such wood. I have had good luck with Brazilian tulipwood and purpleheart. I also like to use ash, walnut, sassafrass, cherry, oak (both red and white), and hard maple for the accent strips. Be on the lookout here for that special piece of "wild grain" stock that ordinarily would be discarded. Plane whatever stock you choose to the same thickness as the three major pieces you roughed out previously. This dimension will become the width of the accent stripes as assembly progresses. Getting the accent stripes to the correct thickness can be quite challenging. Because they are so thin, they have a tendency to chip as they are being planed to the correct dimension. I have solved that problem by bypassing the planer altogether and using a table saw equipped with a good carbide tipped blade to dimension the stock (see Fig. 2). If your table saw is tuned properly and the saw blade is sharp, the strips come directly off the saw ready to be glued together. No further attention is needed! Be sure to cut some extra pieces too. You never know when you might want to add or subtract a piece from your original plan. Dry fit all the pieces together at this point. It is important to realize that nothing is "etched in stone" at this stage of the project. Play with different combinations and patterns until you get something you like. Once you get the combination you like, it is imperative to understand that the grain direction of each piece MUST all be going in the same direction when you make the final glue up (see Fig. 3). There is nothing worse than having a chip develop during the final planing operation because one of the strips was going the wrong way! Once you are satisfied with your final arrangement, prepare to glue it all together (see Fig. 4). However, before you do, you must rip the middle board of your pattern to its final thickness of either 2" or 3", depending on the final arrangement of YOUR board. I like to use Titebond II to glue my SUPPLIES Wood: cherry—orle pisce 13/16" x 2" x 16"; r&d oak—one piece 13/16" x 2" x I 16"; walnut— one piece 13/16" x 3" x 16", one piece 13/16" x 1/4" x 16"; sassafras—one piece 13/16" x 1/8" x 16"; ash—one piece 13/16" x 1 /8" x 16"; tulipwood—one piece 13/16" x 1/8" x 16"; Colorwood— one piece 13/16" X 1 /8" X 16" Note: dimensions I indicated are for the finished breadboard, Tools: band saw; jointer; thickness planer; table saw with carbide-tipped | blade; router with 1/2" roundover bit; random orbit sander; palm sander; glue scraper Sandpaper, assorted grits Franklin's Titebond II wood glue Clamps Soft cloth | Preserve* l "Pres&rve is available from Eagle America, t P.O. Box 1099, Chardon, OH 44024, 1-800-872-2511, Order item No, 443-1000. I Price is $9,99. Plus $5,99 S&H 20 continued on page 22 |


