Creative Woodworks & crafts 2001-08, страница 6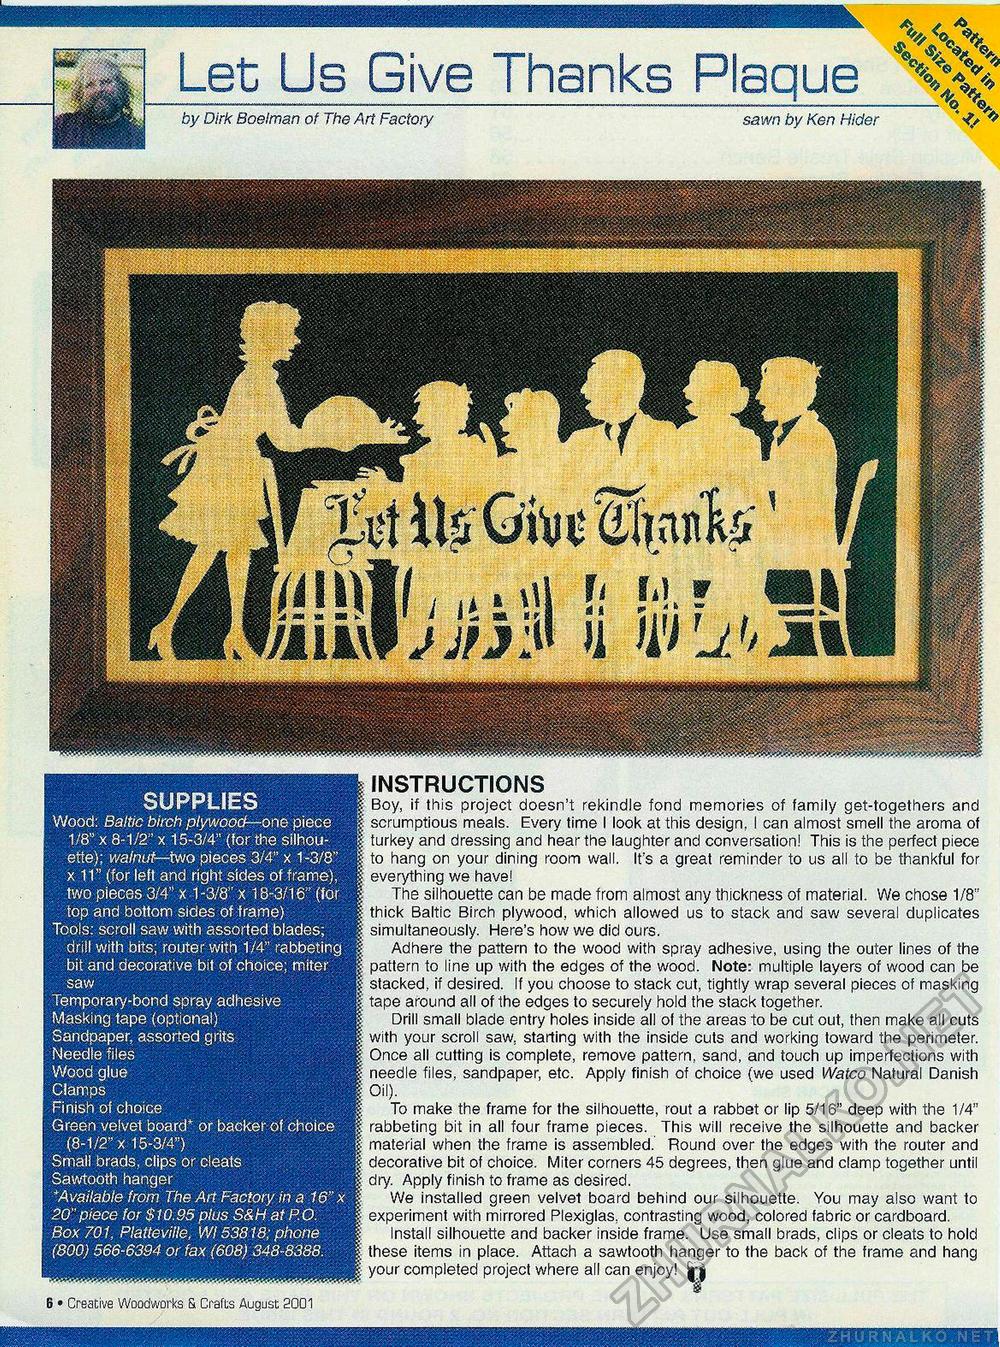
Let Us Give Thanks Plaque by Dirk Boelman of The Art Factory sawn by Ken Hider — *o %. SUPPLIES Wood: Baltic birch plywood—one piece 1/8" x 8-1/2" x 15-3/4" (for the silhouette); walnut—two pieces 3/4" x 1 -3/8" x 11" (for left and right sides of frame), two pieces 3/4" x 1 -3/8" x 18-3/16" (for top and bottom sides of frame) Tools: scroll saw with assorted blades; drill with bits; router with 1/4" rabbeting bit and decorative bit of choice; miter saw Temporary-bond spray adhesive Masking tape (optional) Sandpaper, assorted grits Needle files Wood glue Clamps Finish of choice Green velvet board* or backer of choice (8-1/2" x 15-3/4") Small brads, clips or cleats Sawtooth hanger *Available from The Art Factory in a 16" x 20"piece for $10.95plus S&H at P.O. Box 701, Platteville, Wl 53818; phone (800) 566-6394 or fax (608) 348-8388. INSTRUCTIONS Boy, if this project doesn't rekindle fond memories of family get-togethers and scrumptious meals. Every time I look at this design, I can almost smell the aroma of turkey and dressing and hear the laughter and conversation! This is the perfect piece to hang on your dining room wall. It's a great reminder to us all to be thankful for everything we have! The silhouette can be made from almost any thickness of material. We chose 1/8" thick Baltic Birch plywood, which allowed us to stack and saw several duplicates simultaneously. Here's how we did ours. Adhere the pattern to the wood with spray adhesive, using the outer lines of the pattern to line up with the edges of the wood. Note: multiple layers of wood can be stacked, if desired. If you choose to stack cut, tightly wrap several pieces of masking tape around all of the edges to securely hold the stack together. Drill small blade entry holes inside all of the areas to be cut out, then make all cuts with your scroll saw, starting with the inside cuts and working toward the perimeter. Once all cutting is complete, remove pattern, sand, and touch up imperfections with needle files, sandpaper, etc. Apply finish of choice (we used Watco Natural Danish Oil). To make the frame for the silhouette, rout a rabbet or lip 5/16" deep with the 1/4" rabbeting bit in all four frame pieces. This will receive the silhouette and backer material when the frame is assembled. Round over the edges with the router and decorative bit of choice. Miter corners 45 degrees, then glue and clamp together until dry. Apply finish to frame as desired. We installed green velvet board behind our silhouette. You may also want to experiment with mirrored Plexiglas, contrasting wood, colored fabric or cardboard. Install silhouette and backer inside frame. Use small brads, clips or cleats to hold these items in place. Attach a sawtooth hanger to the back of the frame and hang your completed project where all can enjoy! |rg ¥ 6 • Creative Woodworks S. Crafts August 2001 ft ml ntujl f; ,111 mixwjjfja >1 w u f> jlw |


