Creative Woodworks & crafts 2001-08, страница 8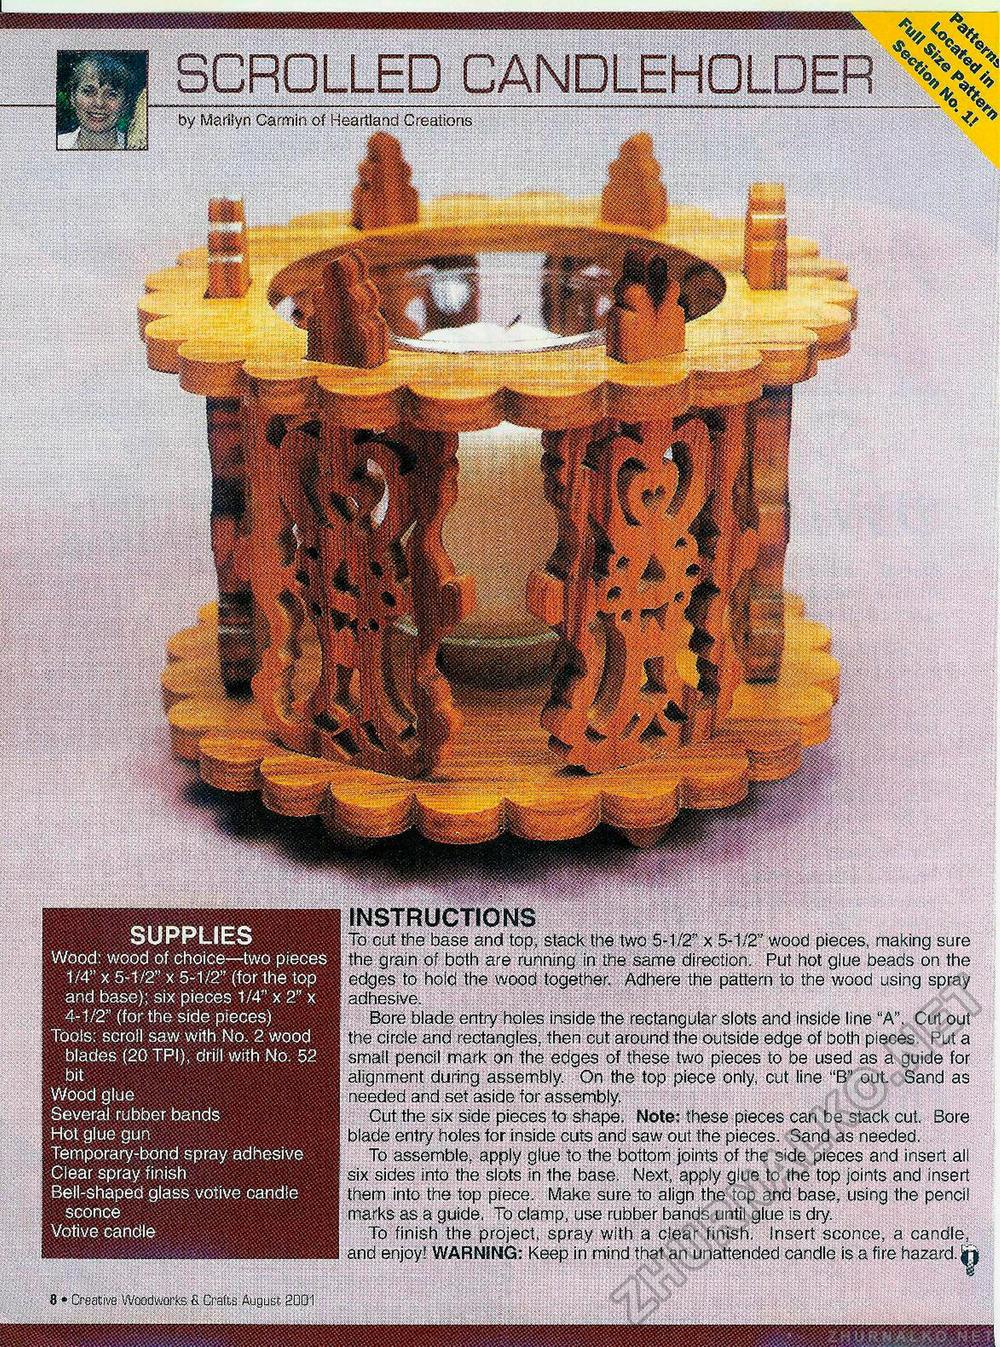
SUPPLIES Wood: wood of choice—two pieces 1/4" x 5-1/2" x 5-1/2" (for the top and. base); six pieces 1/4" x 2" x 4-1/2" (for the side pieces) Tools: scroll saw with No. 2 wood blades (20 TPI), drill with No. 52 bit Wood glue Several rubber bands Hot glue gun Temporary-bond spray adhesive Clear spray finish Bell-shaped glass votive candle sconce Votive candle by Marilyn Carmin of Heartland Creations INSTRUCTIONS To cut the base and top, stack the two 5-1/2" x 5-1/2" wood pieces, making sure the grain of both are running in the same direction. Put hot glue beads on the edges to hold the wood together. Adhere the pattern to the wood using spray adhesive. Bore blade; entry holes inside the rectangular slots and inside line "A". Cut out the circle and rectangles, then cut around the outside edge of both pieces. Put a small pencil mark on the edges of these two pieces to be used as a guide for alignment during assembly. On the top piece only, cut line "B" out Sand as needed and set aside for assembly. Cut the six side pieces to shape. Note: these pieces can be stack cut. Bore blade entry holes for inside cuts and saw out the pieces. Sand as needed. To assemble, apply glue to the bottom joints of the side pieces and insert all six sides into the slots in the base. Next; apply glue to the top joints and insert them into the top piece. Make sure, to align the top and base, using the pencil marks as a guide, To clamp, use rubber bands until glue is dry. To finish the project, spray with a clear finish, insert sconce, a candle, and enjoy! WARNING: Keep in mind that an unattended candle is a fire hazard, jf 8 * Creative Woodworks. & Crafts August 2001 |


