Creative Woodworks & crafts 2001-10, страница 35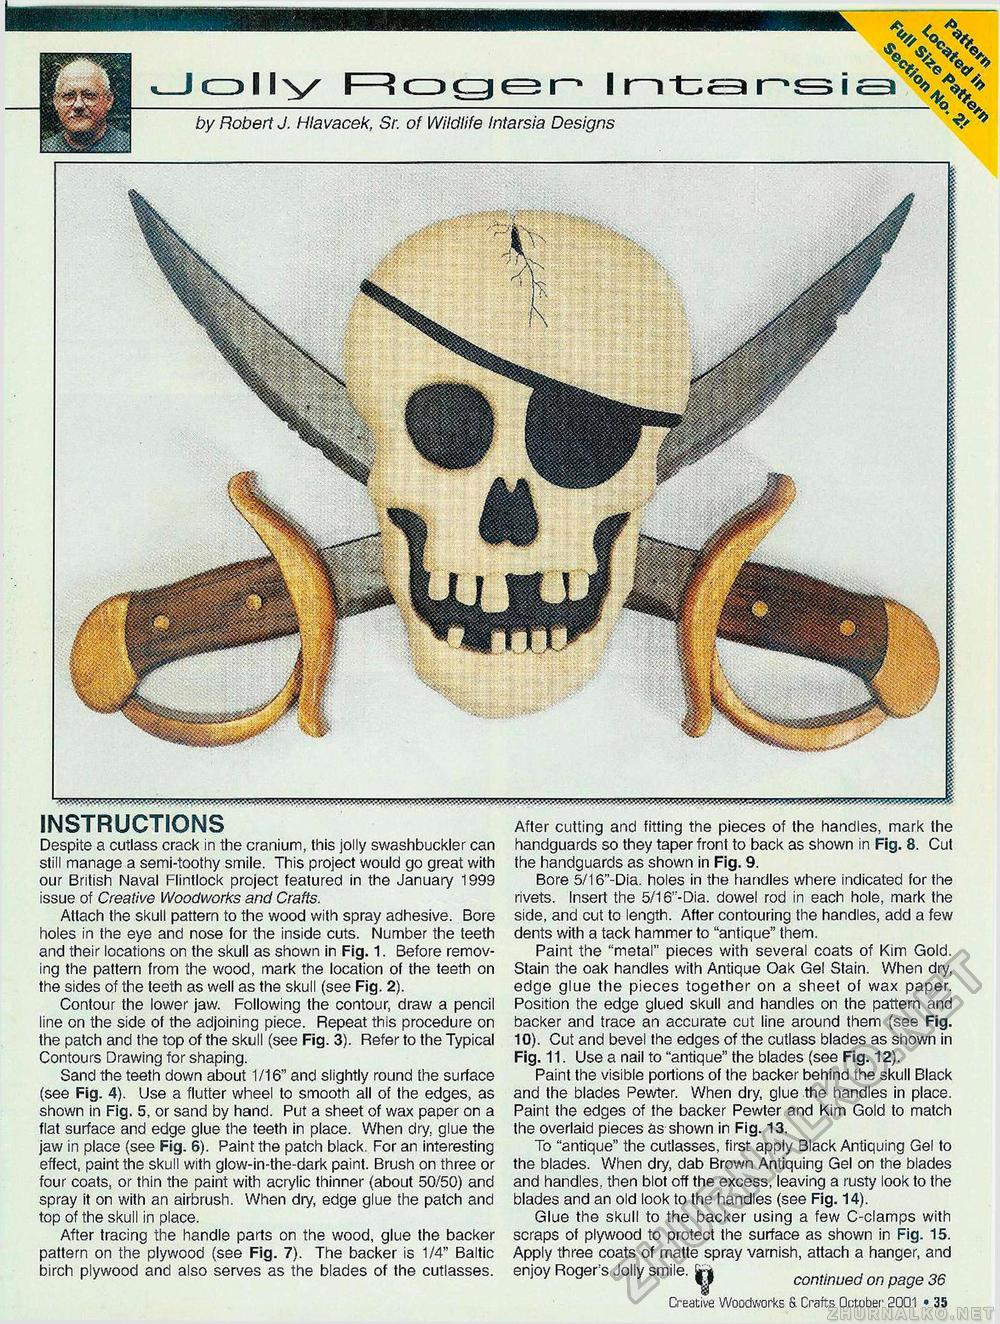
«_I o 11 y F^CDger-11 Intansi by Robert J. Hlavacek, Sr. of Wildlife Intarsia Designs INSTRUCTIONS Despite a cutlass crack in the cranium, this jolly swashbuckler can still manage a semi-toothy smile. This project would go great with our British Naval Flintlock project featured in the January 1999 issue of Creative Woodworks and Crafts. Attach the skull pattern to the wood with spray adhesive. Bore holes in the eye and nose for the inside cuts. Number the teeth and their locations on the skull as shown in Fig. 1. Before removing the pattern from the wood, mark the location of the teeth on the sides of the teeth as well as the skull (see Fig. 2). Contour the lower jaw. Following the contour, draw a pencil line on the side of the adjoining piece. Repeat this procedure on the patch and the top of the skull (see Fig. 3). Refer to the Typical Contours Drawing for shaping. Sand the teeth down about 1/16" and slightly round the surface (see Fig. 4). Use a flutter wheel to smooth all of the edges, as shown in Fig. 5, or sand by hand. Put a sheet of wax paper on a flat surface and edge glue the teeth in place. When dry, glue the jaw in place (see Fig. 6). Paint the patch black. For an interesting effect, paint the skull with glow-in-the-dark paint. Brush on three or four coats, or thin the paint with acrylic thinner (about 50/50) and spray it on with an airbrush. When dry, edge glue the patch and top of the skull in place. After tracing the handle parts on the wood, glue the backer pattern on the plywood (see Fig. 7). The backer is 1/4" Baltic birch plywood and also serves as the blades of the cutlasses. After cutting and fitting the pieces of the handles, mark the handguards so they taper front to back as shown in Fig. 8. Cut the handguards as shown in Fig. 9. Bore 5/l6"-Dia. holes in the handles where indicated for the rivets. Insert the 5/16"-Dia. dowel rod in each hole, mark the side, and cut to length. After contouring the handles, add a few dents with a tack hammer to "antique" them. Paint the "metal" pieces with several coats of Kim Gold. Stain the oak handles with Antique Oak Gel Stain. When dry, edge glue the pieces together on a sheet of wax paper. Position the edge glued skull and handles on the pattern and backer and trace an accurate cut line around them (see Fig. 10). Cut and bevel the edges of the cutlass blades as shown in Fig. 11. Use a nail to "antique" the blades (see Fig. 12). Paint the visible portions of the backer behind the skull Black and the blades Pewter. When dry, glue the handles in place. Paint the edges of the backer Pewter and Kim Gold to match the overlaid pieces as shown in Fig. 13. To "antique" the cutlasses, first apply Black Antiquing Gel to the blades. When dry, dab Brown Antiquing Gel on the blades and handles, then blot off the excess, leaving a rusty look to the blades and an old look to the handles (see Fig. 14). Glue the skull to the backer using a few C-clamps with scraps of plywood to protect the surface as shown in Fig. 15. Apply three coats of matte spray varnish, attach a hanger, and enjoy Roger's Jolly smile, jri .. , ' a 1 W continued on page 36 12 • Creative Woodworks & Crafts October- 2001 _ _ _| |


