Creative Woodworks & crafts 2001-10, страница 57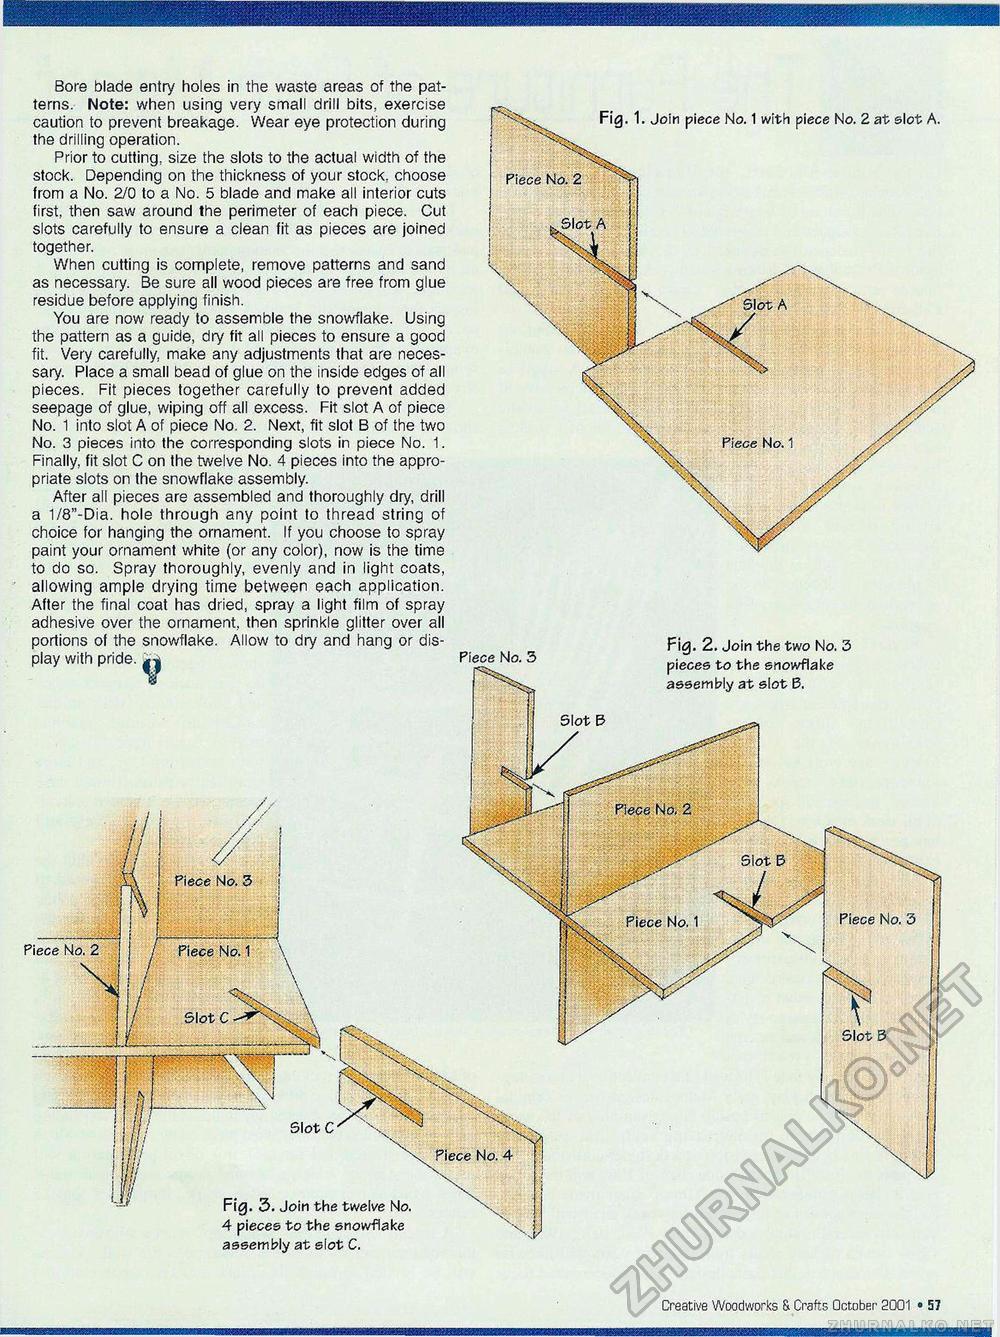
12 • Creative Woodworks & Crafts October- 2001 Fig. 2. Join the two No. 3 pieces to the snowflake assembly at slot B. Bore blade entry holes in the waste areas of the patterns. Note: when using very small drill bits, exercise caution to prevent breakage. Wear eye protection during the drilling operation. Prior to cutting, size the slots to the actual width of the stock. Depending on the thickness of your stock, choose from a No. 2/0 to a No. 5 blade and make all interior cuts first, then saw around the perimeter of each piece. Cut slots carefully to ensure a clean fit as pieces are joined together. When cutting is complete, remove patterns and sand as necessary. Be sure all wood pieces are free from glue residue before applying finish. You are now ready to assemble the snowflake. Using the pattern as a guide, dry fit all pieces to ensure a good fit. Very carefully, make any adjustments that are necessary. Place a small bead of glue on the inside edges of all pieces. Fit pieces together carefully to prevent added seepage of glue, wiping off all excess. Fit slot A of piece No. 1 into slot A of piece No. 2. Next, fit slot B of the two No. 3 pieces into the corresponding slots in piece No. 1. Finally, fit slot C on the twelve No. 4 pieces into the appropriate slots on the snowflake assembly. After all pieces are assembled and thoroughly dry, drill a 1/8"-Dia. hole through any point to thread string of choice for hanging the ornament. If you choose to spray paint your ornament white (or any color), now is the time to do so. Spray thoroughly, evenly and in light coats, allowing ample drying time between each application. After the final coat has dried, spray a light film of spray adhesive over the ornament, then sprinkle glitter over all portions of the snowflake. Allow to dry and hang or display with pride. Piece No. 3 Fig. 3. Join the twelve No. 4 pieces to the snowflake assembly at slot C. Slot C |


