Creative Woodworks & crafts 2002-03, страница 16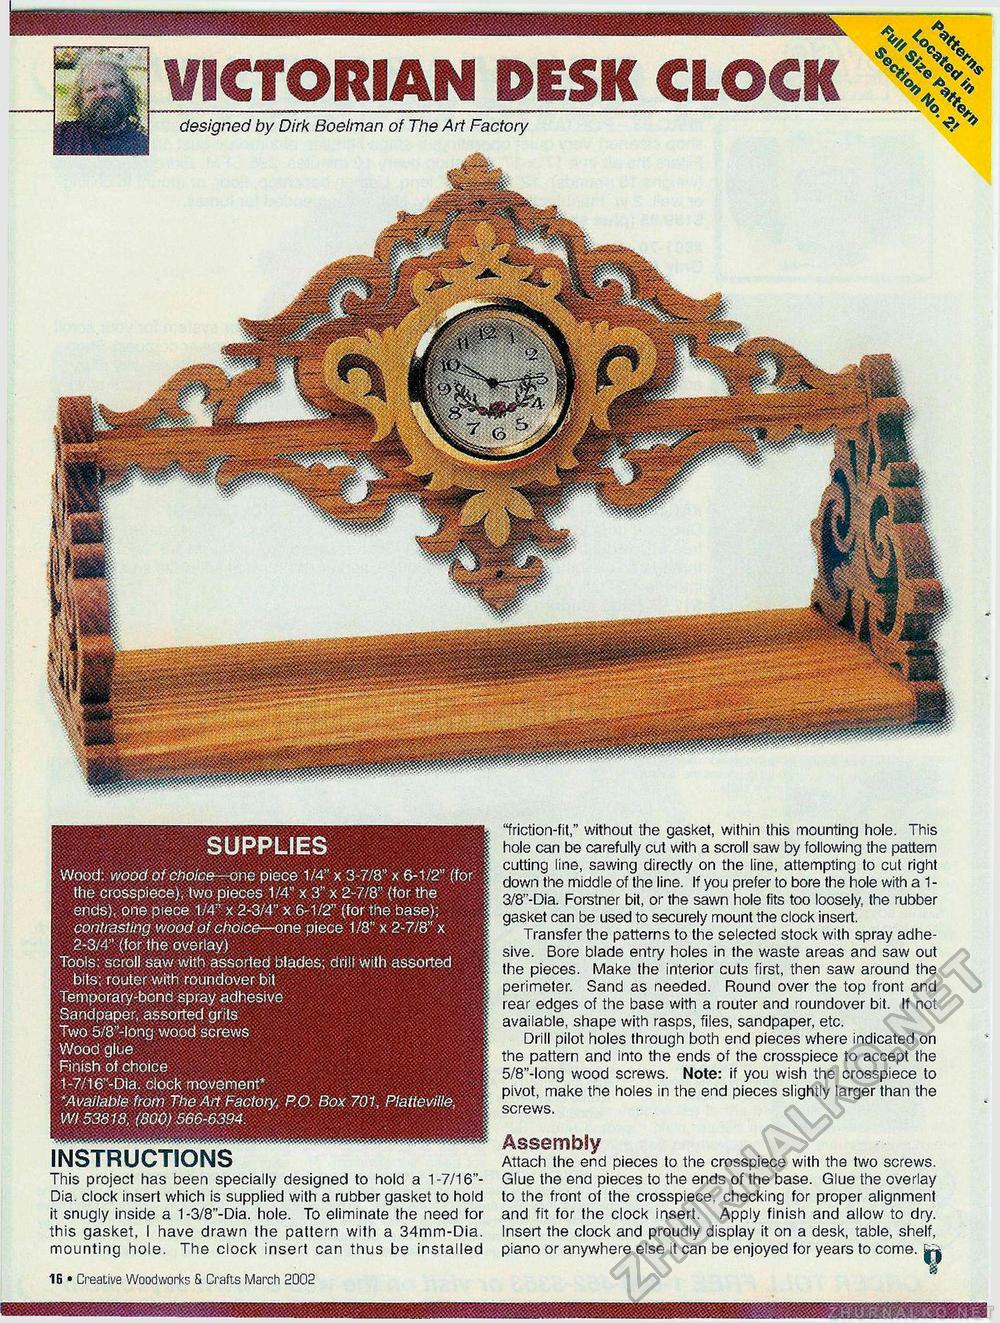
.-------------,---ro 'c^ designed by Dirk Boelman of The Art Factory SUPPLIES Wood: wood of choice—one piece 1/4" x 3-7/8" x 6-1/2" (for the crosspiece), two pieces 1/4" x 3" x 2-7/8" (for the ends), one piece 1/4" x 2-3/4" x 6-1/2" (for the base); contrasting wood of choice—one piece 1/8" x 2-7/8" x 2-3/4" (for the overlay) Tools: scroll saw with assorted blades; drill With assorted bits; router with roundover bit Temporary-bond spray adhesive Sandpaper, assorted grits Two 5/8"-long wood screws Wood glue Finish of choice 1-7/16"'-Dia. clock movement* *Available from The Art Factory, P.O. Box 701, Platteville, Wl 53818, (800) 566-6394. INSTRUCTIONS This project has been specially designed to hold a 1-7/16"-Dia. clock insert which is supplied with a rubber gasket to hold it snugly inside a 1 -3/8"-Dia. hole. To eliminate the need for this gasket, I have drawn the pattern with a 34mm-Dia. mounting hole. The clock insert can thus be installed "friction-fit," without the gasket, within this mounting hole. This hole can be carefully cut with a scroll saw by following the pattern cutting line, sawing directly on the line, attempting to cut right down the middle of the line. If you prefer to bore the hole with a 1-3/8"-Dia. Forstner bit, or the sawn hole fits too loosely, the rubber gasket can be used to securely mount the clock insert. Transfer the patterns to the selected stock with spray adhesive. Bore blade entry holes in the waste areas and saw out the pieces. Make the interior cuts first, then saw around the perimeter. Sand as needed. Round over the top front and rear edges of the base with a router and roundover bit. If not available, shape with rasps, files, sandpaper, etc. Drill pilot holes through both end pieces where indicated on the pattern and into the ends of the crosspiece to accept the 5/8"-long wood screws. Note: if you wish the crosspiece to pivot, make the holes in the end pieces slightly larger than the screws. Assembly Attach the end pieces to the crosspiece with the two screws. Glue the end pieces to the ends of the base. Glue the overlay to the front of the crosspiece, checking for proper alignment and fit for the clock insert. Apply finish and allow to dry. Insert the clock and proudly display it on a desk, table, shelf, piano or anywhere else it can be enjoyed for years to come. i 1fi • Creative Woodworks & Crafts March 2002 |


