Creative Woodworks & crafts 2002-03, страница 34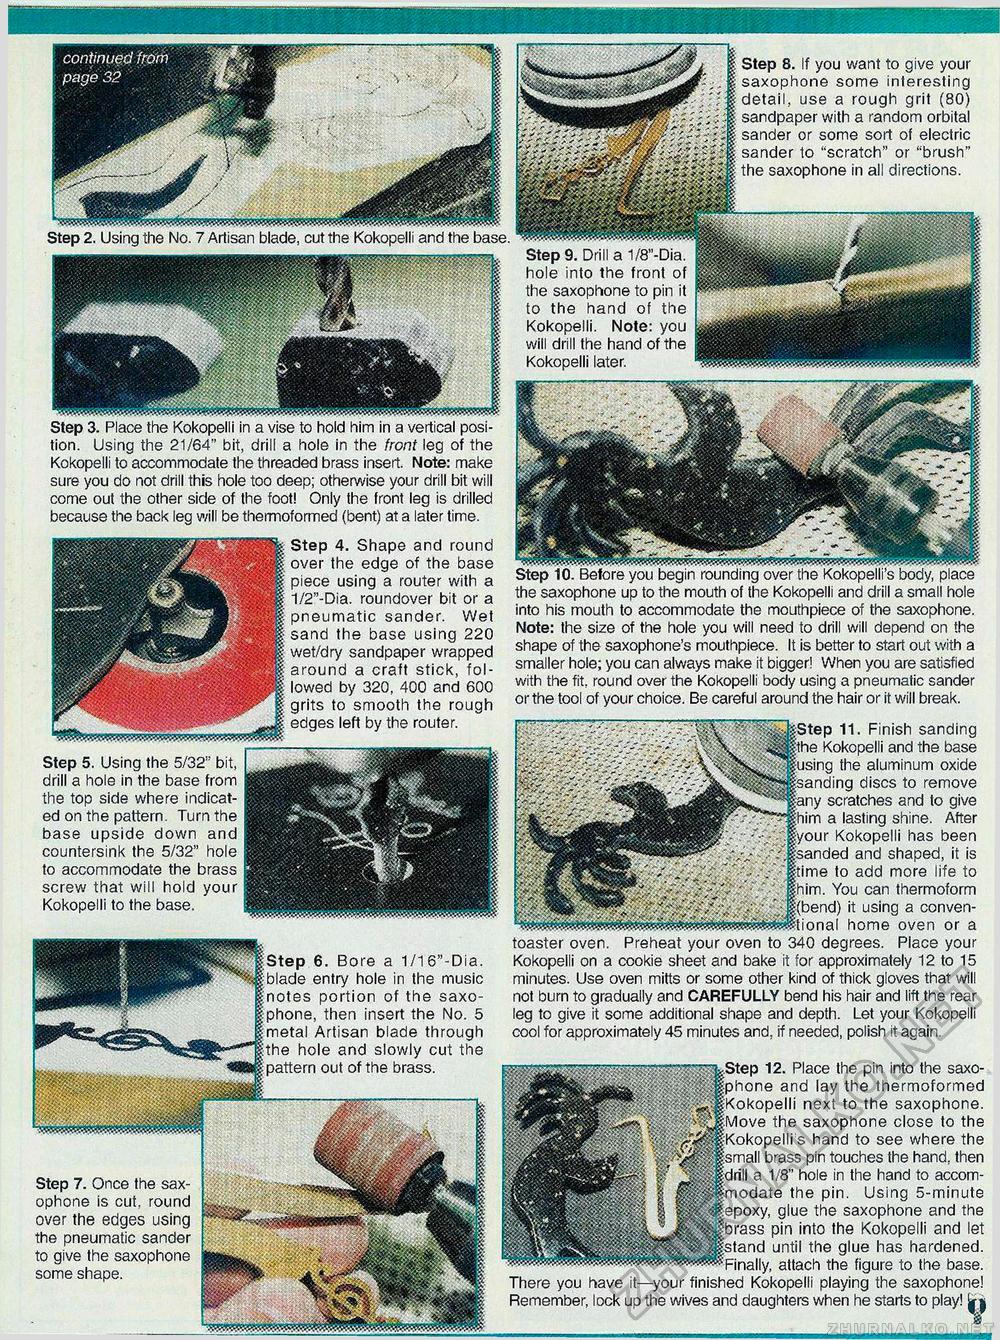
Step 8. If you want to give your saxophone some interesting detail, use a rough grit (80) sandpaper with a random orbital sander or some sort of electric sander to "scratch" or "brush" the saxophone in all directions. Step 2. Using the No. 7 Artisan blade, cut the Kokopelli and the base. Step 9. Drill a 1/8"-Dia. hole into the front of the saxophone to pin it to the hand of the Kokopelli. Note: you will drill the hand of the Kokopelli later. Step 3. Place the Kokopelli in a vise to hold him in a vertical position. Using the 21/64" bit, drill a hole in the front leg of the Kokopelli to accommodate the threaded brass insert. Note: make sure you do not drill this hole too deep; otherwise your drill bit will come out the other side of the foot! Only the front leg is drilled because the back leg will be thermoformed (bent) at a later time. Step 5. Using the 5/32" bit, drill a hole in the base from the top side where indicated on the pattern. Turn the base upside down and countersink the 5/32" hole to accommodate the brass screw that will hold your Kokopelli to the base. Step 6. Bore a 1/16"-Dia. blade entry hole in the music notes portion of the saxophone, then insert the No. 5 metal Artisan blade through the hole and slowly cut the pattern out of the brass. "7 — step 12. Place the pin into the saxo- ijWBfeLia^:.': fphone and lay the thermoformed iMHBHg^^ ^ |'Kokopelli next to the saxophone. "tTHHp v?Move the saxophone close to the P JllSr f^lKokopelli's hand to see where the ^ffl isma" brass pin touches the hand, then . Illjp^l If J||§ Idrill a 1/8" hole in the hand to accom-* r modate the pin. Using 5-minute I pip|epoxy, glue the saxophone and the ^ J^lllibrass pin into the Kokopelli and let ^mSgtey 1 §| -stand until the glue has hardened. ^Finally, attach the figure to the base. There you have it—your finished Kokopelli playing the saxophone! Remember, lock up the wives and daughters when he starts to play! jjrj Step 7. Once the saxophone is cut, round over the edges using the pneumatic sander to give the saxophone some shape. |


