Creative Woodworks & crafts 2002-03, страница 36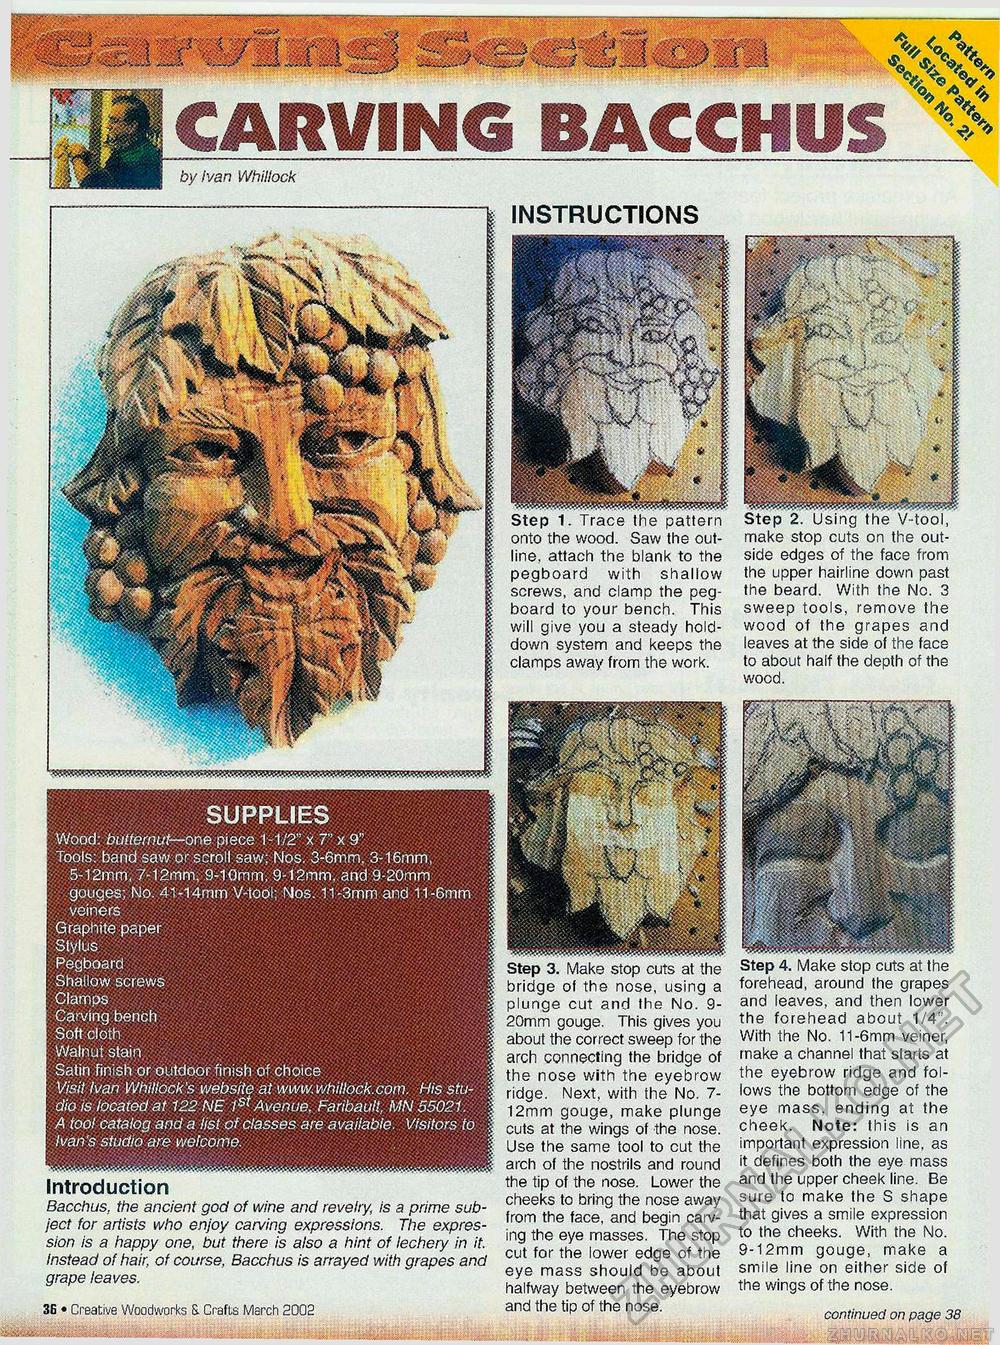
SUPPLIES Wood: butternut— one piece 1-1/2" x 7" x 9" Tools: band saw or scroll saw; Nos. 3-6mm, 3-16mm, 5-12mm. /-12mm, 9-10mm. 9-12mm,. and 9-20mm gouges; No. 41-14mm V-tool; Nos. 11-3mm and 11-6mm : veiners Graphite paper Stylus Pegboard Shallow screws Clamps Carving bench Soft cloth Walnut stain Satin finish or outdoor finish of choice Visit Ivan Whillock's website at www.whillock.com. His studio is located at 122 NE 1st Avenue, Faribault, MN 55021. A tool catalog and a list of classes are available. Visitors to Ivan's studio are welcome. CARVING BACCHUSby Ivan Whillock INSTRUCTIONS Step 3. Make stop cuts at the bridge of the nose, using a plunge cut and the No. 9-20mm gouge. This gives you about the correct sweep for the arch connecting the bridge of the nose with the eyebrow ridge. Next, with the No. 7-12mm gouge, make plunge cuts at the wings of the nose. Use the same tool to cut the arch of the nostrils and round the tip of the nose. Lower the cheeks to bring the nose away from the face, and begin carving the eye masses. The stop cut for the lower edge of the eye mass should be about halfway between the eyebrow and the tip of the nose. Step 4. Make stop cuts at the forehead, around the grapes and leaves, and then lower the forehead about 1/4". With the No. 11-6mm veiner, make a channel that starts at the eyebrow ridge and follows the bottom edge of the eye mass, ending at the cheek. Note: this is an important expression line, as it defines both the eye mass and the upper cheek line. Be sure to make the S shape that gives a smile expression to the cheeks. With the No. 9-12mm gouge, make a smile line on either side of the wings of the nose. continued on page 38 Introduction Bacchus, the ancient god of ivine and revelry, is a prime subject for artists who enjoy carving expressions. The expression is a happy one, but there is also a hint of lechery in it. Instead of hair, of course, Bacchus is arrayed with grapes and grape leaves. 3G • Creative Woodworks S. Crafts March 2002 Step 1. Trace the pattern onto the wood. Saw the outline, attach the blank to the pegboard with shallow screws, and clamp the peg-board to your bench. This will give you a steady hold-down system and keeps the clamps away from the work. make stop cuts on the outside edges of the face from the upper hairline down past the beard. With the Nc. 3 sweep tools, remove the wood of the grapes and leaves at the side of the face to about half the depth of the wood. |


