Creative Woodworks & crafts 2002-04, страница 48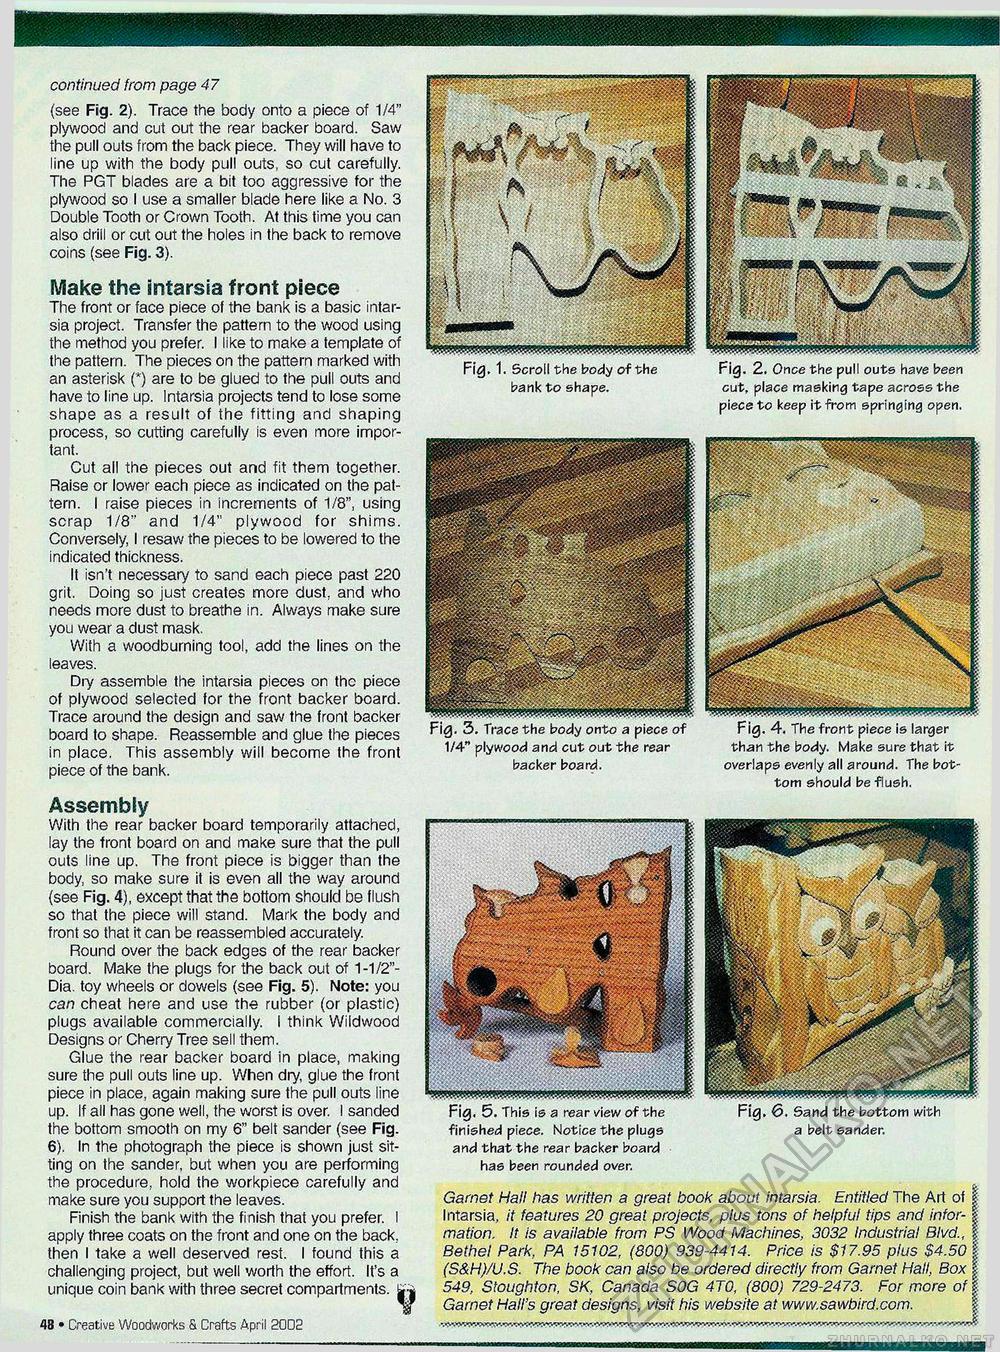
continued from page 47 (see Fig. 2). Trace the body onto a piece of 1/4" plywood and cut out the rear backer board. Saw the pull outs from the back piece. They will have to line up with the body pull outs, so cut carefully. The PGT blades are a bit too aggressive for the plywood so I use a smaller blade here like a No. 3 Double Tooth or Crown Tooth. At this time you can also drill or cut out the holes in the back to remove coins (see Fig. 3). Make the intarsia front piece The front or face piece of the bank is a basic intarsia project. Transfer the pattern to the wood using the method you prefer. I like to make a template of the pattern. The pieces on the pattern marked with an asterisk (*) are to be glued to the pull outs and have to line up. Intarsia projects tend to lose some shape as a result of the fitting and shaping process, so cutting carefully is even more important. Cut all the pieces out and fit them together. Raise or lower each piece as indicated on the pattern. I raise pieces in increments of 1/8", using scrap 1/8" and 1/4" plywood for shims. Conversely, I resaw the pieces to be lowered to the indicated thickness. It isn't necessary to sand each piece past 220 grit. Doing so just creates more dust, and who needs more dust to breathe in. Always make sure you wear a dust mask. With a woodburning tool, add the lines on the leaves. Dry assemble the intarsia pieces on the piece of plywood selected for the front backer board. Trace around the design and saw the front backer board to shape. Reassemble and glue the pieces in place. This assembly will become the front piece of the bank. Assembly With the rear backer board temporarily attached, lay the front board on and make sure that the pull outs line up. The front piece is bigger than the body, so make sure it is even all the way around (see Fig. 4), except that the bottom should be flush so that the piece will stand. Mark the body and front so that it can be reassembled accurately. Round over the back edges of the rear backer board. Make the plugs for the back out of 1-1/2"-Dia. toy wheels or dowels (see Fig. 5). Note: you can cheat here and use the rubber (or plastic) plugs available commercially. I think Wildwood Designs or Cherry Tree sell them. Glue the rear backer board in place, making sure the pull outs line up. When dry, glue the front piece in place, again making sure the pull outs line up. If all has gone well, the worst is over. I sanded the bottom smooth on my 6" belt sander (see Fig. 6). In the photograph the piece is shown just sitting on the sander, but when you are performing the procedure, hold the workpiece carefully and make sure you support the leaves. Finish the bank with the finish that you prefer. I apply three coats on the front and one on the back, then I take a well deserved rest. I found this a challenging project, but well worth the effort. It's a unique coin bank with three secret compartments. IB • Creative Woodworks S. Crafts April S002 Fig. 1. Scroll the body of the bank to shape. Fig. 2. Once the pull outs have been cut, place masking tape across the piece to keep it from springing open. Fig. 3. Trace the body onto a piece of 1/4" plywood and cut out the rear backer board. Fig. 5. This is a rear view of the finished piece. Notice the plugs and that the rear backer board has been rounded over. Sand the bottom with a belt sander. Garnet Hall has written a great book about intarsia. Entitled The Art of £ Intarsia, it features 20 great projects, plus tons of helpful tips and infor-1 mation. It is available from PS Wood Machines, 3032 Industrial Blvd., % Bethel Park, PA 15102, (800) 939-4414. Price is $17.95 plus $4.50 I (S&H)/U.S. The book can also be ordered directly from Garnet Hall, Box I 549, Stoughton, SK, Canada SOG 4T0, (800) 729-2473. For more of | Garnet Hall's great designs, visit his website at www.sawbird.com. Fig. 4. The front piece is larger than the body. Make sure that it overlaps evenly all around. The bottom should be flush. |


