Creative Woodworks & crafts 2002-08, страница 19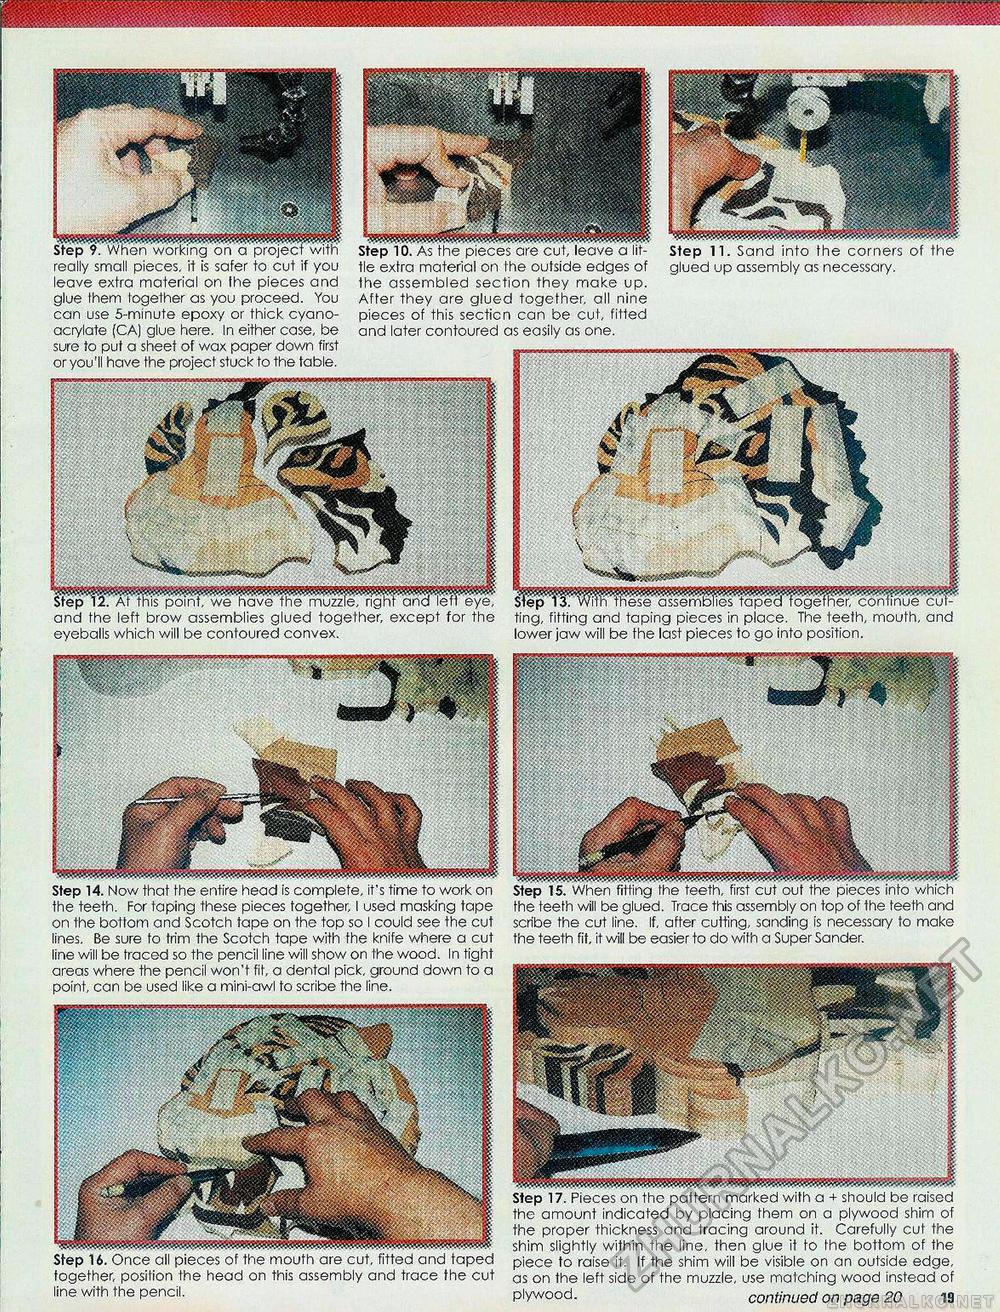
tie extra material ori Ihe outside edges of the assembled section they make up. After they are glued together, all nine pieces of this secticn can be cut, titled and later contoured as easily as one. Step 11. Sand into the corners of the glued up assembly as necessary. and the left brow assemblies glued together, except for the eyeballs which will be contoured convex. The teeth, mouth, and jaw will be the last pieces to go into position. really small pieces, it is safer to cut if you leave extra material on Ihe pieces and glue them together as you proceed. You can use 5-minute epoxy or thick cyano-acrylate (CA) glue here. In either case, be sure to put a sheet of wax paper down first or you'll have the project stuck to the table. Step 14. Now that the entire head is complete, it's time to work on the teeth. For taping these pieces together, I used masking tape on the bottom and Scotch tape on the top so I could see the cut lines. Be sure to trim the Scotch tape with the knife where a cut line will be traced so the pencil line will show on the wood. In tight areas where the pencil won't fit, a dental pick, ground down to a point, can be used like a mini-awl to scribe the line. Step 15. When fitting the teeth, first cut out the pieces into which the teeth will be glued. Trace this assembly on top of the teeth and scribe the cut line. If, after cutting, sanding is necessary to make the teeth fit, it will be easier to do with a Super Sander. Step 16. Once all pieces of the mouth are cut, fitted and taped together, position the head on this assembly and trace the cut line with the pencil. Step 17. Pieces on the pattern marked with a + should be raised the amount indicated by placing them on a plywood shim of the proper thickness and tracing around it. Carefully cut the shim slightly within the line, then glue it to the bottom of the piece to raise it. If the shim will be visible on an outside edge, as on the left side of the muzzle, use matching wood instead of plywood. continued on page 20 19 |


