Creative Woodworks & crafts 2002-08, страница 20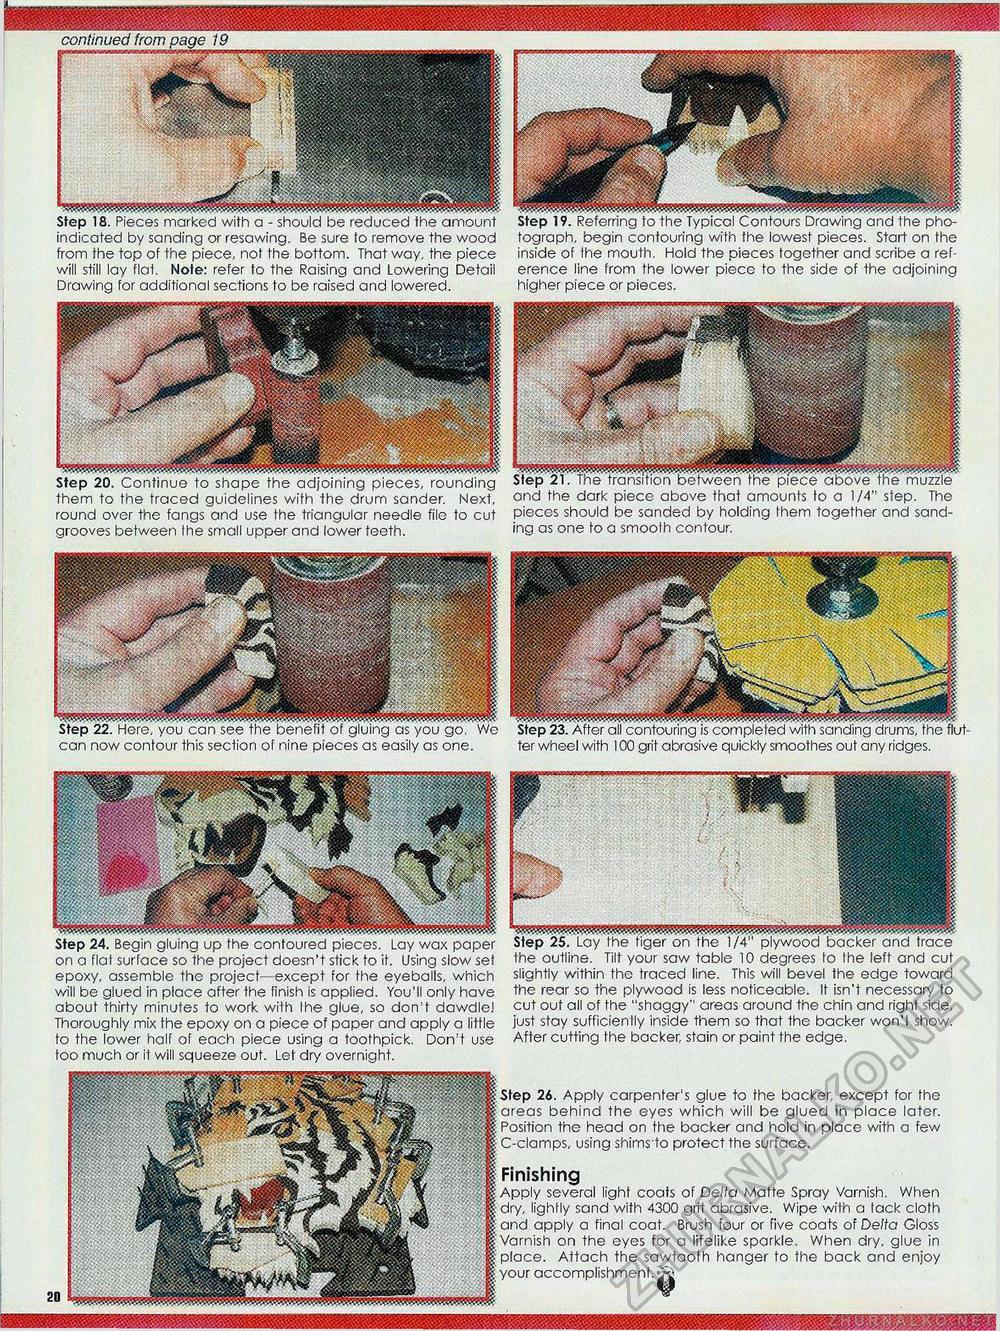
Step 18. Pieces marked _______ _____________________________ indicated by sanding or resawing. Be sure to remove the wood from the top of the piece, not the bottom. That way, the piece will still lay flat. Note: refer to the Raising and Lowering Detail Drawing for additional sections to be raised and lowered. Step 19. Referring to the Typical Contours Drawing and the photograph, begin contouring with the lowest pieces. Start on the inside of the mouth. Hold the pieces together and scribe a reference line from the lower piece to the side of the adjoining higher piece or pieces. Step 20. Continue to shape the adjoining pieces, rounding them to the traced guidelines with the drum sander. Next, round over the fangs and use the triangular needle file to cut grooves between Ihe small upper and lower teeth. and the dark piece above that amounts to a 1/4" step. The pieces should be sanded by holding them together and sanding as one to a smooth contour. quickly smoothes out any ridges. Step 22. Here, you can see the benefit of gluing as you go. Wo can now contour this section of nine pieces as easily as one. ter wheel with ^^HHSB 4SSSsSSrjSS i'Step 26. Apply carpenter's glue to the backer, except for the 'areas behind the eyes which will be glued in place later. \ Position the head on the backer and hold in place with a few i' C-clarnps, using shims'to protect the surface. Finishing ■Apply several light coats of Delta Matte Spray Varnish. When [• dry, lightly sand with 4300 grit abrasive. Wipe with a tack cloth I and apply a final coat. Brush four or five coats of Delta Gloss J Varnish on the eyes for a lifelike sparkle. When dry. glue in I place. Attach the sawtooth hanger to the back and enjoy \ your accomplishment. jy& Step 24. Begin gluing up the contoured pieces. Lay wax paper on a flat surface so the project doesn't stick to it. Using slow set epoxy, assemble the project—except for the eyeballs, which will be glued in place after the finish is applied. You'll only have about thirty minutes to work with Ihe glue, so don't dawdle! Thoroughly mix the epoxy on a piece of paper and apply a little to the lower hall of each piece using a toothpick. Don't use too much or it will squeeze out. Let dry overnight. the outline. Tilt your saw table 10 degrees to Ihe left and cut slightly within the traced line. This will bevel the edge toward the rear so the plywood is less noticeable. It isn't necessary to cut out all of the "shaggy" areas around the chin and right side, just stay sufficiently inside them so that the backer won't show. After cutting the backer, stain or paint the edge. |


