Creative Woodworks & crafts 2002-11, страница 58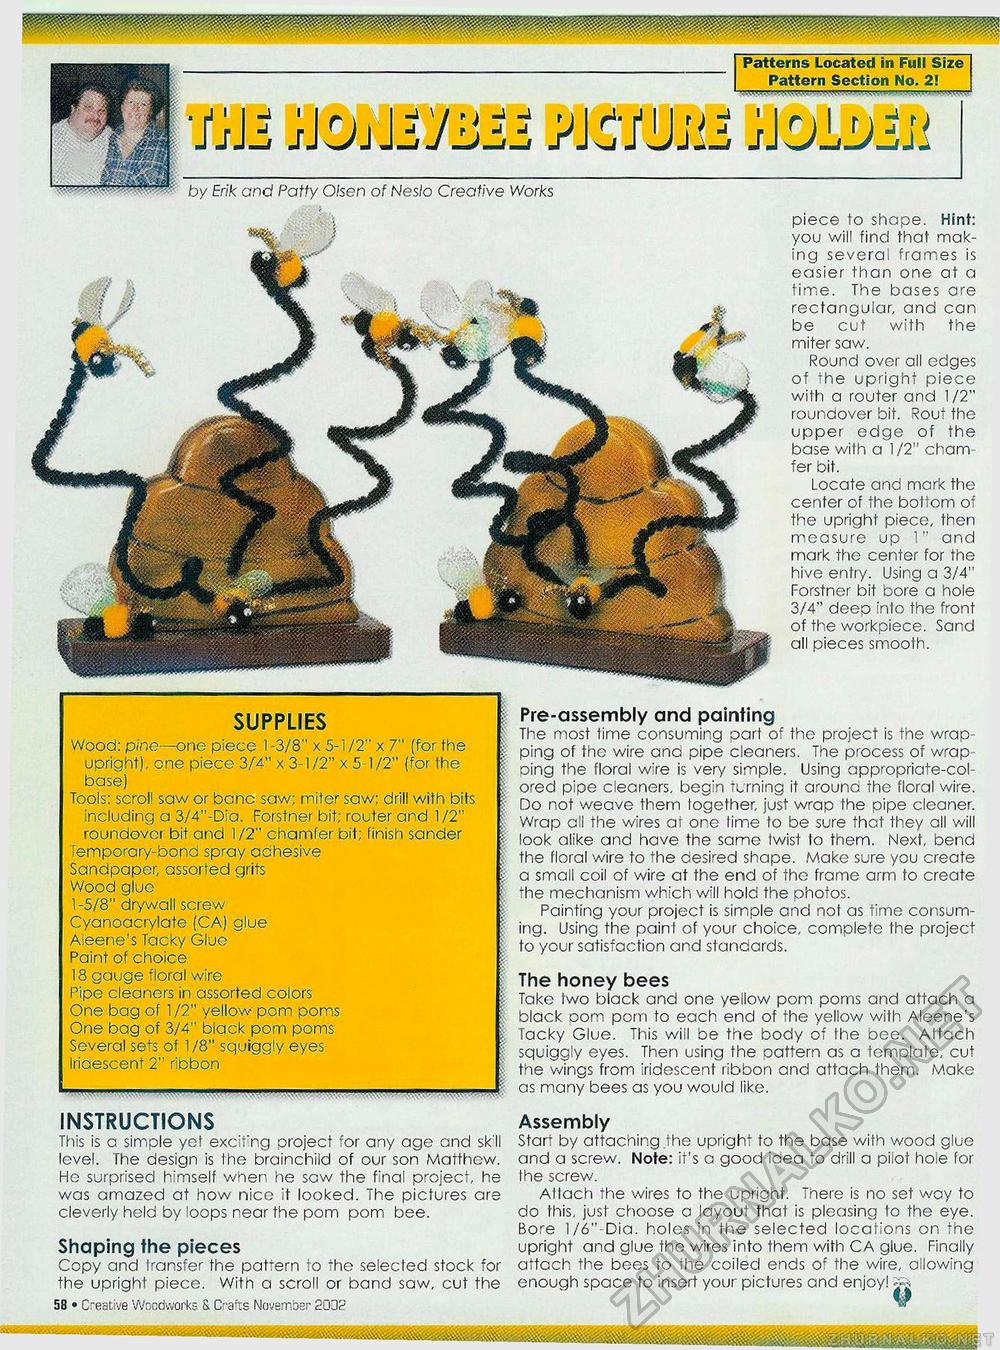
Patty O'sen of Neslo Creative Works piece to shape. Hint: you will find that making several trarr.es is easier than one at a time. The bases are rectangular, and can be cut with the miter saw. Round over all edges of the upright piece with a router and 1/2" roundover bit. Rout the upper edge of the base with a 1/2" cham fer bit. Locate and mark the center of the bottom of the upright piece, then measure up 1" and mark the center for the hive entry. Using a 3/4" Forstner bit bore a hole 3/4" deep into the front of the workpiece. Sand all pieces smooth. Pre-assembly and painting The most time consuming part of the project is the wrapping of the wire and pipe cleaners. The process of wrap ping the floral wire is very simple. Using appropriate-colored pipe cleaners, begin turning it arouna the floral wire. Do not weave them logether, just wrap the pipe cleaner. Wrap all the wires at one lime to be sure that they all will look alike and have the same twist lo them. Next, bend the floral wire to the desired shape. Make sure you create a small coil of wire at the end of the frame arm to create fhe mechanism which will hold the photos. Painting your project is simple and nol as time consuming. Using the pain t of your choice, complete the project to your satisfaction and standards. The honey bees Take two black and one yellow pom poms and attach a black oom pom to each end of the yellow with Aleene's Tacky Glue. This will be the body of the bee. Attach squiggly eyes. Then using the pattern as a template, cut the wings from iridescent ribbon and attach them. Make as many bees as you would like. SUPPLIES Wood: pine—one piece 1-3/8" x 5-1/2" x 7" (for the upright), one piece 3/4" x 3-1/2" x 5 1/2" (for the base) Tools: scroll saw or banc saw; miter saw; drill with bits including a 3/4"-D'a. Forstner bit; router and 1 /2" roundover bit and 1 /2" chamfer bit; finish sander emporary-bond spray adhesive Sandpaper, assorted grits Wood glue 1-5/8" drywall screw Cyanoacrylate (CA) glue A eene's Tacky Glue Paint of choice 18 gauge floral wire Pipe cleaners in assorted colors One bag of 1/2" yellow pom poms One bag of 3/4" black pom poms Several se*~s of 1/8" squiggly eyes Iriaescent 2" ribbon __I Patterns Located in Full Size Pattern Section No. 2! iiomyMi Mimi noLym INSTRUCTIONS This is a simple yet excit'ng project for any age and skll level. The design is the brainchild of our son Matthew. Ho surprised himself when he sew the final project, he was amazed at how nico it looked. The pictures are cleverly held by loops near the pom pom bee. Shaping the pieces Copy and transfer the pattern to the selected stock for the upright piece. With a scroll or band saw, cut the 5B • Creative Woodworks 8. Crafts November 2032 Assembly Start by attaching the upright to the base with wood glue and a screw. Note: it's a good iaea to drill a pilot hole for Ihe screw. Allach the wires to the upright. There is no set way to do this, just choose a layout that is pleasing to the eye. Bore 1/6" Dia. holes in the selected locations on the upright and glue the wires into them with CA glue. Finally attach the bees to ihe coiled ends of the wire, allowing enough space to insert your pictures and enjoy! % |


