Creative Woodworks & crafts 2003-03, страница 30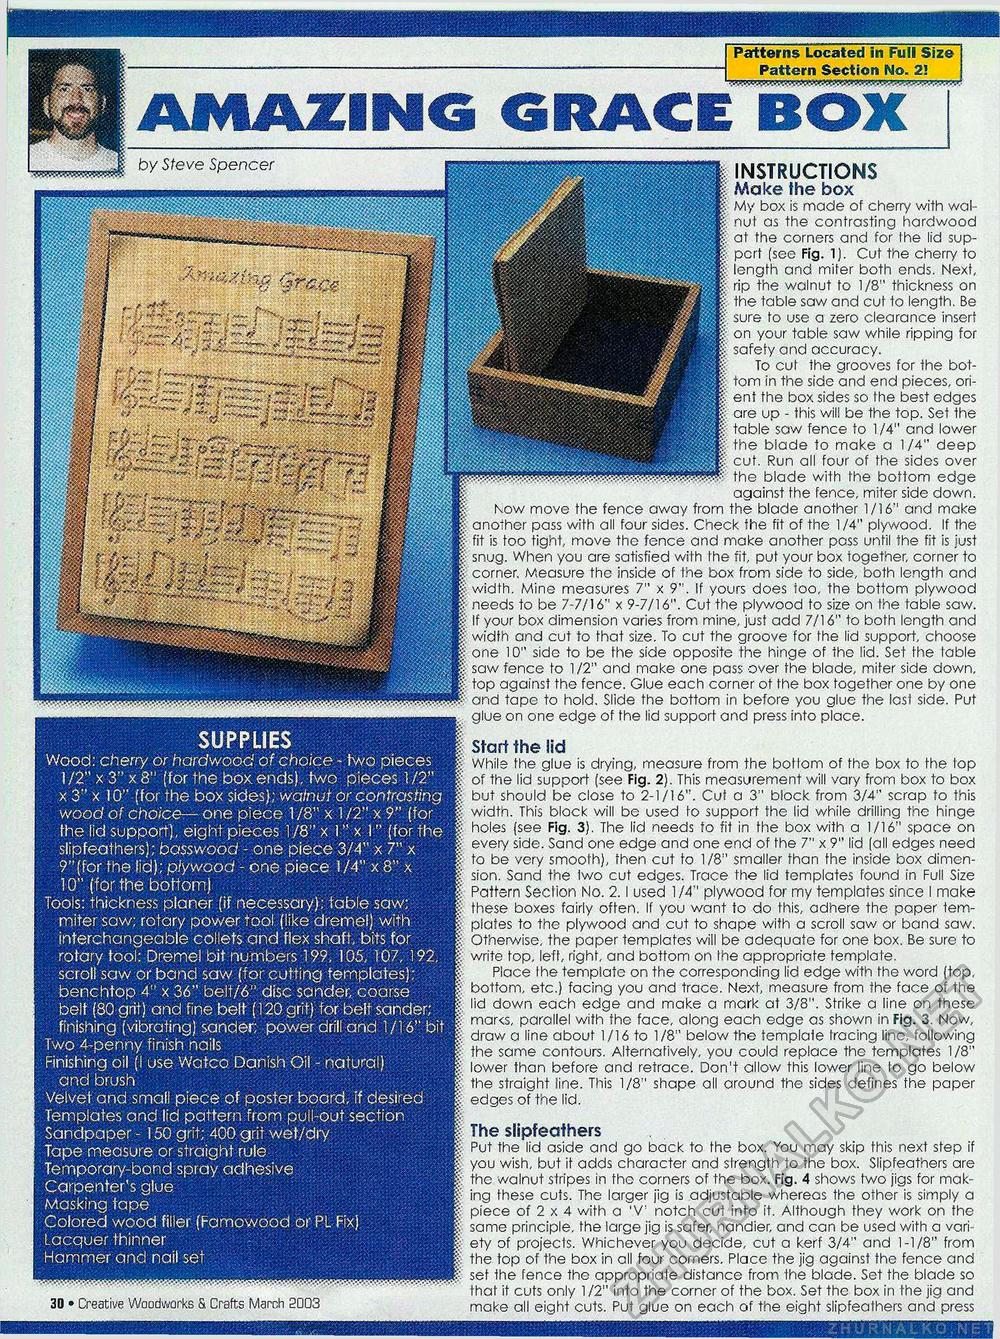
SUPPLIES Wood: cherry Or hardwood of choice - two pieces 1/2" x 3" x 8" (for the box ends), two pieces 1/2" x 3" x 10" (for the box sides); walnut or contrasting ; wood of choice— one piece 1 /8" x 1 /2" x 9" (for fhe lid support), eight pieces 1/8" x 1" x 1" (for the ; slipfeathers); basswood - one piece 3/4" x 7" x 9"(for the lid); plywood - one piece 1/4" x 8" x 10" (for the bottom) Tools: thickness planer (if necessary); table saw; miter saw; rotary power tool (like dremel) with interchangeable collets and flex shaft, bits for rotary tool: Dremel bit numbers 199, 105, 107, 192, j scroll saw or band saw (for cutting templates); benchtop 4" x 36" belt/6" disc sander, coarse belt (80 grit) and fine belt (120 grit) for belt sander; j finishing (vibrating) sander power drill and 1 / 16" bit J Two 4-penny finish nails Finishing oil (I use Watco Danish Oil - natural) I and brush Velvet and small piece of poster board, if desired j Templates and lid pattern from pull-out section Sandpaper - 150 grit; 400 grit wet/dry Tape measure or straight rule Temporary-bond spray adhesive Carpenter's glue Masking tape Colored wood filler (Famowood or PL Fix) Lacquer thinner Hammer and nail set I Patterns Located in Full Size ----- Pattern Section No. 2! AMAZING GRACE BOX by Steve Spencer 12 • Creative Woodworks & Crafts March 2003 Base INSTRUCTIONS Make fhe box My box is made of cherry with walnut as the contrasting hardwood at the corners and for the lid support (soe Fig. 1). Cut the cherry to length and miter both ends. Next, rip the walnut to 1/8" thickness on the table saw and cut to length. Be sure to use a zero clearance insert on your table saw while ripping for safety and accuracy. To cut the grooves for the bottom in the side and end pieces, orient the box sides so the best edges are up - this will be the top. Set the table saw fence to 1/4" and lower the blade to make a 1/4" deep cut. Run all four of the sides over the blade with the bottom edge against the fence, miter side down. Now move the fence away from the blade another 1/16" and make another pass with all four sides. Check the fit of the 1/4" plywood. If the fit is too tight, move tho fence and make another pass until the fit is just snug. When you are satisfied with the fit, put your box together, corner to corner. Measure the inside of the box from side to side, both length and width. Mine measures 7" x 9". If yours does too, the bottom plywood needs to be 7-7/16" x 9-7/16". Cut the plywood to size on the table saw. If your box dimension varies from mine, just add 7/16" to both length and and cut to that size. To cut the groove for the lid support, choose one 10" side to be the side opposite the hinge of the lid. Set fhe lable saw fence to 1/2" and make one pass over the blade, miter side down, ., top against the fence. Glue each corner ot the box together one by one £ and tape to hold. Slide the bottom in before you glue the lost side. Put glue on one edge of the lid support and press into place. Start the lid While the glue is drying, measure from the botlom of the box to the lop of the lid support (see Fig. 2). This measurement will vary from box to box but should be close to 2-1/16". Cut a 3" block from 3/4" scrap to this width. This block will be used to support the lid while drilling the hinge holes (see Fig. 3). The lid needs to fit in the box with a 1/16" space on every side. Sand one edge and one end of the 7" x 9" lid (all edges need to be very smooth), then cut to 1/8" smaller than the inside box dimension. Sand the two cut edges. Trace the lid templates found in Full Size Pattern Seclion No. 2.1 used 1/4'1 plywood for my templates since I make these boxes fairly often. If you want to do this, adhere the paper templates to the plywood and cut to shape with a scroll saw or band saw. Otherwise, the paper templates will be adequate for one box. Be sure to write top, left, right, and bottom on the appropriate template. Place the template on the corresponding lid edge with the word (top, bottom, etc.) facing you and trace. Next, measure from the face of the lid down each edge and make a mark at 3/8". Strike a line on these mar<s, parallel with the face, along each edge as shown in Fig. 3. Now, draw a line about 1/16 to 1/8" below the template tracing line, following the same contours. Alternatively, you could replace the templates 1/8" lower than before and retrace. Don't allow this lower line lo go below the straight line. This 1/8" shape all around the sides defines the paper edges of the lid. The slipfeathers Put the lid aside and go back to the box. You may skip this next step if you wish, but it adds character and strength to the box. Slipfeathers are the walnut stripes in the corners of the box. Fig. 4 shows two jigs for making these cuts. The larger jig is adjustable whereas the other is simply a piece of 2 x 4 with a 'V! notch cut into it. Although they work on the same principle, fhe large jig is safer, handier, and can be used with a vari ety of projecls. Whichever you decide, cut a kerf 3/4" and 1-1/8" from the top of the box in ell four corners. Place the jig against the fence and set the fence the appropriate distance from the blade. Set the blade so that it cuts only 1/2" into the corner of the box. Set the box in the jig and make all eight cuts. Put glue on each of the eight slipfeathers and press |


