Creative Woodworks & crafts 2003-03, страница 34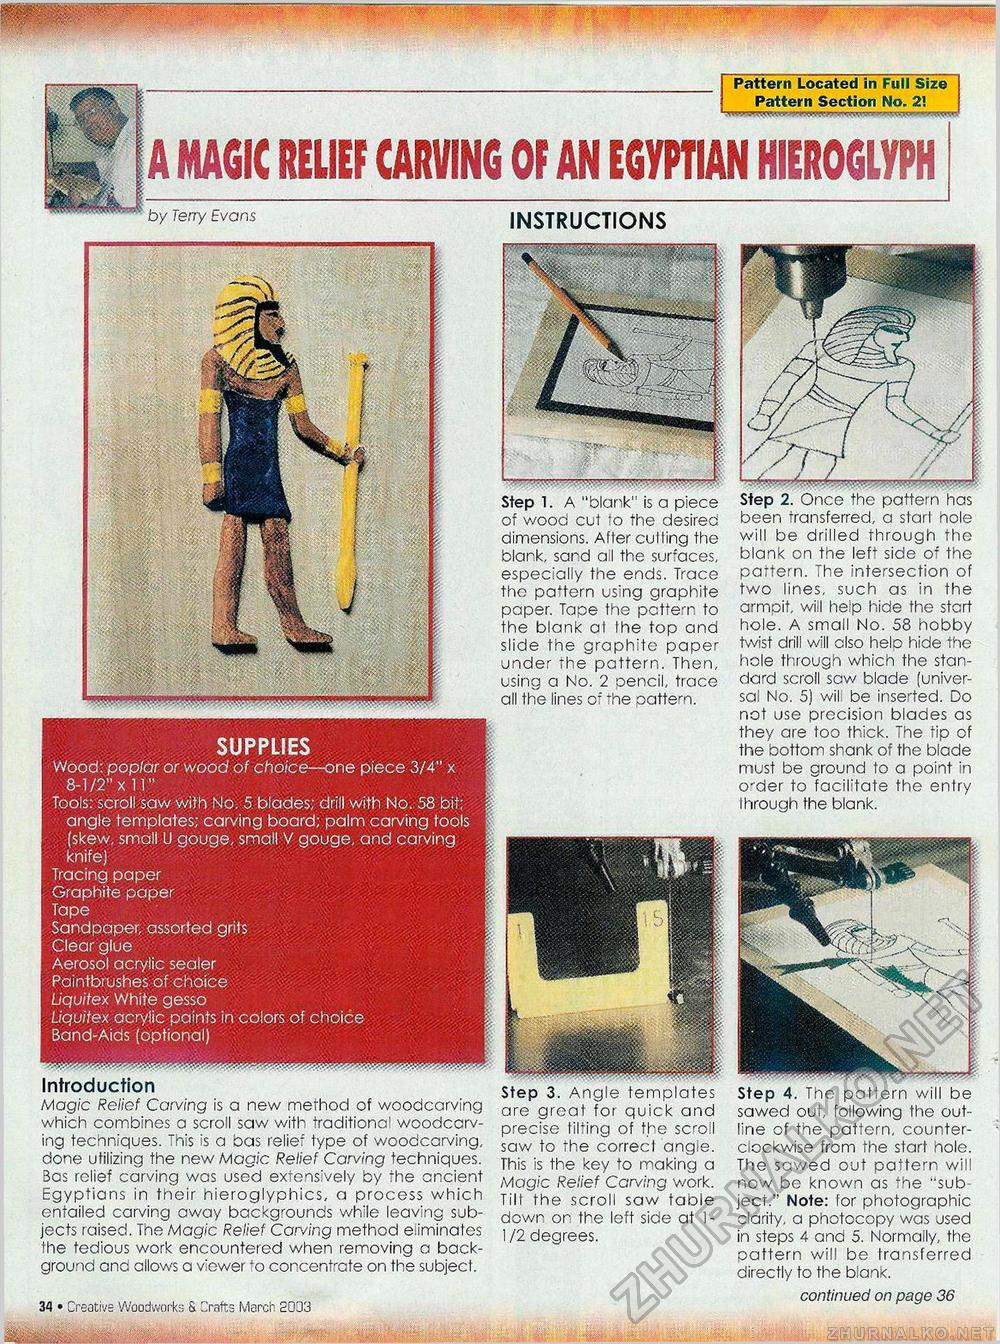
Pattern Located in Full Size Pattern Section No. 2! 1 am1-'1.1 ^ ■ I >> ■ ' A MAGIC RELIEF CARVING OF AN EGYPTIAN HIEROGLYPH f. %J by Terry Evans INSTRUCTIONS SUPPLIES Wood: poplar or wood of choice—one piece 3/4" x 8-1/2" x 11" Tools: scroll saw with No. 5. blades; drill with No. 58 bit; angle templates; carving board; palm carving tools (skew, small U gouge, small V gouge, and carving knife) Tracing paper Graphite paper Tape Sandpaper, assorted grits Clear glue Aerosol acrylic sealer Paintbrushes of choice Liquitex White gesso Liquitex acrylic paints in colors of choice Band-Aids (optional) Introduction Magic Relief Carving is a new method of woodcarving which combines a scroll saw with traditional woodcarving techniques. This is a bas relief type of woodcarving, done utilizing the new Magic Relief Carving techniques. Bos relief carving was used extensively by the ancient Egyptians in their hieroglyphics, a process which entailed carving away backgrounds while leaving subjects raised. The Magic Relief Carving method e.iminates the tedious work encountered when removing a background and allows a viewer "o concentrate on the subject. been transferred, a start hole will be drilled through the blank on the left side of the pattern. The intersection of two lines, such as in the armpit, will help hide the start hole. A small No. 58 hobby twist drill will olso helo hide the hole through which the standard scroll saw blade (universal No. 5) wil be inserted. Do not use precision blades as they are too thick. The tip of the bottom shank of the blade must be ground to a point in o'der to facilitate the entry Ihrough the blank. 12 • Creative Woodworks & Crafts March 2003 Base Step 4. The pattern will be sawed out, following the outline of the pattern, counterclockwise from the start hole. The sawed out pattern will now be known as the "subject." Note: lor photographic c'arity. a photocopy was used in steps 4 and 5. Normally, the pattern will be transferred directly to the blank. continued on page 36 Step 1. A "blank" is a piece of wood cut lo the desirec dimensions. Afler culling the blank, sand a I the sur'aces, especially the ends. Trace the pattern using graphite paper. Tape the pattern to the blank al the top and slide the graphite paper under the pattern. Then, using a No. 2 pencil, trace all the lines of the pattern. Step 3. Angle templates are groat for quick and precise tilting of the scroll saw to the correct angle. This is the key to making a Magic Relief Carving work. Till the scroll saw table down on the left side at 1-1/2 degrees. |


