Creative Woodworks & crafts 2003-03, страница 36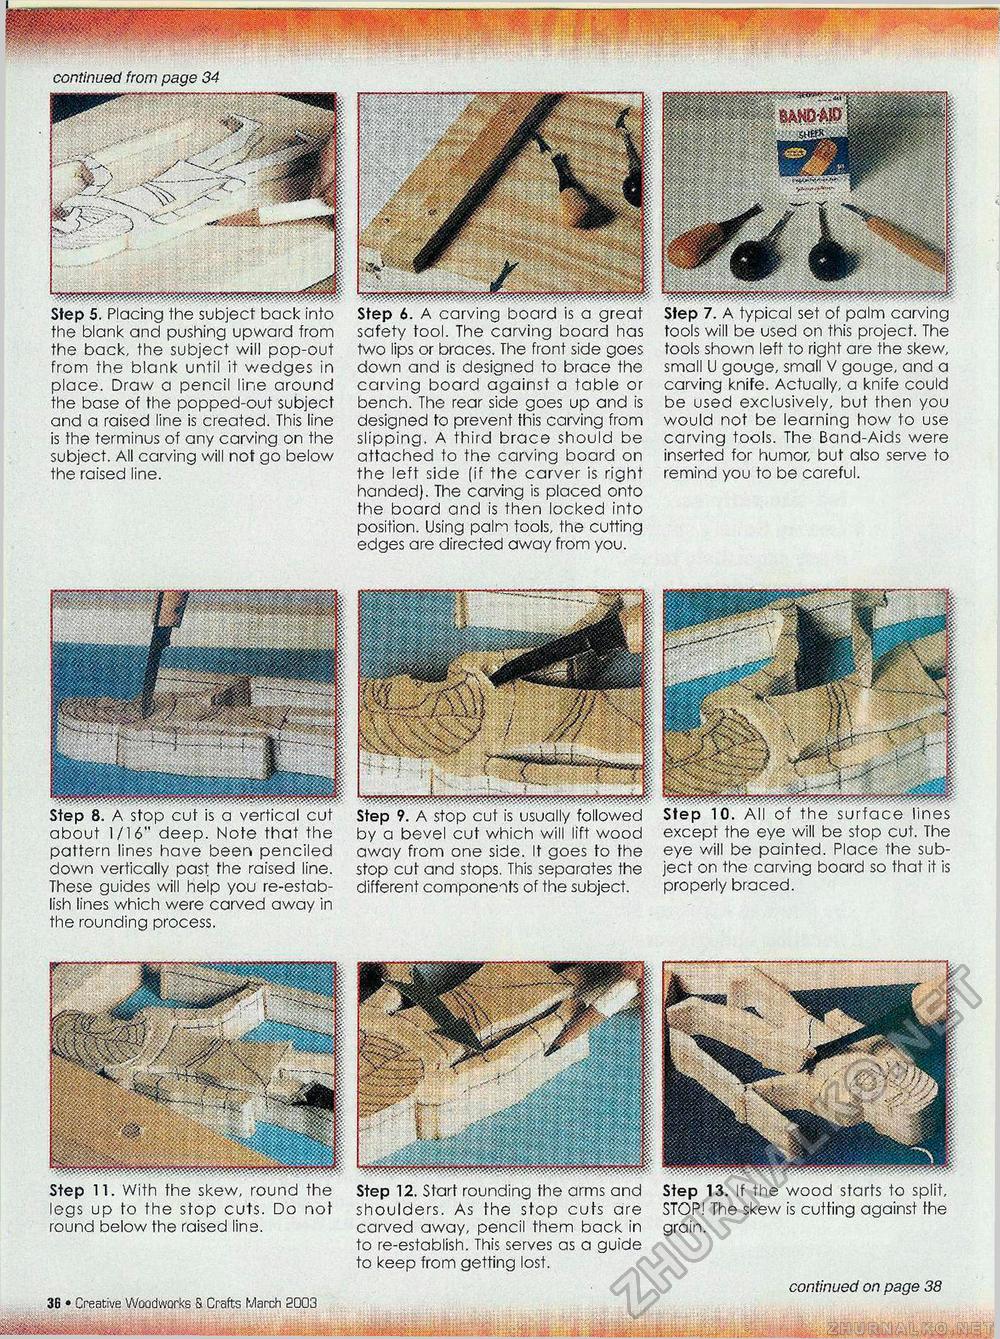
Step 6. A carving board is a great safety tool. The carving board has two lips or braces. The front side goes down and is designed to brace the carving board against a table or bench. The rear side goes up and is designed to prevent this carving from slipping. A third brace should be attached to the carving board on the left side (if the carver is right handed). The carving is placed onto the board and is then locked into position. Using pain tools, the cutting edges are directed away from you. tools will be used on this project. The tools shown left to right are the skew, small U gouge, small V gouge, and a carving knife. Actually, a knife could be used exclusively, but then you would not be learning how to use carving tools. The Band-Aids were inserted for humor, but also serve to remind you to be careful. continued from page 34 Step 5. Placing the subject back into the blank and pushing upward from the back, the subject will pop-out from the blank until it wedges in place. Draw a pencil line around the base of the popped-out subject and a raised line is created. This line is the terminus of any carving on the subject. All carving will not go below the raised line. about 1/16 deep. Note that pattern lines have been penciled down vertically past the raised line. These guides will help you re-establish lines which were carved away in the rounding process. except the eye will be stop cut. The eye will be painted. Place the subject on the carving board so that it is properly braced. usually followed by a bevel cut which will lift wood away from one side. It goes to the stop cut and stops. This separates the different components of the subject. Step 11. With the skew, round the legs up to the stop cuts. Do not round below the raised lins. 12 • Creative Woodworks & Crafts March 2003 Base Step 12. Start rounding the arms and shoulders. As the stop cuts are carved away, pencil them back in to re-establish. This serves as a guide to keep from getting lost. Step 13. If the wood starts to split, STOP! The skew is cutting against fhe grain. continued on page 38 |


