Creative Woodworks & crafts 2003-03, страница 39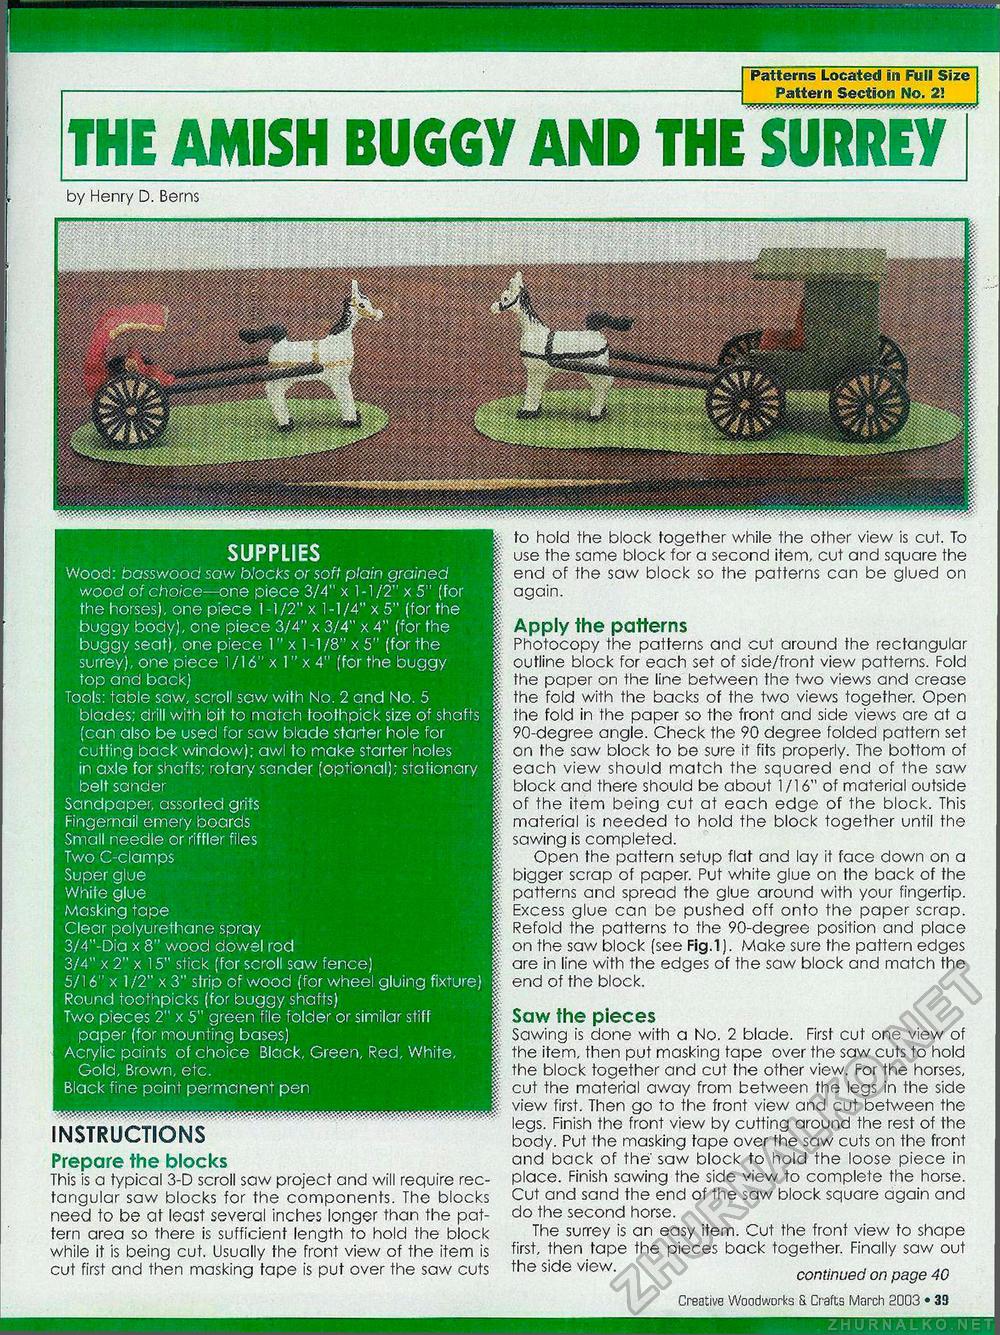
SUPPLIES Wood: basswood saw blocks or soft plain grained wood of choice—one piece 3/4" x 1-1/2" x5" (for the horses), one piece 1-1/2" x 1-1/4" x 5" (for the buggy body), one piece 3/4" x 3/4" x 4" (for the buggy seat), one piece 1" x 1-1/8" x5" (for the surrey), one piece 1/16" x 1" x 4" (for the buggy top and back) Tools: table saw, scroll saw with No. 2 and No. 5 blades; drill with bit to match toothpick size of shafts (can also be used for saw blade starter hole for cutting back window); awl to make starter holes in axle for shafts; rotary sander (optional); stationary belt sander Sandpaper, assorted grits Fingernail emery boards Small needle or riffler files Two C-clamps Super glue White glue Masking tape Clear polyurethane spray 3/4"-Dia x 8" wood dowel rod 3/4" x 2" x 15" stick (for scroll saw fence) 5/16I! x 1/2" x 3" strip of wood (for wheel gluing fixture) Round toothpicks (for buggy shafts) Two pieces 2" x 5" green file folder or similar stiff paper (for mounting bases) Acrylic paints of choice Black, Green, Red, White, Gold, Brown, etc. Black fine point permanent pen INSTRUCTIONS Prepare the blocks This is a typical 3-D scroll saw project and will require rectangular saw blocks for the components. The blocks need to be at least several inches longer than the pattern area so there is sufficient length to hold the block while it is being cut. Usually the front view of the item is cut first and then masking tape is put over the saw cuts I Patterns Located in Full Pattern Section No, ill Size I ■ 21.....| THE AMISH BUGGY AND THE SURREYby Henry D. Bems Apply the patterns Photocopy the patterns and cut around the rectangular outline block for each set of side/front view patterns. Fold the paper on the line between the two views and crease the fold with the backs of the two views together. Open the fold in the paper so the front and side views are at a 90-degree angle. Check the 90 degree folded pattern set on the saw block to be sure it fits properly. The bottom of each view should match the squared end of the saw block and there should be about 1/16" of material outside of the item being cut at each edge of the block. This material is needed to hold the block together until the sawing is completed. Open the pattern setup flat and lay it face down on a bigger scrap of paper. Put white glue on the back of the patterns and spread the glue around with your fingertip. Excess glue can be pushed off onto the paper scrap. Refold the patterns to the 90-degree position and place on the saw block (see Fig.1). Make sure the pattern edges are in line with the edges of the saw block and match fhe end of the block. Saw the pieces Sawing is done with a No. 2 blade. First cut one view of the item, then put masking tape over the saw cuts to hold the block together and cut the other view. For the horses, cut the material away from between the legs in the side view first. Then go to the front view and cut between the legs. Finish the front view by cutting around the rest of the body. Put the masking tape over fhe saw cuts on the front and back of the' saw block to hold the loose piece in place. Finish sawing the side view to complete the horse. Cut and sand the end of the saw block square again and do the second horse. The surrey is an easy item. Cut the front view to shape first, then tape the pieces back together. Finally saw out the side view. ________„„ „„„„ .n continued on page 40 to hold the block together while the other view is cut. To use the same block for a second item, cut and square the end of the saw block so the patterns can be glued on again. 12 • Creative Woodworks & Crafts March 2003 Base |


