Creative Woodworks & crafts 2003-04, страница 11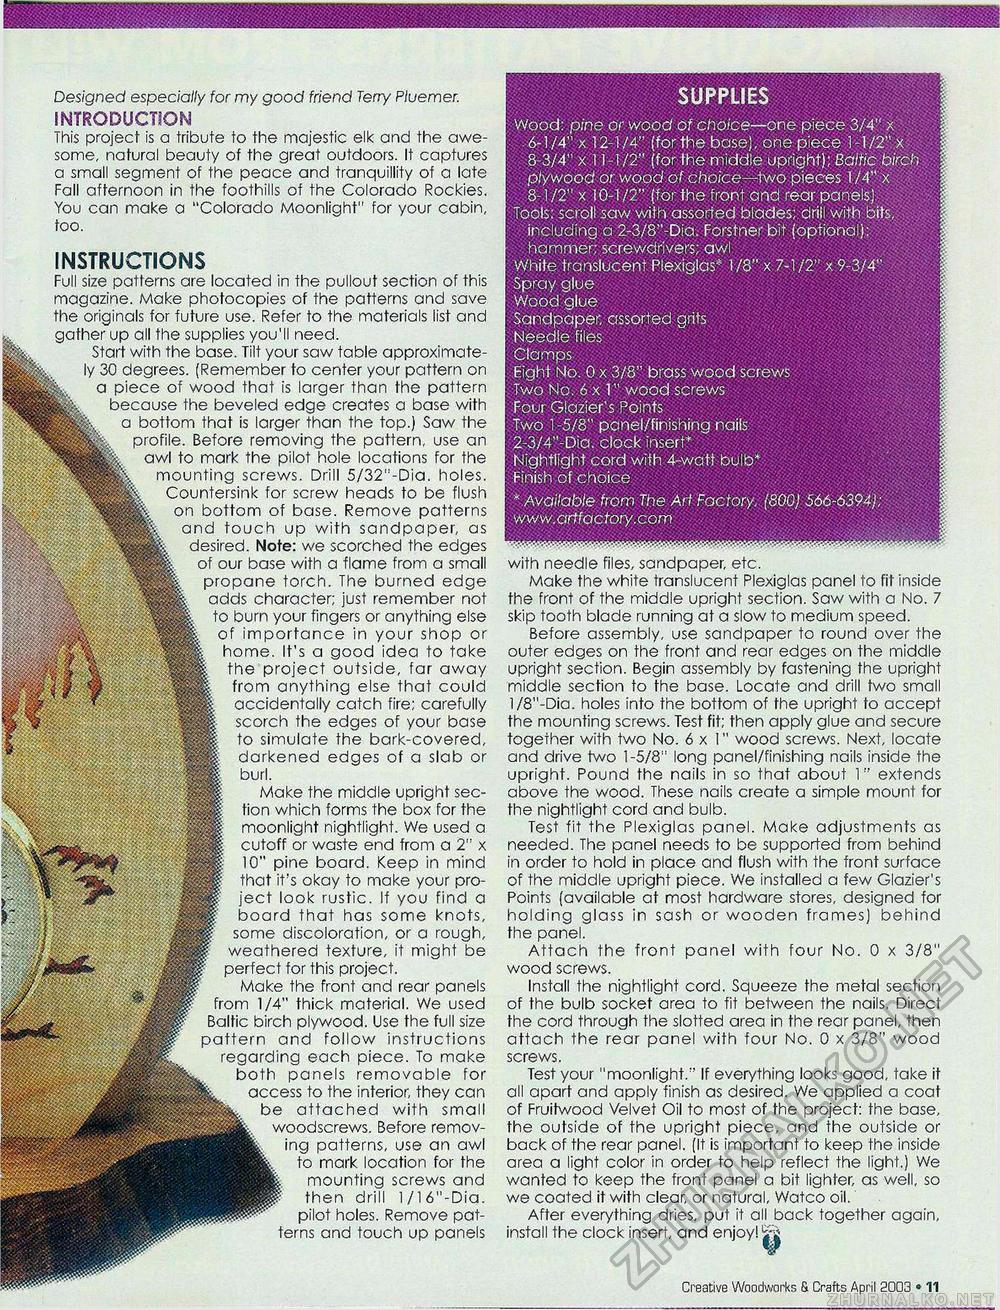
SUPPLIES Wood: pine or wood of choice—one piece 3/4" x -6-1/4" x 12-1M" {for the base], one piece 1 -1 /2" x 8-3/4" x 11-1/2" (for the middle upright); Baltic birch plywood or wood of choice—two pieces 1/4" x 8-1/2" x 10-1/2" (for the front and rear panels) Tools: scroll saw with assorted blades;.drill with bits; including a 2-3/8"-Dia. Forstner bit (optional); hammer; screwdrivers; awl White translucent Plexiglas* 1/8" x 7-1/2" x 9-3/4" Spray glue Wood glue Sandpaper, assorted grits Needle files Clamps Eight No. 0 x 3/8" brass wood screws Two No. 6 x 1" wood screws Four Glazier's Points Two 1 -5/8" panel/finishing nails 2-3/4"-Dia. clock insert* Nighflight cord with 4-watt bulb* Finish of choice * Available from The Art Factory, (800) 566-6394); www.artfactory.com Creative Woodworks S. Crafts April 2003 • 19 Designed especially for my good friend Terry Pluemer. INTRODUCTION I his project is a tribute to the majestic elk and the awesome, natural beauty of the great outdoors. It captures a small segment of the peace and tranquillity of a late Fall afternoon in the foothills of the Colorado Rockies. You can make a "Colorado Moonlight" for your cabin, too. INSTRUCTIONS Full size patterns are located in the pullout section of this magazine. Make photocopies of the patterns and save the originals for future use. Refer to the materials list and gather up all the supplies you'll need. Start with the base. Tilt your saw table approximately 30 degrees. (Remember to center your pattern on a piece of wood that is larger than the pattern because the beveled edge creates a base with a bottom that is larger than the top.) Saw the profile. Before removing the pattern, use an awl to mark the pilot hole locations for the mounting screws. Drill 5/32"-Dia. holes. Countersink for screw heads to be flush on bottom of base. Remove patterns and touch up with sandpaper, as desired. Note: we scorched the edges of our base with a flame from a small propane torch. The burned edge adds character; just remember not to burn your fingers or anything else of importance in your shop or home. It's a good idea to take the project outside, far away from anything else that could accidentally catch fire; carefully scorch the edges of your base to simulate the bark-covered, darkened edges of a slab or burl. Make the middle upright section which forms the box for the moonlight nighflight. We used a cutoff or waste end from a 2" x 10" pine board. Keep in mind that it's okay to make your project look rustic. If you find a board that has some knots, some discoloration, or a rough, weathered texture, it might be perfect for this project. Make the front and rear panels from 1/4" thick material. We used Baltic birch plywood. Use the full size pattern and follow instructions regarding each piece. To make both panels removable for access to the interior, they can be attached with small woodscrews. Before removing patterns, use an awl to mark location for the mounting screws and then drill 1/16"-Dia. pilot holes. Remove patterns and touch up panels with needle files, sandpaper, etc. Make the white translucent Plexiglas panel to fit inside the front of the middle upright section. Saw with a No. 7 skip tooth blade running at a slow to medium speed. Before assembly, use sandpaper to round over the outer edges on the front and rear edges on the middle upright section. Begin assembly by fastening the upright middle section to the base. Locate and drill two small l/8"-Dia. holes into the bottom of the upright to accept the mounting screws. Test fit; then apply glue and secure together with two No. 6x1" wood screws. Next, locate and drive two 1-5/8" long panel/finishing nails inside the upright. Pound the nails in so that about 1" extends above the wood. These nails create a simple mount for the nighflight cord and bulb. Test fit the Plexiglas panel. Make adjustments as needed. The panel needs to be supported from behind in order to hold in place and flush with the front surface of the middle upright piece. We installed a few Glazier's Points (available at most hardware stores, designed for holding glass in sash or wooden frames) behind the panel. Attach the front panel with four No. 0 x 3/8" wood screws. Install the nighflight cord. Squeeze the metal section of the bulb socket area to fit between the nails. Direct the cord through the slotted area in the rear panel, then attach the rear panel with four No. 0 x 3/8" wood screws. Test your "moonlight." If everything looks good, take it all apart and apply finish as desired. We applied a coat of Fruitwood Velvet Oil to most of the project: the base, the outside of the upright piece, and the outside or back of the rear panel. (It is important to keep the inside area a light color in order to help reflect the light.) We wanted to keep the front panel a bit lighter, as well, so we coated it with clear, or natural, Watco oil. After everything dries, put it all back together again, install the clock insert, and enjoy! ££ |


