Creative Woodworks & crafts 2003-09, страница 57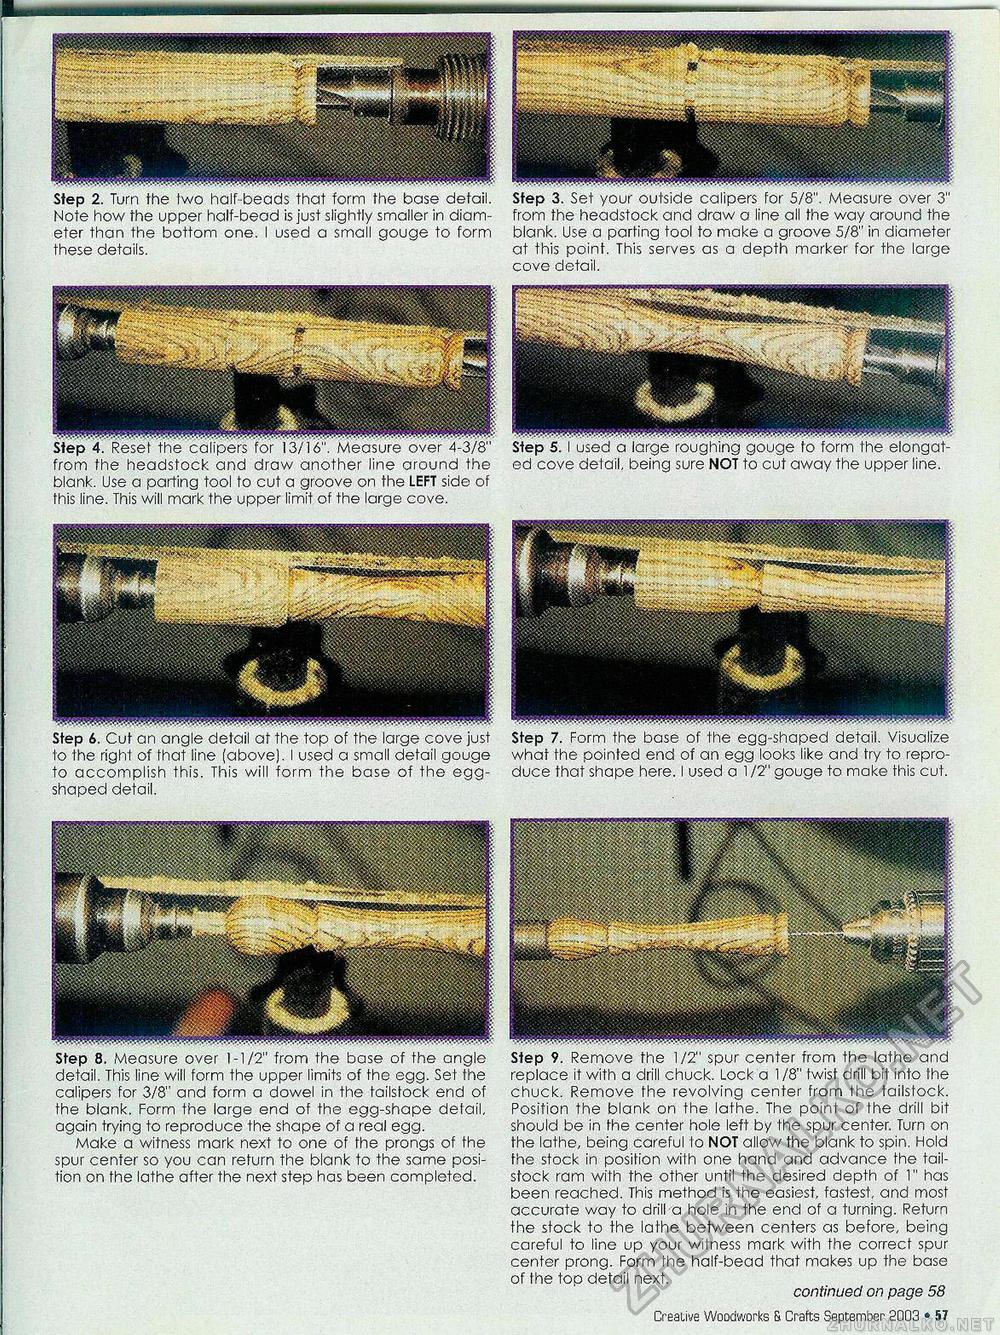
A Step 8. Measure over 1-1/2" from the base of the angle detail. This line will form the upper limits of the egg. Set the calipers for 3/8" and form a dowel in the tailsfock end of the blank. Form the large end of the egg-shape delail, again trying to reproduce the shape of a real egg. Make a witness mark next to one of fhe prongs of the spur center so you can return the blank to the same position on the lathe after the next step has been completed. Step 9. Remove the 1/2" spur center from the lathe and replace it with a drill chuck. Lock a 1/8" twist drill bit into Ihe chuck. Remove the revolving center from the tailslock. Position the blank on the lathe. The point of the drill bit should be in the center hole left by the spur center. Turn on the lathe, being careful to NOT allow the blank to spin. Hold the stock in position with one hand and advance the tailsfock ram with the other until the desired depth of 1" has been reached. This method is the easiest, fastest, and most accurate way to drill a hole in the end of a turning. Return the stock to the lathe between centers as before, being careful to line up your witness mark with the correct spur center prong. Form the half-bead that makes up the base of the top detail next. continued on page 58 Step 2. Turn the Iwo half-beads that form the base detail. Note how the upper half-bead is just slightly smaller in diameter than the bottom one. I used a small gouge to form these details. from the headstock and draw o line all the way around the blank. Use a parting tool to make a groove 5/8" in diameter at this point. This serves as a depth marker for the large cove detail. ,.w... fhe headstock and draw another line around the blank. Use a parting tool to cut a groove on the LEFT side of this line. This will mark the upper limit of the large cove. ed cove delail, being sure NOT to cut away the upper line. Step 6. Cut an angle detail at the top of the large cove just to the right of lhat line (above). I used a small detail gouge to accomplish this. This will form the base of the egg-shaped detail. Visualize to repro-gouge to make this cut. Step 7. Form the base what the pointed end of an duce that shape here. I used Creative Woodworks & Crafts September 8003 • 57 |


