Creative Woodworks & crafts 2003-11, страница 20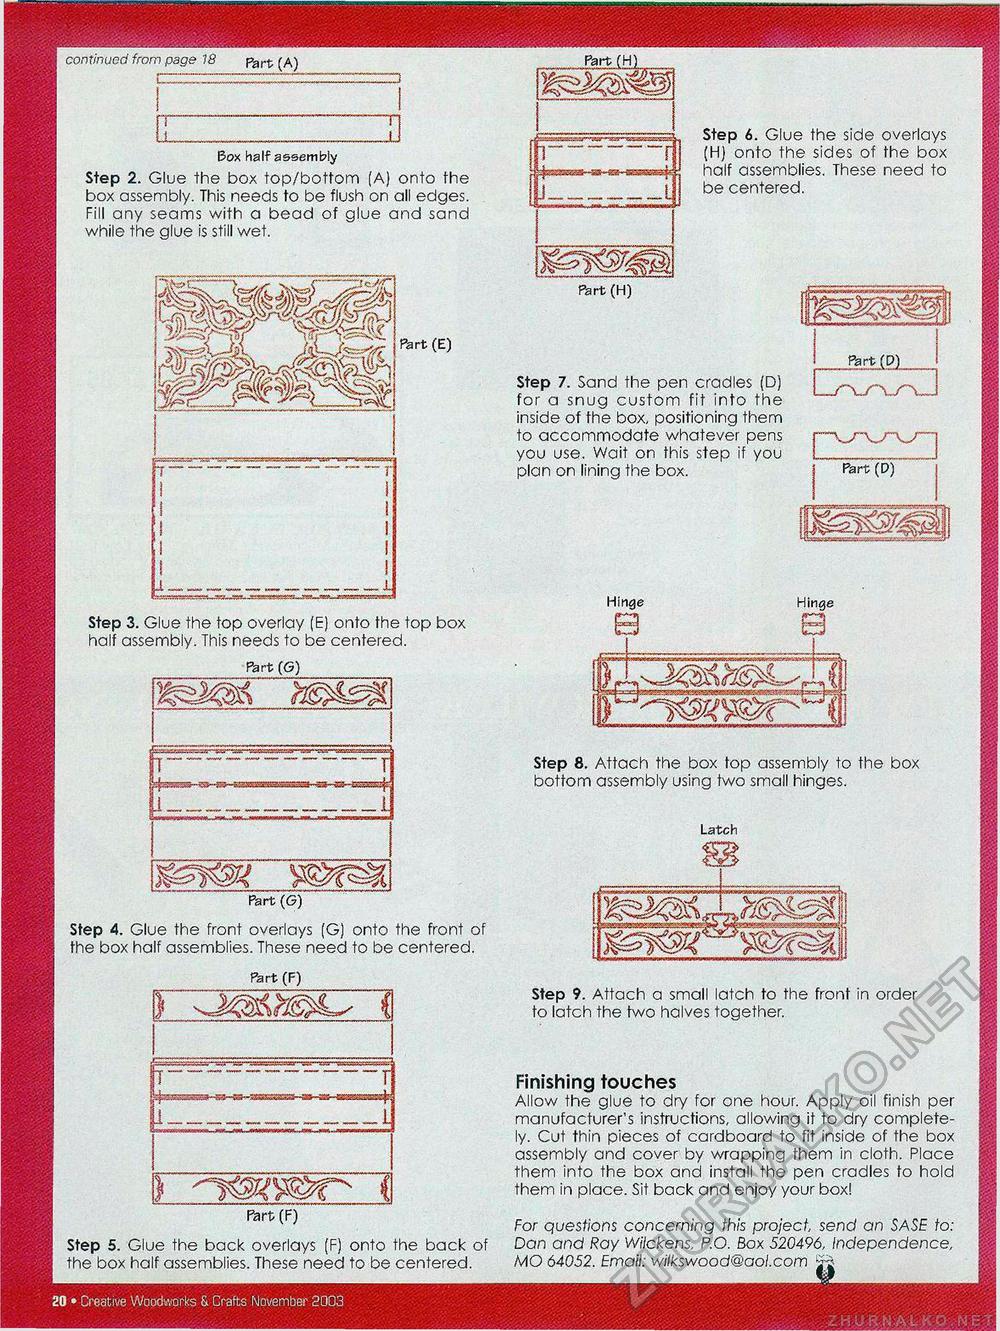
Step 4. Glue the front overlays (G) onto the front of the box half assemblies. These need to be centered. Step 5. Glue the back overlays (F) onto the back of the box half assemblies. These need to be centered. Step 9. Attach a small latch to the front in order to latch the two halves together. Finishing touches Allow the glue to dry for one hour. Apply oil finish per manufacturer's instructions, allowing it to dry completely. Cut thin pieces of cardboard to fit inside of the box assembly and cover by wrapping them in cloth. Place them into the box and install the pen cradles to hold them in place. Sit back and enjoy your box! For questions concerning this project send an SASE to: Dan and Ray Wilckens, P.O. Box 520496, Independence, MO 64052. Email: wilkswood@aol.com 1--------------r i I i i I i I i 1 I Step 3. Glue the top overlay (E) onto the top box half assembly. This needs to be centered. Latch Step 6. Glue the side overlays (H) onto the sides of the box half assemblies. These need to be centered. Part (H) Step 8. Attach the box top assembly to the box bottom assembly using two small hinges. continued from page 18 Part (A) Box half assembly Step 2. Glue the box top/bottom (A) onto the box assembly. This needs to be flush on all edges. Fill any seams with a bead of glue and sand while the glue is still wet. Step 7. Sand the pen cradles (D) for a snug custom fit into the inside of the box, positioning them to accommodate whatever pens you use. Wait on this step if you plan on lining the box. fiart (E) |


