Creative Woodworks & crafts 2003-11, страница 18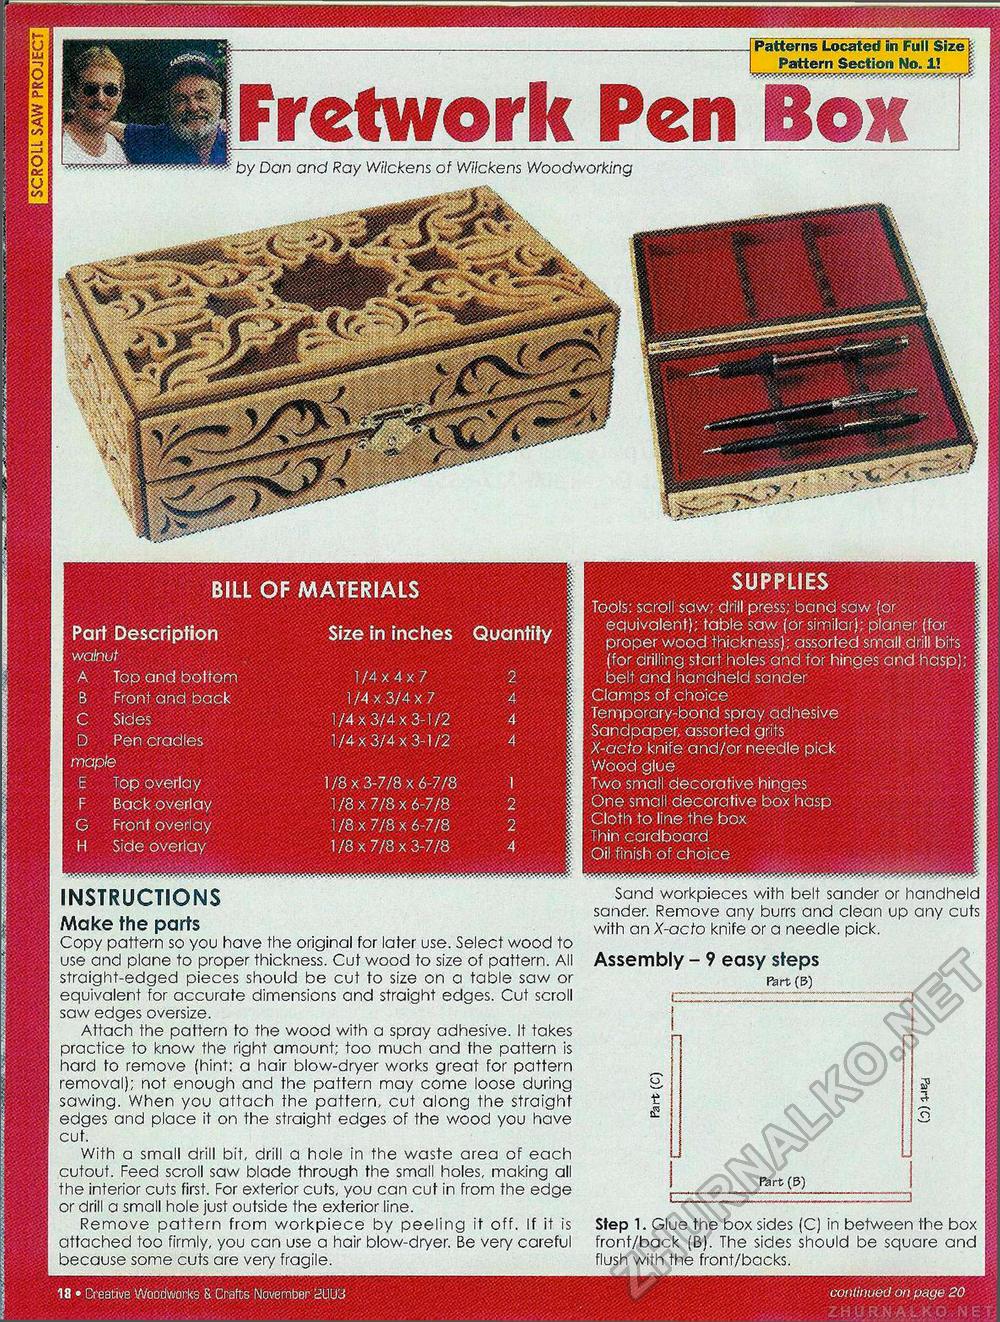
BILL OF MATERIALS Size in inches Quantity Part Description walnut A Top and bottom B Front and back C Sides D Pen cradles maple E Top overlay F Back overlay G Front overlay H Side overlay SUPPLIES Tools: scroll saw; drill press; band saw (or equivalent); table saw (or similar); planer (for proper wood thickness); assorted small drill bits (for drilling start holes and for hinges and hasp); belt and handheld sander Clamps of choice Temporary-bond spray adhesive Sandpaper, assorted grits X-acto knife and/or needle pick Wood glue Two small decorative hinges One small decorative box hasp Cloth to line the box Thin cardboard Oil finish of choice Patterns Located in Full Size Pattern Section No. 1! Fretwork Pen Bo by Dan and Ray Wilckens of Wilckens Woodworking INSTRUCTIONS Make the parts Copy pattern so you have the original for later use. Select wood to use and plane to proper thickness. Cut wood to size of pattern. All straight-edged pieces should be cut to size on a table saw or equivalent for accurate dimensions and straight edges. Cut scroll saw edges oversize. Attach the pattern fo the wood with a spray adhesive. It takes practice to know the right amount; too much and the pattern is hard to remove (hint: a hair blow-dryer works great for pattern removal); not enough and the pattern may come loose during sawing. When you attach the pattern, cut along the straight edges and place it on the straight edges of the wood you have cut. With a small drill bit, drill a hole in the waste area of each cutout. Feed scroll saw blade through the small holes, making all the interior cuts first. For exterior cuts, you can cut in from the edge or drill a small hole just outside the exterior line. Remove pattern from workpiece by peeling it off. If it is attached too firmly, you can use a hair blow-dryer. Be very careful because some cuts are very fragile. Sand workpieces with belt sander or handheld sander. Remove any burrs and clean up any cuts with an X-acto knife or a needle pick. Assembly - 9 easy steps Rjrt(B) Part (B) Step 1. Glue the box sides (C) in between the box front/back (B). The sides should be square and flush with the front/backs. 1/8x3-7/8x6-7/8 1/8x7/8x6-7/8 1 /8 x 7/8 x 6-7/8 1 /8 x 7/8 x 3-7/8 |


