Creative Woodworks & crafts 2003-11, страница 29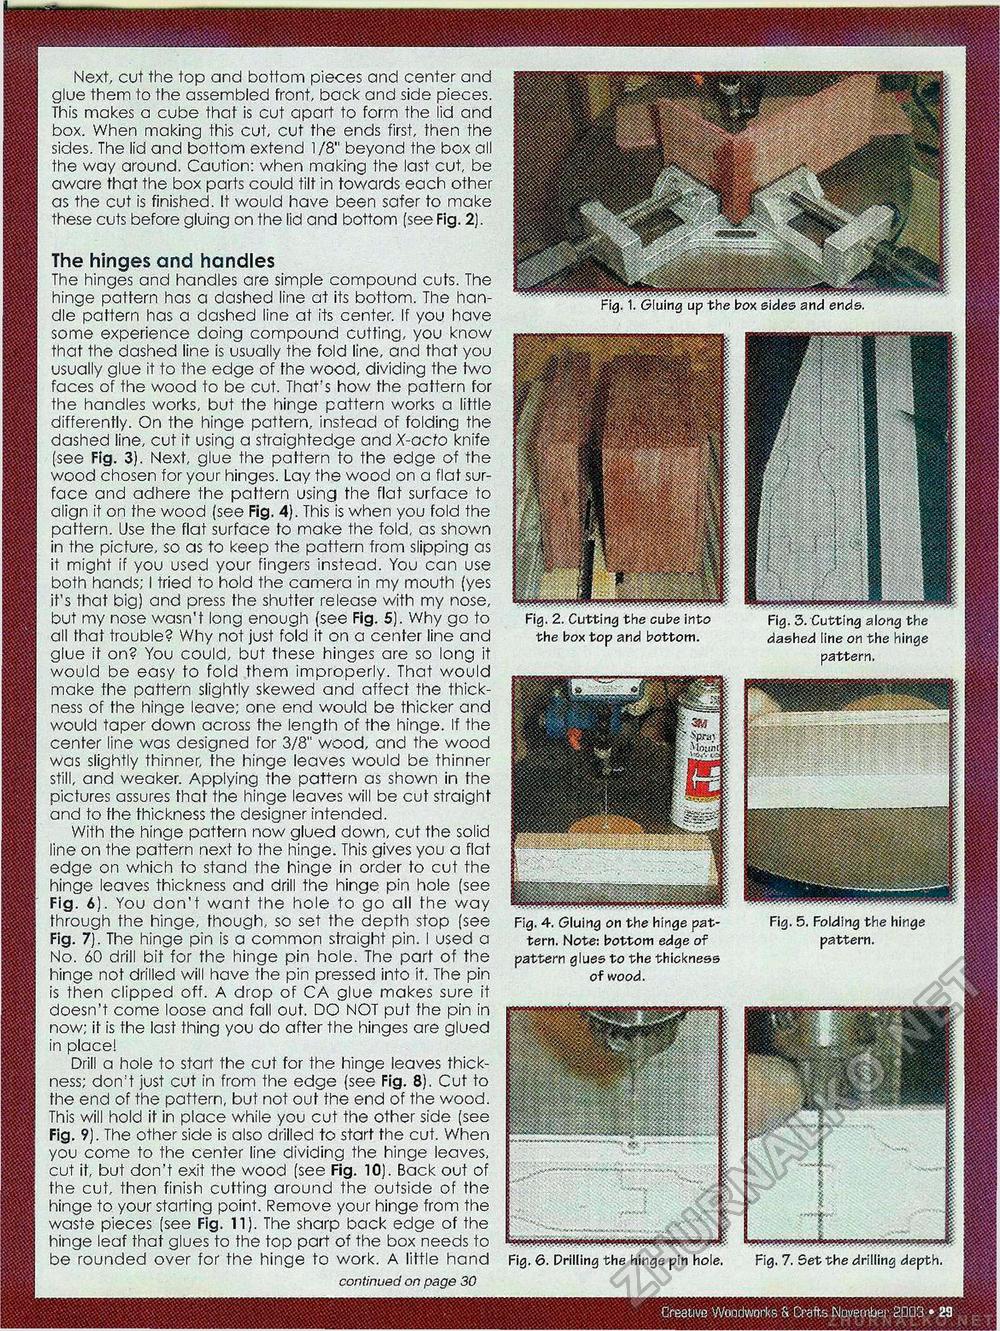
Creative Woodworks & Grafts November 2003* 29 Next, cut the top and bottom pieces and center and glue them to the assembled front, back and side pieces. This makes a cube that is cut apart to form the lid and box. When making this cut, cut the ends first, then the sides. The lid and bottom extend 1 /8" beyond the box all the way around. Caution: when making the last cut, be aware that the box parts could tilt in towards each other as the cut is finished. It would have been safer to make these cuts before gluing on the lid and bottom [see Fig. 2). The hinges and handles The hinges and handles are simple compound cuts. The f||§§$fl hinge pattern has a dashed line at its bottom. The han-die pattern has a dashed line at its center. If you have some experience doing compound cutting, you know that the dashed line is usually the fold line, and that you jjgjjjl usually glue it to the edge of the wood, dividing the two |M||P faces of the wood to be cut. That's how the pattern for j|j|||f|| the handles works, but the hinge pattern works a little ||t|||§? differently. On the hinge pattern, instead of folding the dashed line, cut it using a straightedge and X-acto knife ||f (see Fig. 3). Next, glue the pattern to the edge of the f|§ff|f wood chosen for your hinges. Lay the wood on a flat sur- ' w^/ face and adhere the pattern using the flat surface to I align it on the wood (see Fig. 4). This is when you fold the pattern. Use the flat surface to make the fold, as shown J in the picture, so as to keep the pattern from slipping as it might if you used your fingers instead. You can use M}jm§_ both hands; I tried to hold the camera in my mouth (yes |tfK:. ffl * ^ it's that big) and press the shutter release with my nose, but my nose wasn't long enough (see Fig. 5). Why go to Fig. 2. Cutting the cube into all that trouble? Why not just fold it on a center line and the box top and bottom, glue it on? You could, but these hinges are so long it would be easy to fold them improperly. That would , _ ,, make the pattern slightly skewed and affect the thick- f^^p^^ Vj*' ness of the hinge leave; one end would be thicker and ^^^^SSam^^^ would taper down across the length of the hinge. If the '-Cjsra^paB. center line was designed for 3/8" wood, and the wood was slightly thinner, the hinge leaves would be thinner mm» still, and weaker. Applying the pattern as shown in the 't-i- pictures assures that the hinge leaves will be cut straight and to the thickness the designer intended. With the hinge pattern now glued down, cut the solid psWSW • ^SsBN. ^ line on the pattern next to the hinge. This gives you a flat [ | edge on which to stand the hinge in order to cut the | Fig34). You don't want the hole to^go'all the way ^RsH^tel&I^^P through the hinge, though, so set the depth stop (see Fig. 4. Gluing on the hinge pat-Fig. 7). The hinge pin is a common straight pin. I used a tern. Note: bottom edge of No. 60 drill bit for the hinge pin hole. The part of the pattern glues to the thickness hinge not drilled will have the pin pressed into it. The pin of wood, is then clipped off. A drop of CA glue makes sure it doesn't come loose and fall out. DO NOT put the pin in now; if is the last thing you do after the hinges are glued || Drill a hole to start the cut for the hinge leaves thick- ; X *%|||§|tlfcf •' ness; don't just cut in from the edge (see Fig. 8). Cut to ^SffHf the end of the pattern, but not out the end of the wood. This will hold it in place while you cut the other side (see |f|p|1§ || K- mmm® Fig. 9). The other side is also drilled to start the cut. When ""ffiffi^ you come to the center line dividing the hinge leaves, cut it, but don't exit the wood (see Fig. 10). Back out of .......... the cut, then finish cutting around the outside of the hinge to your starting point. Remove your hinge from the , waste pieces (see Fig. 11). The sharp back edge of the hinge leaf that glues to the top part of the box needs to fcjwwWw*^^ be rounded over for the hinge to work. A little hand Fig. 6. Drilling the hinge pin hole. continued on page 30 Fig. 1. Gluing up the box sides and ends. Fig. 3. Cutting along the dashed line on the hinge pattern. Fig. 5. Folding the hinge pattern. Fig. 7. Set the drilling depth, |


