Creative Woodworks & crafts 2003-11, страница 30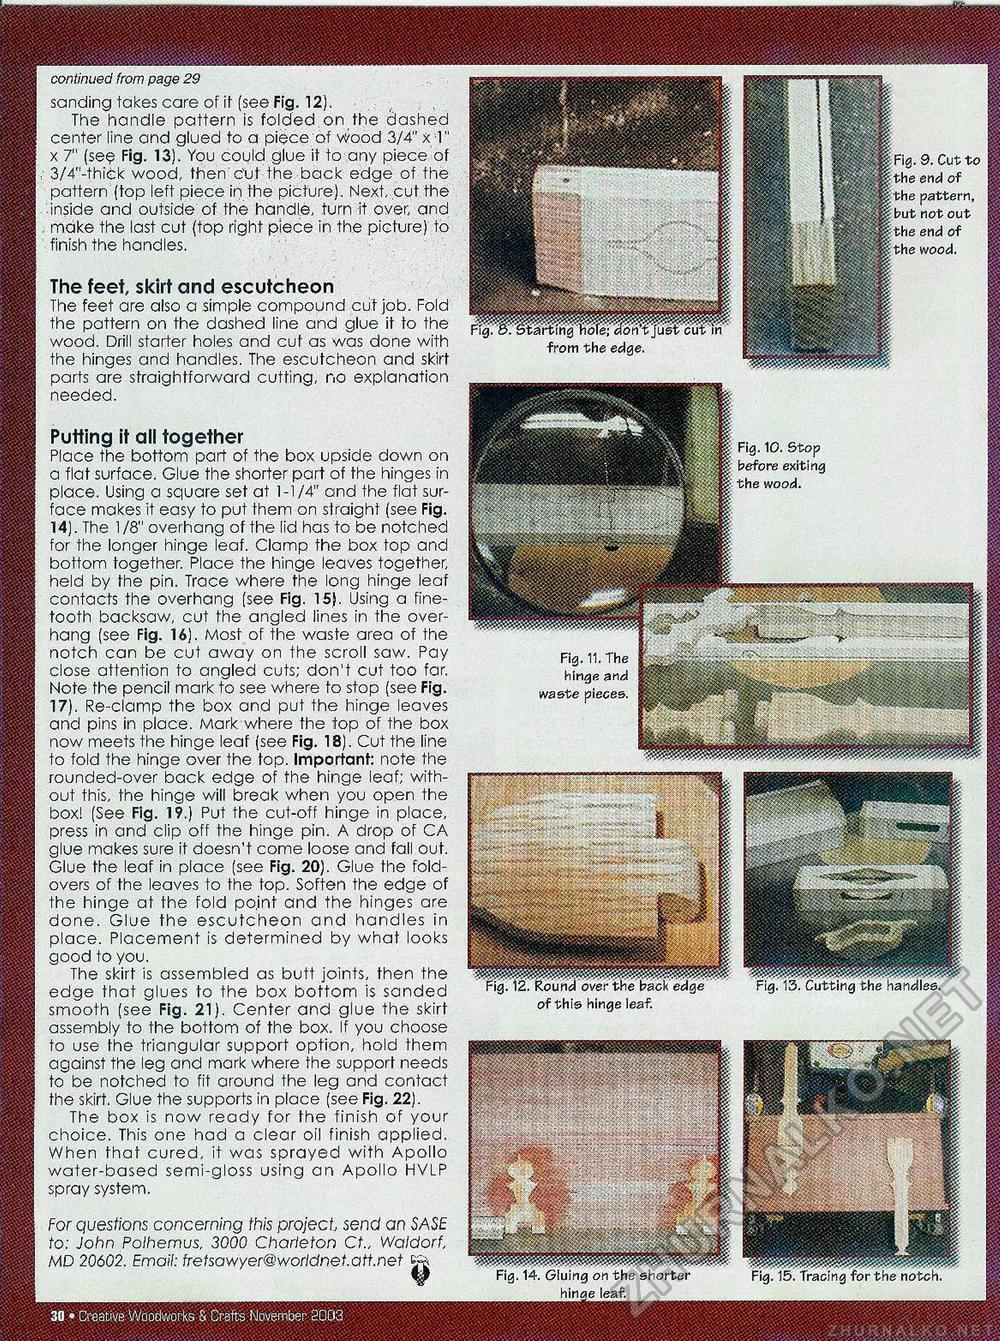
30 • Creative Woodworks & Crafts November 2003 Fig. 14. Gluing on the shorter hinae leaf. Fig. 15. Tracing for the notch. continued from page 29 sanding takes care of if (see Fig. 12). The handle pattern is folded on the dashed center line and glued to a piece of wood 3/4" x 1" x 7" (se$ Fig. 13). You could glue it to any piece of 3/4"-thick wood, then Cut the back edge of the pattern (top left piece in the picture). Next, cut the inside and outside of the handle, turn it over, and make the last cut (top right piece in the picture) to finish the handles. 9. Cut to end of pattern, not out end of wood. The feet, skirt and escutcheon The feet are also a simple compound cut job. Fold the pattern on the dashed line and glue it to the wood. Drill starter holes and cuf as was done with the hinges and handles. The escutcheon and skirt parts are straightforward cutting, no explanation needed. Putting it all together Place the bottom part of the box upside down on a flat surface. Glue the shorter part of the hinges in place. Using a square set at 1-1/4" and the flat surface makes it easy to put them on straight (see Fig. 14). The 1/8" overhang of the lid has to be notched for the longer hinge leaf. Clamp the box top and bottom together. Place the hinge leaves together, held by the pin. Trace where the long hinge leaf contacts the overhang (see Fig. 15). Using a fine-tooth backsaw, cut the angled lines in the overhang (see Fig. 16). Most of the waste area of the notch can be cut away on the scroll saw. Pay close attention to angled cuts; don't cut too far. Note the pencil mark to see where to stop (see Fig. 17). Re-clamp the box and put the hinge leaves and pins in place. Mark where the top of the box now meets the hinge leaf (see Fig. 18). Cut the line to fold the hinge over the fop. Important: note the rounded-over back edge of the hinge leaf; without this, the hinge will break when you open the box! (See Fig. 19.) Put the cut-off hinge in place, press in and clip off the hinge pin. A drop of CA glue makes sure if doesn't come loose and fall out. Glue the leaf in place (see Fig. 20). Glue the fold-overs of the leaves to the top. Soften the edge of the hinge at the fold po.int and the hinges are done. Glue the escutcheon and handles in place. Placement is determined by what looks good to you. The skirt is assembled as butt joints, then the edge that glues to the box bottom is sanded smooth (see Fig. 21). Center and glue the skirt assembly to the bottom of the box. If you choose to use the triangular support option, hold them against the leg and mark where the support needs to be notched to fit around the leg and contact fhe skirt. Glue the supports in place (see Fig. 22). The box is now ready for the finish of your choice. This one had a clear oil finish applied. When that cured, it was sprayed with Apollo water-based semi-gloss using an Apollo HVLP spray system. For questions concerning this project, send an SASE to: John Polhemus, 3000 Charleton Ct„ Waldorf, MD 20602. Email: fretsawyer@worldnet.att.net Fig. 11. The hinge and waste pieces. of this hinge leaf. Fig. 10. Stop before exiting the wood. |


