Creative Woodworks & crafts 2004-01, страница 33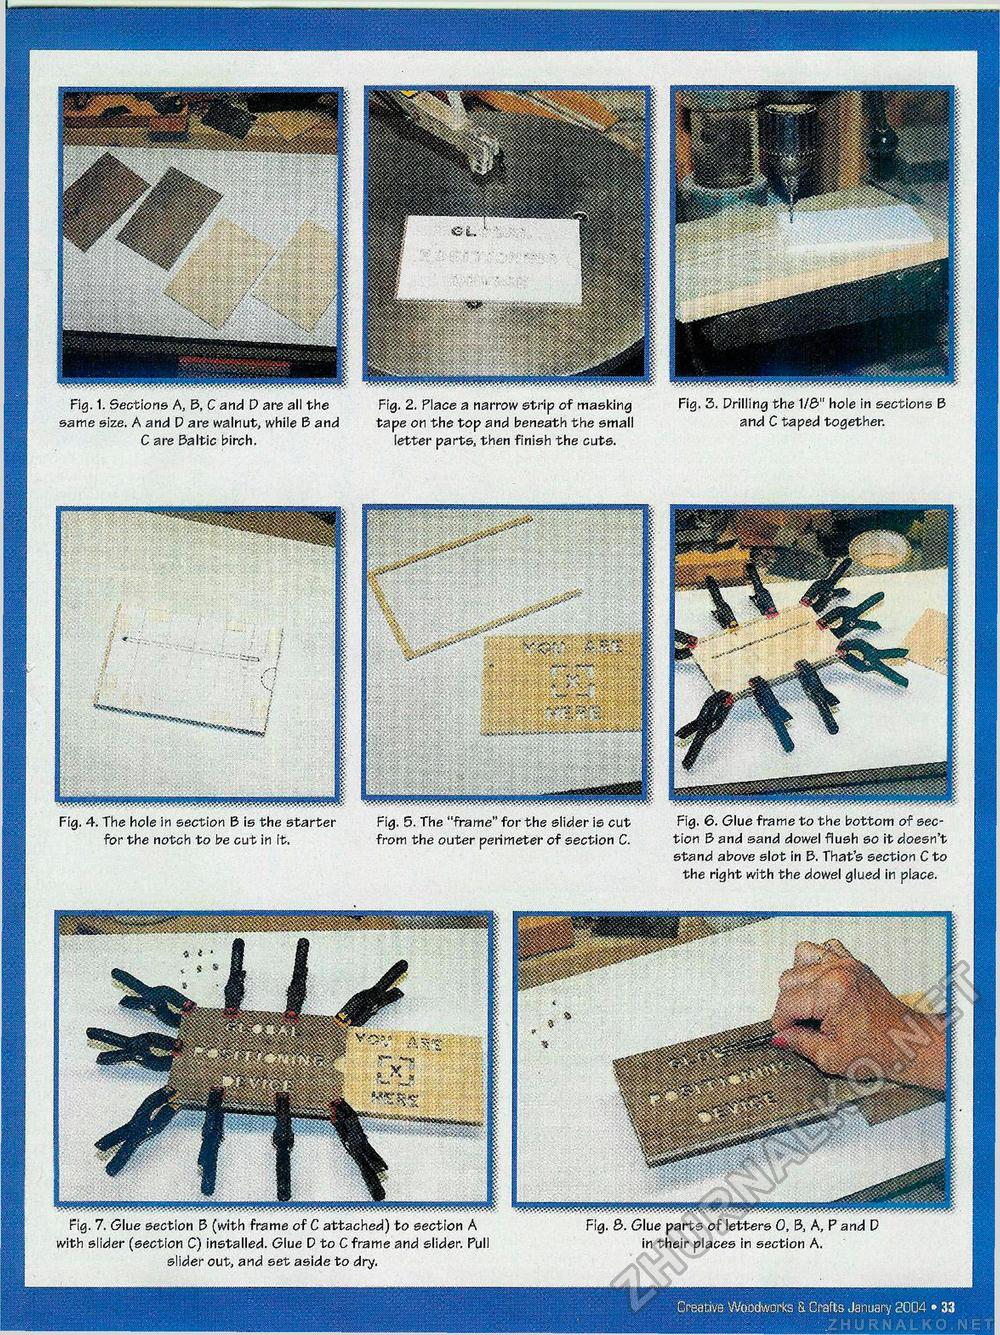
Fig. 1. Sections A, B, C and D are all the same size. A and D are walnut, while B and C are Baltic birch. Fig. 2. Place a narrow strip of masking tape on the top and beneath the small letter parts, then finish the cuts. Fig. 3. Drilling the 1/0" hole in sections B and C taped together. Fig. 4. The hole in section B is the starter Fig. 5. The "frame" for the slider is cut Fig. 6. Glue frame to the bottom of sec-for the notch to be cut in it. from the outer perimeter of section C. tion B and sand dowel flush so it doesn't stand above slot in B. That's section C to the right with the dowel glued in place. Fig. 7. Glue section E5 (with frame of C attached) to section A Fig. 6. Glue parts of letters 0, B, A, P and D with slider (section C) installed. Glue D to C frame and slider. Pull in their places in section A. slider out, and set aside to dry. .Creative- Woodworks & Crafts January 2004 • 33 |


