Creative Woodworks & crafts 2004-01, страница 38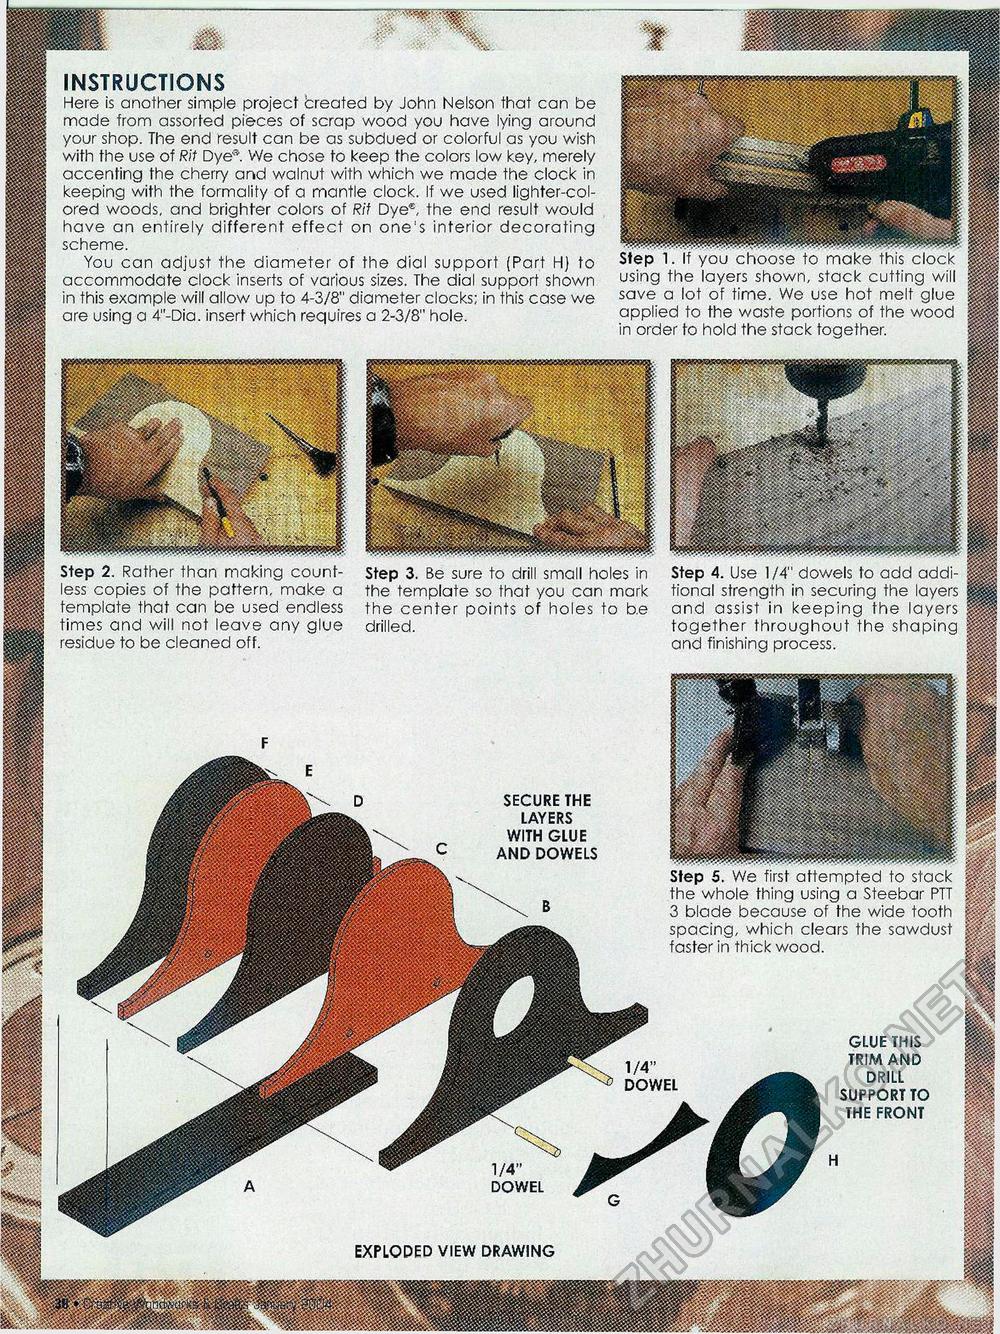
INSTRUCTIONS Here is another simple project Created by John Nelson that can be made from assorted pieces of scrap wood you have lying around your shop. The end result can be as subdued or colorful as you wish with the use of Rit Dye®. We chose to keep the colors low key, merely accenting the cherry and walnut with which we made the clock in keeping with the formality of a mantle clock. If we used lighter-colored woods, and brighter colors of Rit Dye®, the end result would have an entirely different effect on one's interior decorating scheme. You can adjust the diameter of the dial support (Part H) to accommodate clock inserts of various sizes. The dial support shown in this example will allow up to 4-3/8" diameter clocks; in this case we are using a 4"-Dia. insert which requires a 2-3/8" hole. Step 1. If you choose to make this clock using the layers shown, stack cutting will save a lot of time. We use hot melt glue applied to the waste portions of the wood in order to hold the stack together. iwp Step 2. Rather than making countless copies of the pattern, make a template that can be used endless times and will not leave any glue residue to be cleaned off. Step 4. Use 1/4" dowels to add additional strength in securing the layers and assist in keeping the layers together throughout the shaping and finishing process. Step 3. Be sure to drill small holes in the template so that you can mark the center points of holes to be drilled. SECURE THE LAYERS WITH GLUE AND DOWELS Step 5. We first attempted to stack the whole thing using a Steebar PTT 3 blade because of the wide tooth spacing, which clears the sawdust faster in thick wood. GLUE THIS TRIM AND DRILL SUPPORT TO THE FRONT 1/4" DOWEL 1/4" DOWEL EXPLODED VIEW DRAWING |


