Creative Woodworks & crafts 2004-03, страница 30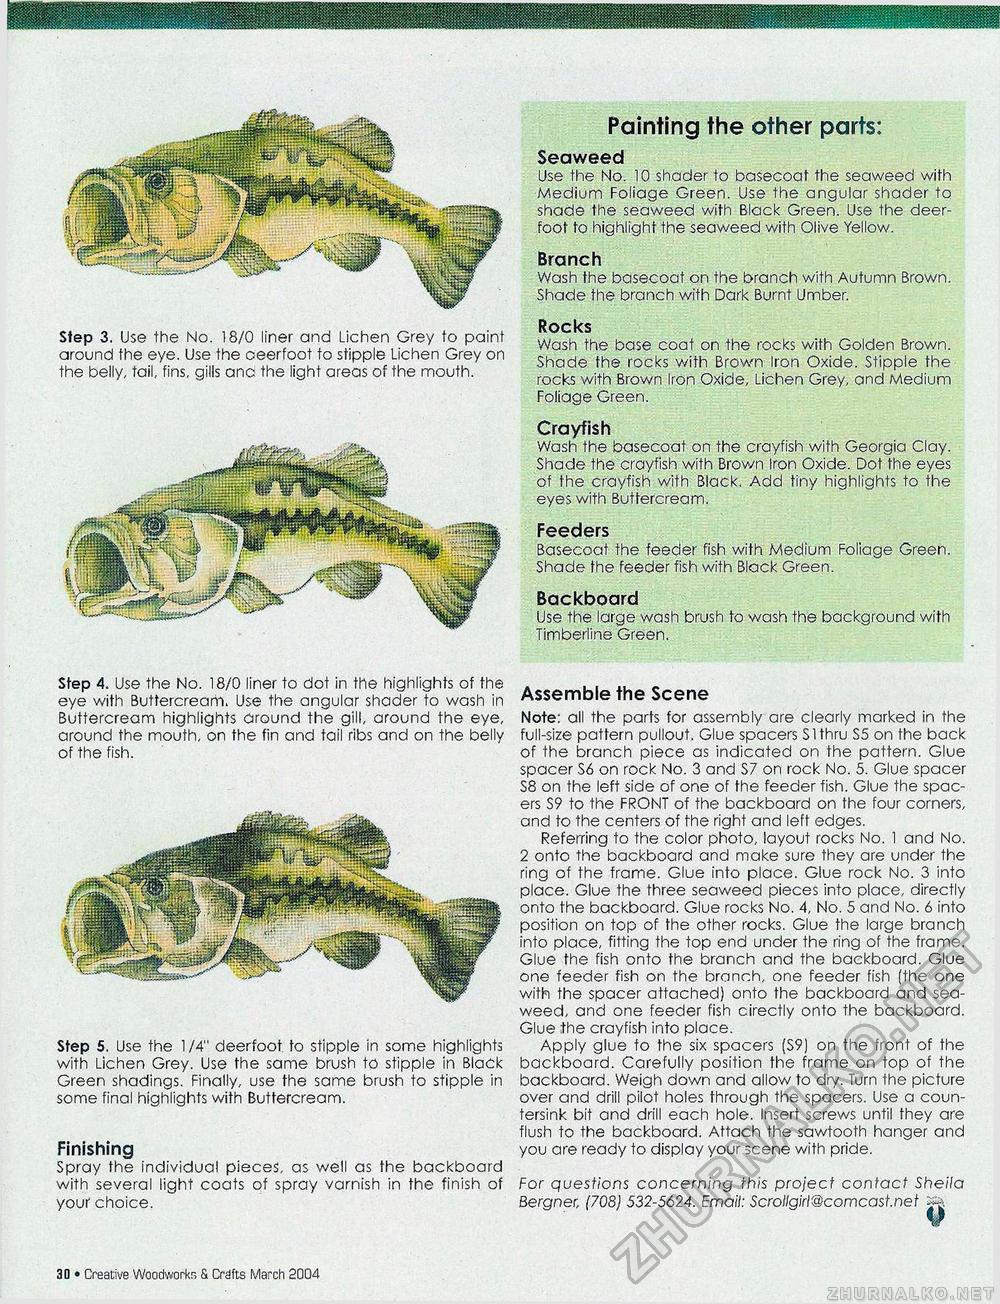
Step 3. Use the No. 18/0 liner and Lichen Grey to paint around the eye. Use the ceerfoot to stipple Lichen Grey on the belly, tail, fins, gills anc the light areas of the mouth. Step 4. Use the No. 18/0 liner to dot in the highlights of the eye with Buttercream. Use the angular shader to wash in Buttercream highlights around the gill, around the eye, around the mouth, on the fin and tail ribs and on the belly of the fish. Step 5. Use the 1 /4" deerfoot. to stipple in some highlights with Lichen Grey. Use the same brush to stipple in Black Green shadings. Finally, use the same brush to stipple in some final highlights with Buttercream. Finishing Spray the individual pieces, as well as the backboard with several light coats of spray varnish in the finish of your choice. Painting the other parts: Seaweed Use the No. 10 shader to basecoat the seaweed with Medium Foliage Green. Use the angular shader to shade the seaweed with Black Green. Use the deer-foot to highlight the seaweed with Olive Yellow. Branch Wash the basecoat on the branch with Autumn Brown. Shade the branch with Dark Burnt Umber. Rocks Wash the base coat on the rocks with Golden Brown. Shade the rocks with Brown Iron Oxide. Stipple the rocks with Brown Iron Oxide, Lichen Grey, and Medium Foliage Green. Crayfish Wash the basecoat on the crayfish with Georgia Clay. Shade the crayfish with Brown Iron Oxide. Dot the eyes of the crayfish with Black. Add tiny highlights to the eyes with Buttercream. Feeders Basecoat the feeder fish with Medium Foliage Green. Shade the feeder fish with Black Green. Backboard Use the large wash brush to wash the background with Timberline Green. Assemble the Scene Note: all the parts for assembly are clearly marked in the full-size pattern pullout. Glue spacers SI thru S5 on the back of the branch piece as indicated on the pattern. Glue spacer S6 on rock No. 3 and S7 on rock No. 5. Glue spacer S8 on the left side of one of the feeder fish. Glue the spacers S9 to the FRONT of the backboard on the four corners, and to the centers of the right and left edges. Referring to the color photo, layout rocks No. 1 and No. 2 onto the backboard and make sure they are under the ring of the frame. Glue into place. Glue rock No. 3 into place. Glue the three seaweed pieces into place, directly onto the backboard. Glue rocks No. 4, No. 5 and No. 6 into position on top of the other rocks. Glue the large branch into place, fitting the top end under the ring of the frame. Glue the fish onto the branch and the backboard. Glue one feeder fish on the branch, one feeder fish (the one with the spacer attached) onto the backboard and seaweed, and one feeder fish cirectly onto the backboard. Glue the crayfish into place. Apply glue to the six spacers (S9) on the front of the backboard. Carefully position the frame on top of the backboard. Weigh down and allow to dry. Turn the picture over and drill pilot holes through the spacers. Use a countersink bit and drill each hole. Insert screws until they are flush to the backboard. Attach the sawtooth hanger and you are ready to display your scene with pride. For questions concerning this project contact Sheila Bergner, (708) 532-5624. Email: Scrollgirl@comcast.net » V 3D • Creative Woodworks & Crdfts March 2004 |


