Creative Woodworks & crafts 2004-03, страница 33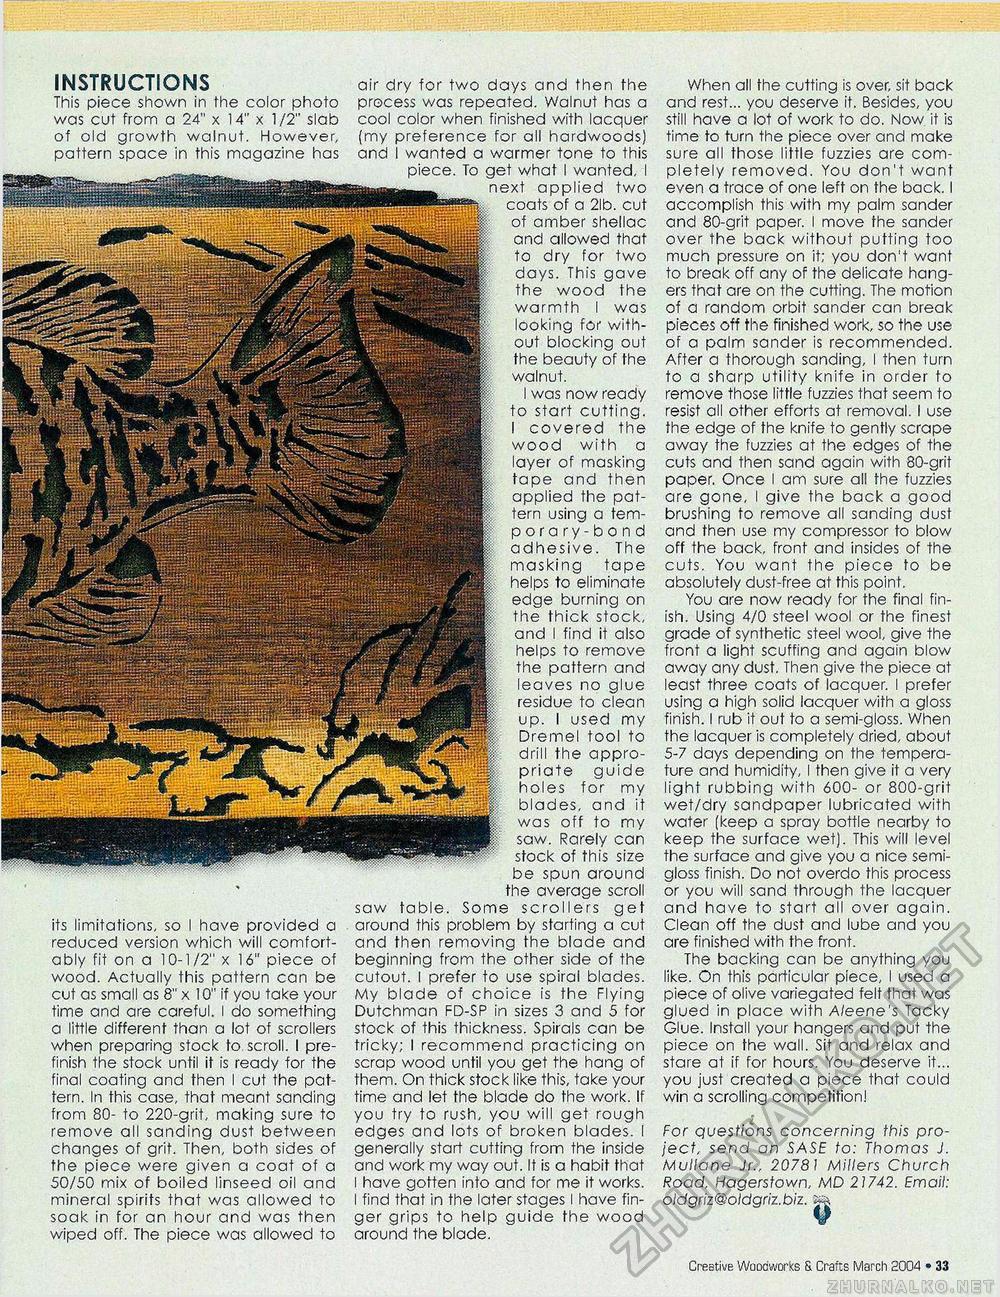
INSTRUCTIONS This piece shown in the color photo was cut from a 24" x 14" x 1/2" slab of old growth walnut. However, pattern space in this magazine has its limitations, so I have provided a reduced version which will comfortably fit on a 10-1/2" x 16" piece of wood. Actually this pattern can be cut as small as 8" x 10" if you take your time and are careful. I do something a little different than a lot of scrollers when preparing stock to. scroll. I pre-finish the stock until it is ready for the final coating and then I cut the pattern. In this case, that meant sanding from 80- to 220-grit, making sure to remove all sanding dust between changes of grit. Then, both sides of the piece were given a coat of a 50/50 mix of boiled linseed oil and mineral spirits that was allowed to soak in for an hour and was then wiped off. The piece was allowed to air dry for two days and then the process was repeated. Walnut has a cool color when finished with lacquer (my preference for all hardwoods) and I wanted a warmer tone to this ---—| what I wanted, I ixt applied two coats of a 21b. cut of amber shellac and allowed that to dry for two days. This gave the wood the warmth I was looking for without blocking out the beauty of the walnut. I was now ready to start cutting. I covered the wood with a layer of masking tape and then applied the pattern using a tem-pora ry-bo n d adhesive. The masking tape helps to eliminate edge burning on the thick stock, and I find it also helps to remove the pattern and leaves no glue residue to clean up. I used my Dremel tool to drill the appropriate guide holes for my blades, and it was off to my saw. Rarely can stock of this size be spun around the average scroll saw table. Some scrollers get around this problem by starting a cut and then removing the blade and beginning from the other side of the cutout. I prefer to use spiral blades. My blade of choice is the Flying Dutchman FD-SP in sizes 3 and 5 for stock of this thickness. Spirals can be tricky; I recommend practicing on scrap wood until you get the hang of them. On thick stock like this, take your time and let the blade do the work. If you try to rush, you will get rough edges and lots of broken blades. I generally start cutting from the inside and work my way out. It is a habit that I have gotten into and for me it works. I find that in the later stages I have finger grips to help guide the wood around the blade. When all the cutting is over, sit back and rest... you deserve it. Besides, you still have a lot of work to do. Now. it is time to turn the piece over and make sure all those little fuzzies are completely removed. You don't want even a trace of one left on the back. I accomplish this with my palm sander and 80-grit paper. I move the sander over the back without putting too much pressure on it; you don't want to break off any of the delicate hangers that are on the cutting. The motion of a random orbit sander can break pieces off the finished work, so the use of a palm sander is recommended. After a thorough sanding, I then turn to a sharp utility knife in order to remove those little fuzzies that seem to resist all other efforts at removal. I use the edge of the knife to gently scrape away the fuzzies at the edges of the cuts and then sand again with 80-grit paper. Once I am sure all the fuzzies are gone, I give the back a good brushing to remove all sanding dust and then use my compressor to blow off the back, front and insides of the cuts. You want the piece to be absolutely dust-free at this point. You are now ready for the final finish. Using 4/0 steel wool or the finest grade of synthetic steel wool, give the front a light scuffing and again blow away any dust. Then give the piece at least three coats of lacquer. I prefer using a high solid lacquer with a gloss finish. I rub it out to a semi-gloss. When the lacquer is completely dried, about 5-7 days depending on the temperature and humidity, I then give it a very light rubbing with 600- or 800-grit wet/dry sandpaper lubricated with water (keep a spray bottle nearby to keep the surface wet). This will level the surface and give you a nice semi-gloss finish. Do not overdo this process or you will sand through the lacquer and have to start all over again. Clean off the dust and lube and you are finished with the front. The backing can be anything you like. On this particular piece, I used a piece of olive variegated felt that was glued in place with A/eene's Tacky Glue. Install your hangers and put the piece on the wall. Sit and relax and stare at if for hours. You deserve it... you just created a piece that could win a scrolling competition! For questions concerning this project, send an SASE to: Thomas J. Mullane Jr., 20781 Millers Church Road, Hagerstown, MD 21742. Email: oldgriz@oldgriz.biz. 14 • Creative Woodworks S. Crafts March 2004 |


