Creative Woodworks & crafts 2004-03, страница 75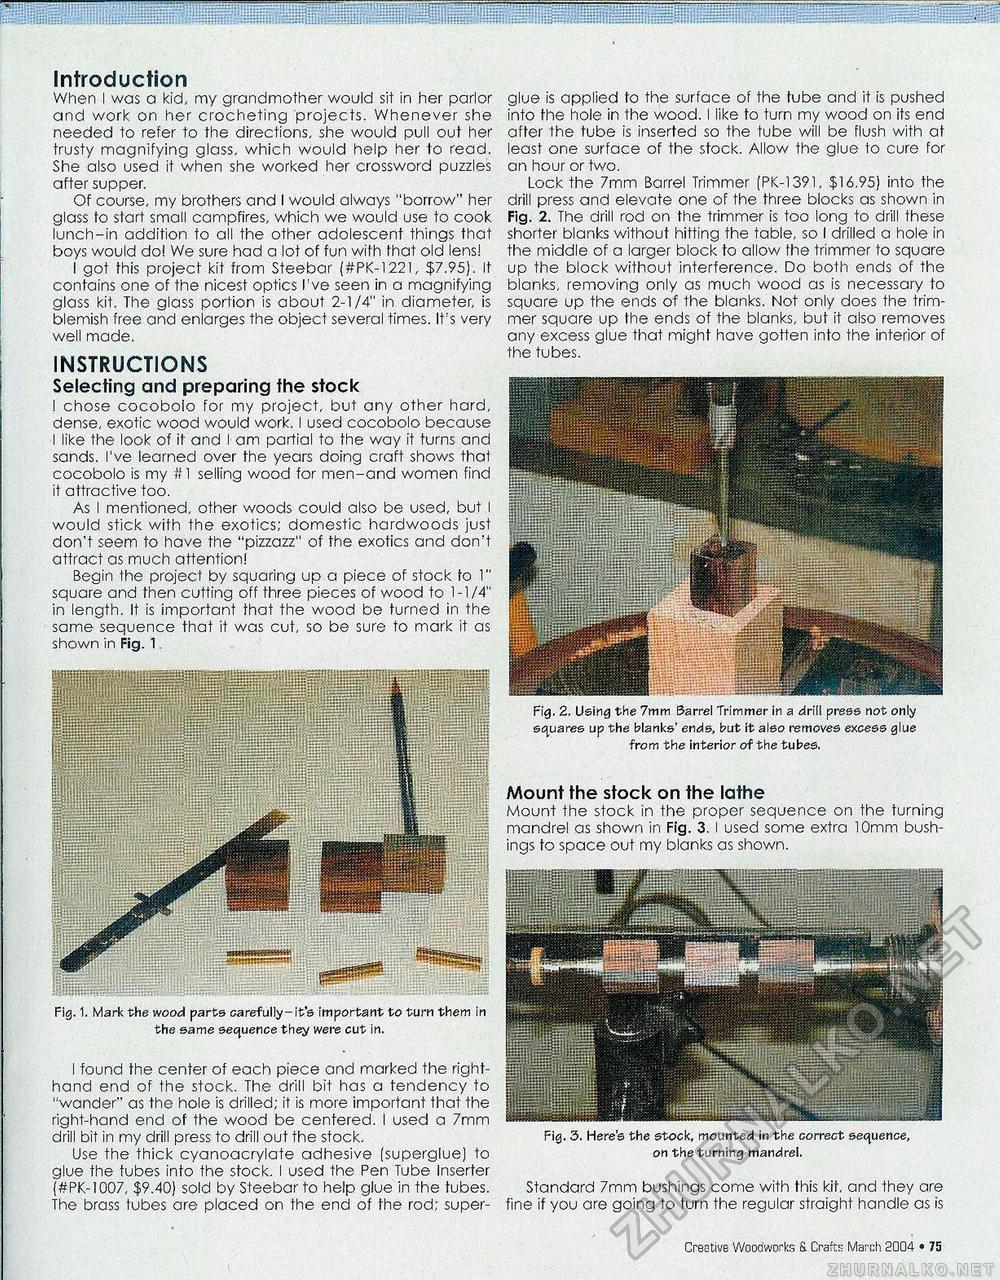
Introduction When I was a kid, my grandmother would sit in her parlor and work on her crocheting projects. Whenever she needed to refer to the directions, she would pull out her trusty magnifying glass, which would help her to read. She also used it when she worked her crossword puzzles after supper. Of course, my brothers and I would always "borrow" her glass to slart small campfires, which we would use to cook lunch-in addition to all the other adolescent things that boys would do! We sure had a lot of fun with that old lens! I got this project kit from Steebar (#PK-1221, $7.95). If contains one of the nicest optics I've seen in a magnifying glass kit. The glass portion is about 2-1/4" in diameter, is blemish free and enlarges the object several times. It's very well made. INSTRUCTIONS Selecting and preparing the stock I chose cocobolo for my project, but any other hard, dense, exotic wood would work. I used cocobolo because I like the look of it and I am partial to the way it turns and sands. I've learned over the years doing craft shows that cocobolo is my #1 selling wood for men-and women find it attractive too. As I mentioned, other woods could also be used, but I would stick with the exotics; domestic hardwoods just don't seem to have the "pizzazz" of the exotics and don't attract as much attention! Begin the project by squaring up a piece of stock to 1" square and then cutting off three pieces of wood to 1-1/4" in length. It is important that the wood be turned in the same sequence that it was cut, so be sure to mark it as shewn in Fig. 1. Fig. 1. Mark the wood parts carefully-it's important to turn them in the same sequence they were cut in. I found the center of each piece and marked the right-hand end of the stock. The drill bit has a tendency to "wonder" as the hole is drilled; it is more important that the right-hand end of the wood be centered. I used a 7mm drill bit in my drill press to drill out the stock. Use the thick cyanoacrylate adhesive (superglue) to glue the tubes into the stock. I used the Pen Tube Inserter {#PK-1007, $9.40) sold by Steebar to help glue in the tubes. The brass tubes are placed on the end of the rod; super- glue is applied to the surface of the tube and it is pushed into the hole in the wood. I like to turn my wood on its end alter the tube is inserted so the tube will be flush with at least one surface of the stock. Allow the glue to cure for an hour or two. Lock the 7mm Barrel Trimmer (PK-1391, $16.95) into the drill press and elevate one of the three blocks as shown in Fig. 2. The drill rod on the trimmer is too long to drill these shorter blanks without hitting the table, so I drilled a hole in the middle of a larger block to allow the trimmer to square up the block without interference. Do both ends of the blanks, removing only as much wood as is necessary to square up the ends of the blanks. Not only does the trimmer square up the ends of the blanks, but it also removes any excess glue that might have gotten info the interior of the tubes. Fig, 2. Using the 7mm Barrel Trimmer in a drill press not only squares up the blanks' ends, but it also removes excess glue from the interior of the tubes. Mount the stock on the lathe Mount the stock in the proper sequence on the turning mandrel as shown in Fig. 3. I used some extra 10mm bushings to space out my blanks as shown. Fig. 3. Here's the stock, mounted in the correct sequence, on the turning mandrel. Standard 7mm bushings come with this kit, and they are fine if you are going to turn the regular straight handle as is 14 • Creative Woodworks S. Crafts March 2004 |


