Creative Woodworks & crafts 2004-03, страница 76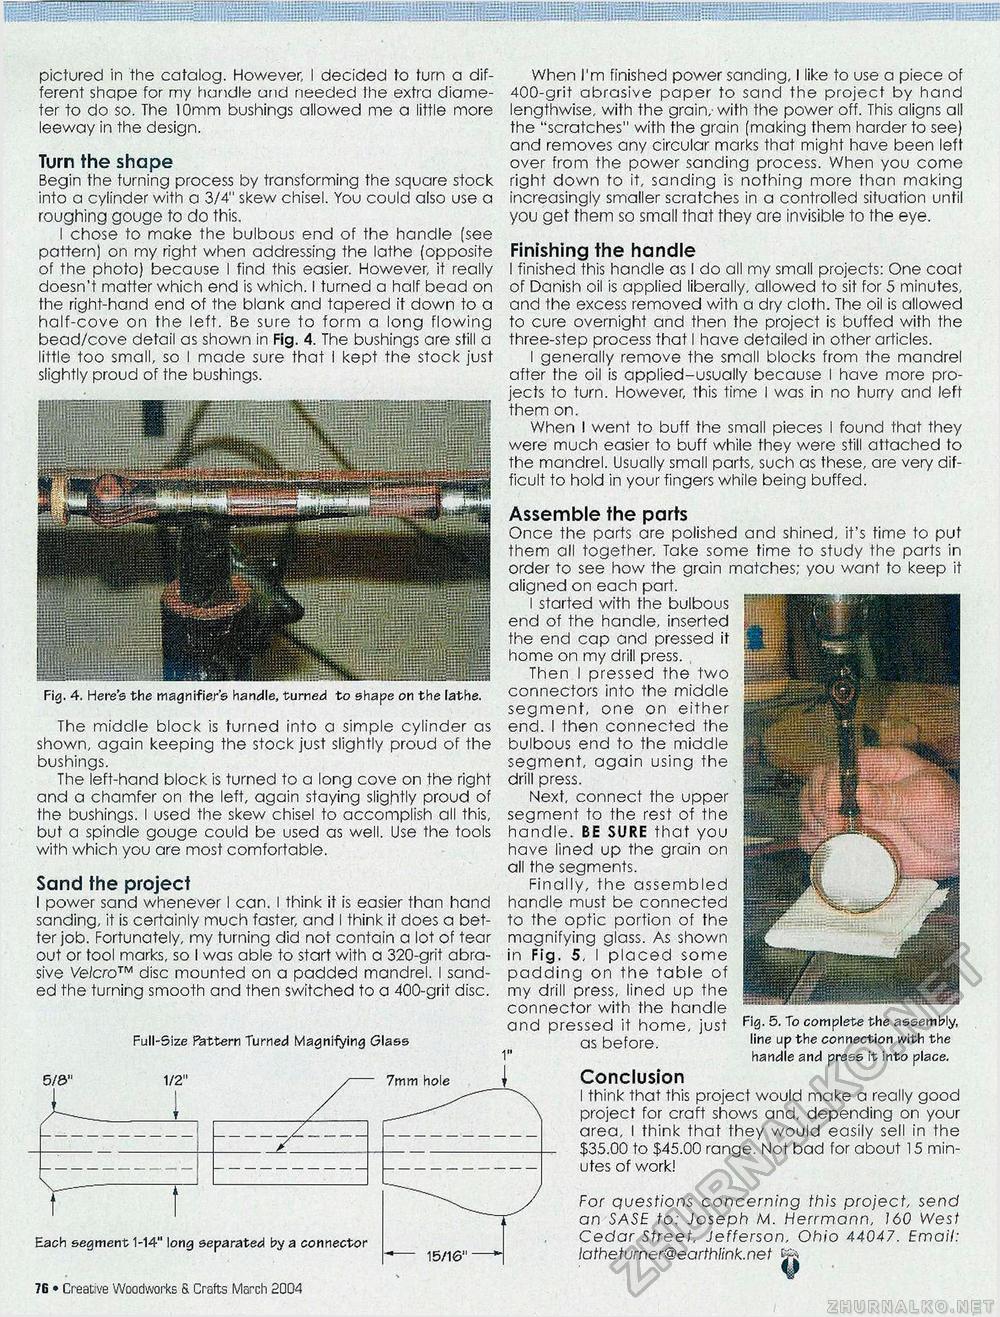
pictured in the catalog. However, I decided to turn a different shape for my handle arid needed the extra diameter to do so. The 10mm bushings allowed me a little more leeway in the design. Turn the shape Begin the turning process by transforming the square stock into a cylinder with a 3/4" skew chisel. You could also use a roughing gouge to do this. I chose to make the bulbous end of the handle (see pattern) on my right when addressing the lathe (opposite of the photo) because I find this easier. However, it really doesn't matter which end is which. I turned a half bead on the right-hand end of the blank and tapered it down to a halt-cove on the left. Be sure to form a long flowing bead/cove detail as shown in Fig. 4. The bushings are still a little too small, so I made sure that 1 kept the stock just slightly proud of the bushings. When I'm finished power sanding, I like to use a piece of 400-grit abrasive paper to sand the project by hand lengthwise, with the grain, with the power off. This aligns all the "scratches" with the grain (making them harder to see) and removes any circular marks that might have been left over from the power sanding process. When you come right down to it, sanding is nothing more than making increasingly smaller scratches in a controlled situation until you get them so small that they are invisible to the eye. Finishing the handle I finished this handle as I do all my small projects: One coat of Danish oil is applied liberally, allowed to sit for 5 minutes, and the excess removed with a dry cloth. The oil is allowed to cure overnight and then the project is buffed with the three-step process that I have detailed in other articles. I generally remove the small blocks from the mandrel after the oil is applied-usually because I have more projects to turn. However, this time I was in no hurry and left them on. When I went to buff the small pieces I found that they were much easier to buff while they were still attached to the mandrel. Usually small parts, such as these, are very difficult to hold in your fingers while being buffed. Fig. 4. Here's the magnifier's handle, turned to shape on the lathe. The middle block is turned into a simple cylinder as shown, again keeping the stock just slightly proud of the bushings. The left-hand block is turned to a long cove on the right and a chamfer on the left, again staying slightly proud of the bushings. I used the skew chisel to accomplish all this, but a spindle gouge could be used as well. Use the tools with which you are most comfortable. Sand the project I power sand whenever 1 can. I think it is easier than hand sanding, it is certainly much faster, and I think it does a better job. Fortunately, my turning did not contain a lot of tear out or tool marks, so I was able to start with a 320-grit abrasive Velcro™ disc mounted on a padded mandrel. I sanded the turning smooth and then switched to a 400-grit disc. Full-Size Pattern Turned Magnifying Glass 1/2" /- 7mm hole Each segment 1-14" long separated by a connector 14 • Creative Woodworks S. Crafts March 2004 Assemble the parts Once the parts are polished and shined, it's time to put them all together. Take some time to study the parts in order to see how the grain matches; you want to keep it aligned on each part. I started with the bulbous end of the handle, inserted the end cap and pressed it home on my drill press. Then I pressed the two connectors into the middle segment, one on either end. I then connected the bulbous end to the middle segment, again using the drill press. Next, connect the upper segment to the rest of the handle. BE SURE that you have lined up the grain on all the segments. Finally, the assembled handle must be connected to the optic portion of the magnifying glass. As shown in Fig. 5, I placed some padding on the table of my drill press, lined up the connector with the handle and pressed it home, just Fig-5. To complete the assembly, as before "ne UP connection with the 1" handle and press it into place. j Conclusion I think that this project would make a really good project for craft shows and, depending on your area, I think that they would easily sell in the $35.00 to $45.00 range. Not bad for about 15 minutes of work! For questions concerning this project, send an SASE to: Joseph M. Herrmann, 160 West Cedar Street, Jefferson, Ohio 44047. Email: latheturner@earthlink.net fft |


