Creative Woodworks & crafts 2004-06, страница 51
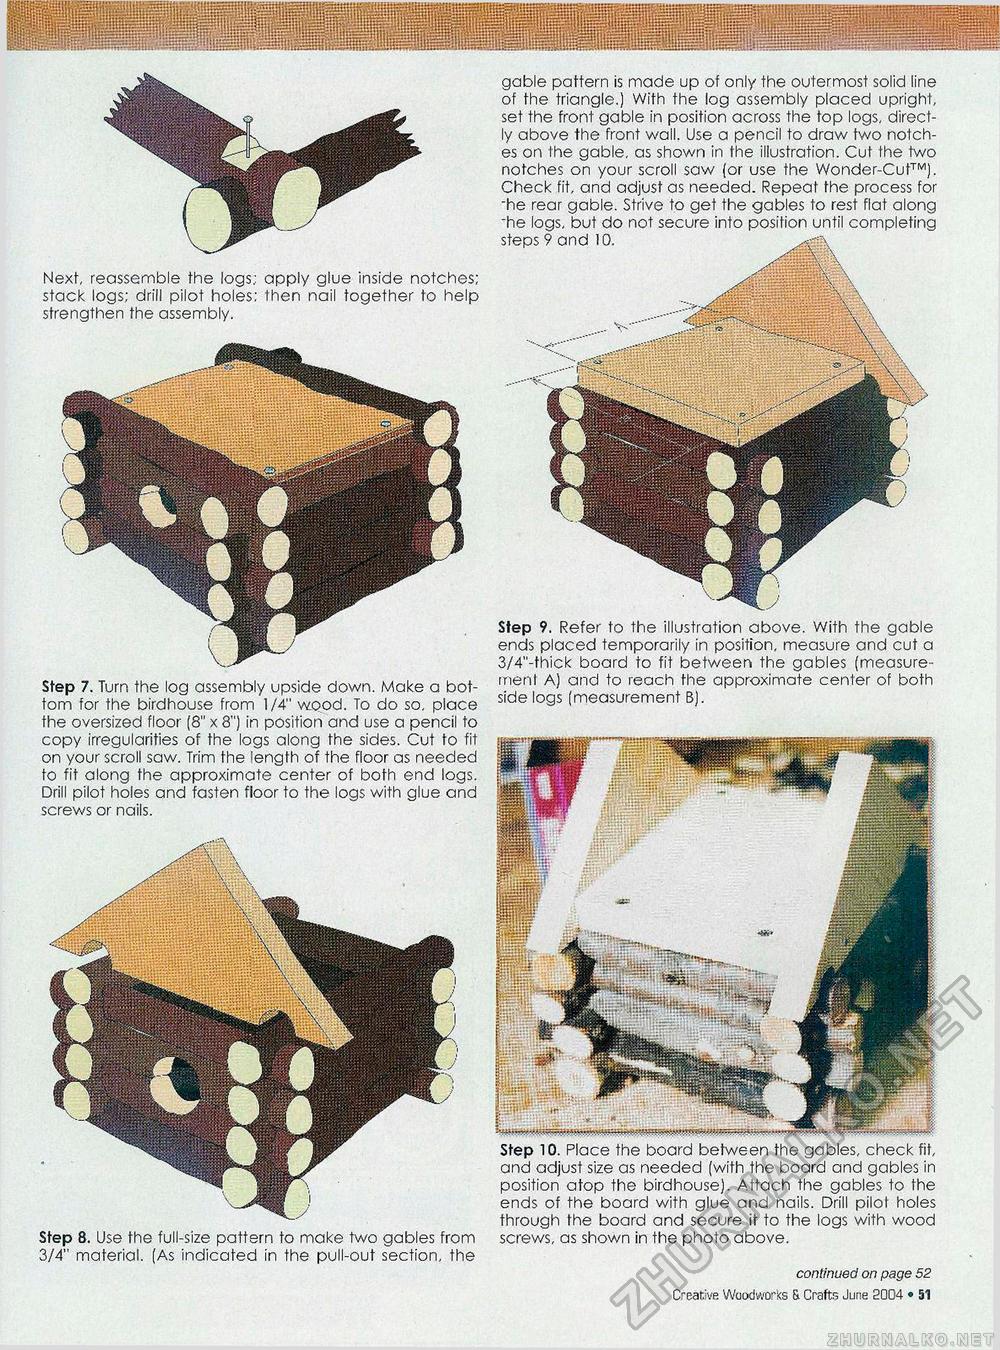
Step 7. Turn the log assembly upside down. Make a bottom for the birdhouse from 1/4" wood. To do so, place the oversized floor (8" x 8") in position and use a pencil to copy irregularities of the logs along the sides. Cut to fit on your scroll saw. Trim the length of the floor as needed to fit along the approximate center of both end logs. Drill pilot holes and fasten floor to the logs with glue and screws or nails. Step 10. Place the board between the gables, check fit, and adjust size as needed (with the board and gables in position atop the birdhouse). Attach the gables to the ends of the board with glue and nails. Drill pilot holes through the board and secure it to the logs with wood screws, as shown in the photo above. continued on page 52 4fi • Creative Woodworks S. Crafts June 2004 Next, reassemble the logs: apply glue inside notches; stack logs; drill pilot holes: then nail together to help strengthen the assembly. Step 8. Use the full-size pattern to make two gables from 3/4" material. (As indicated in the pull-out section, the Step 9. Refer to the illustration above. With the gable ends placed temporarily in position, measure and cut a 3/4"-thick board to fit between the gables (measurement A) and to reach the approximate center of both side logs (measurement B). gable pattern is made up of only the outermost solid line of the triangle.) With the log assembly placed upright, set the front gable in position across the top logs, directly above the front wall. Use a pencil to draw two notches on the gable, as shown in the illustration. Cut the two notches on your scroll saw (or use the Wonder-Cut™). Check fit, and adjust as needed. Repeat the process for •he rear gable. Strive to get the gables to rest flat along "he logs, but do not secure into position until completing steps 9 and 10. |


