Creative Woodworks & crafts 2004-06, страница 50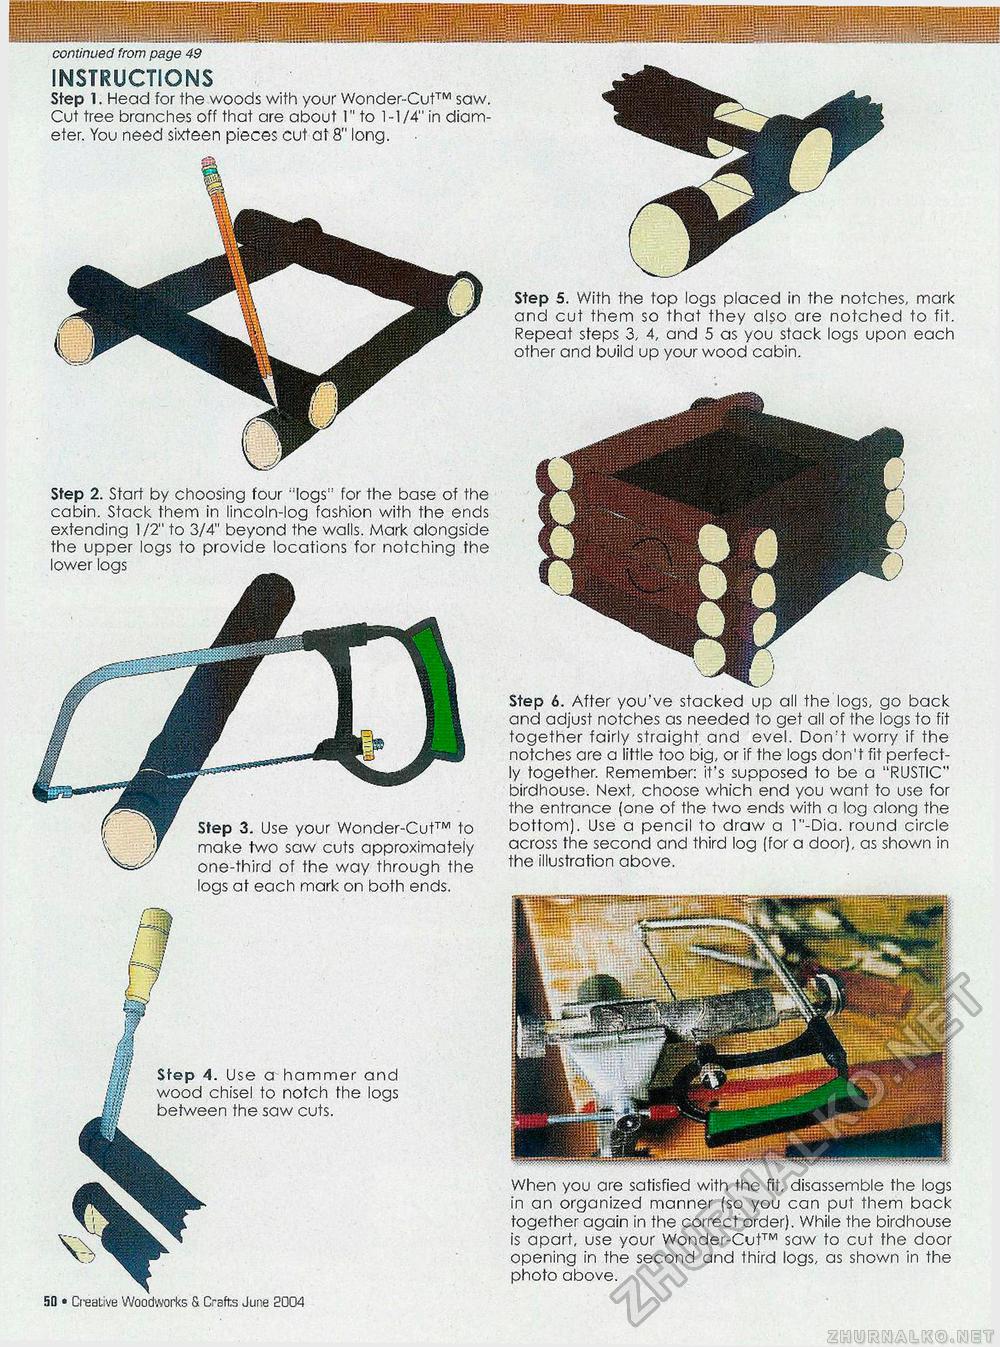
continued from page 49 INSTRUCTIONS Step 1. Head for the woods with your Wonder-Cut™ saw. Cut tree branches off that are about 1" to 1-1/4" in diameter. You need sixteen pieces cut at 8" long. Step 3. Use your Wonder-Cut™ to make two saw cuts approximately one-third of the way through the logs at each mark on both ends. Step 4. Use a hammer and wood chisel to notch the logs between the saw cuts. Step 5. With the top logs placed in the notches, mark and cut them so that they also are notched to fit. Repeat steps 3, 4, and 5 as you stack logs upon each other and build up your wood cabin. Step 2. Start by choosing four "logs" for the base of the cabin. Stack them in lincoln-log fashion with the ends extending 1/2" to 3/4" beyond the walls. Mark alongside the upper logs to provide locations for notching the lower logs Step 6. After you've stacked up all the logs, go back and adjust notches as needed to get all of the logs to fit together fairly straight and evel. Don't worry if the notches are a little too big, or if the logs don't fit perfectly together. Remember: it's supposed to be a "RUSTIC" birdhouse. Next, choose which end you want to use for the entrance (one of the two ends with o log along the bottom). Use a pencil to draw a 1"-Dia. round circle across the second and third log (for a door), as shown in the illustration above. When you are satisfied with the fit, disassemble the logs in an organized manner (so you can put them back together again in the correct order). While the birdhouse is apart, use your Wonder-Cut™ saw to cut the door opening in the second and third logs, as shown in the photo above. 4fi • Creative Woodworks S. Crafts June 2004 |


