Creative Woodworks & crafts 2004-06, страница 47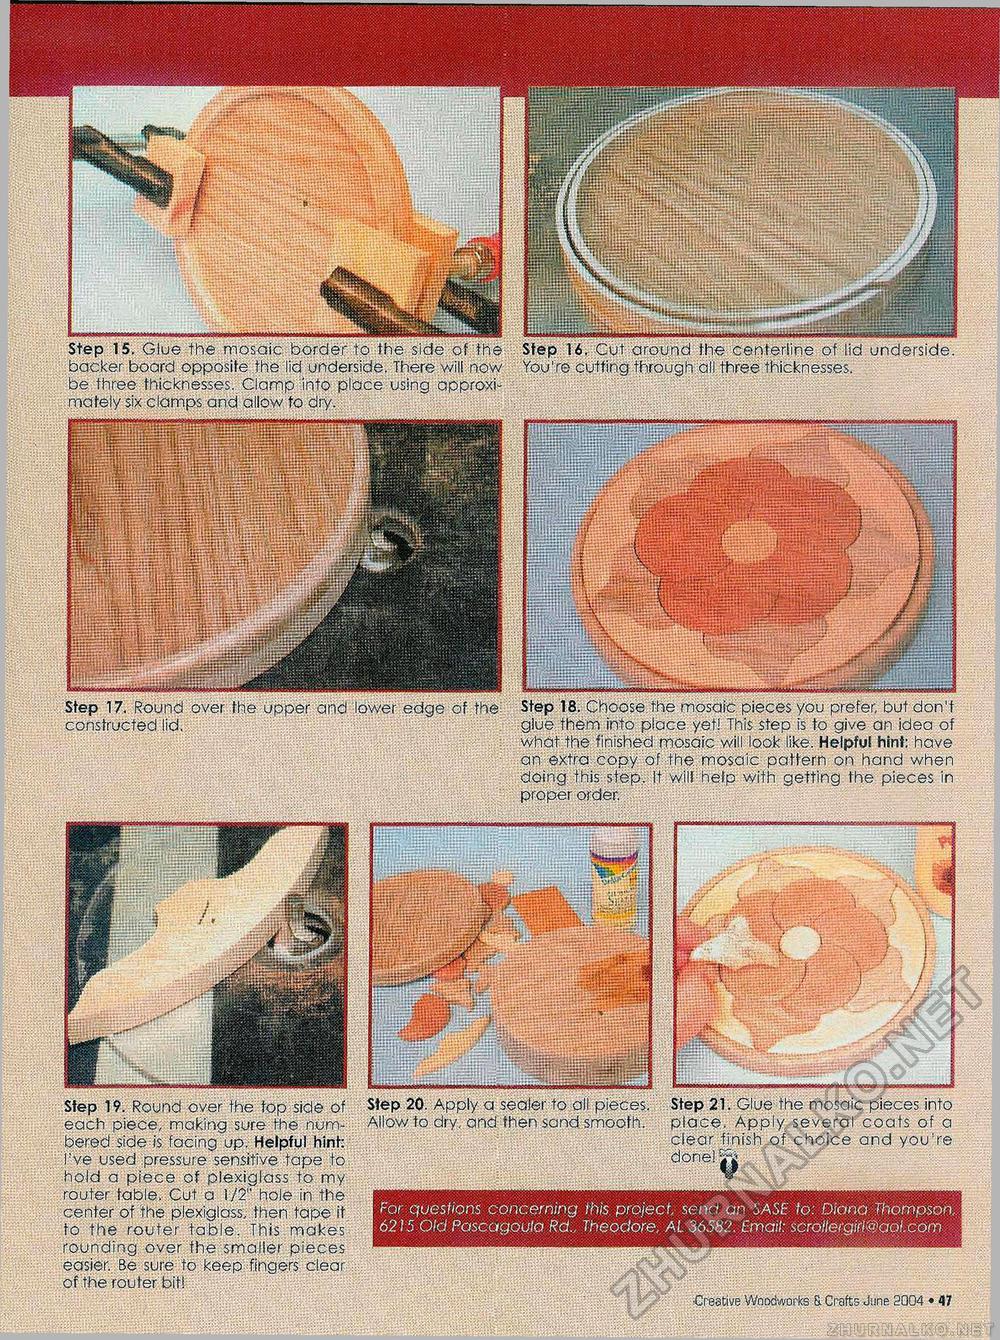
For question's concerning this project send an SASE to Diana Thompson, 6215 Old Pascagoula Rd„ Theodore, AL 36582. Email: scrqllergirl@aQl.com Step 15. Glue the mosaic border to the side of tne Step 16. Cut around the cente-!> o of backer board opposite the lid underside. There will now You're cutting through all three thicknesses, be three thicknesses. Clamp into place using approximately six clamps and allow to dry. mm .iniiKiaijti Step 17. Round over the upper and lower edge of the: Step 18. Choose the mosaic pieces you prefer, but don't constructed (id. glue them into place yet! This step is to give an idea of what the finished mosaic will look like. Helpful hint: have an extra copy of the mosaic pattern on hand when doing this step. It will help with getting the pieces in proper order. Step 19. Round over the fop side of Step 20. Apply a sealer to all pieces. each piece, making sure the num- Allow to dry, and then sand smooth. bered side is facing up. Helpful hint: I've used pressure sensitive tape to hold a piece of plexiglass to my router table. Cut a 1/2" hole in the I8|MMH9||9B^ center of the plexiglass, then tape it TC i-he 'CM ::.....e. mo! ■;; rounding over the smaller pieces easier. Be sure to keep fingers clear of the router bit! Step 21. Glue the mosaic pieces into place. Apply several coats of a clear finish of choice and you're clone! Creative Woodworks S. Crafts June 2004 • 47 |


