Creative Woodworks & crafts 2004-08, страница 57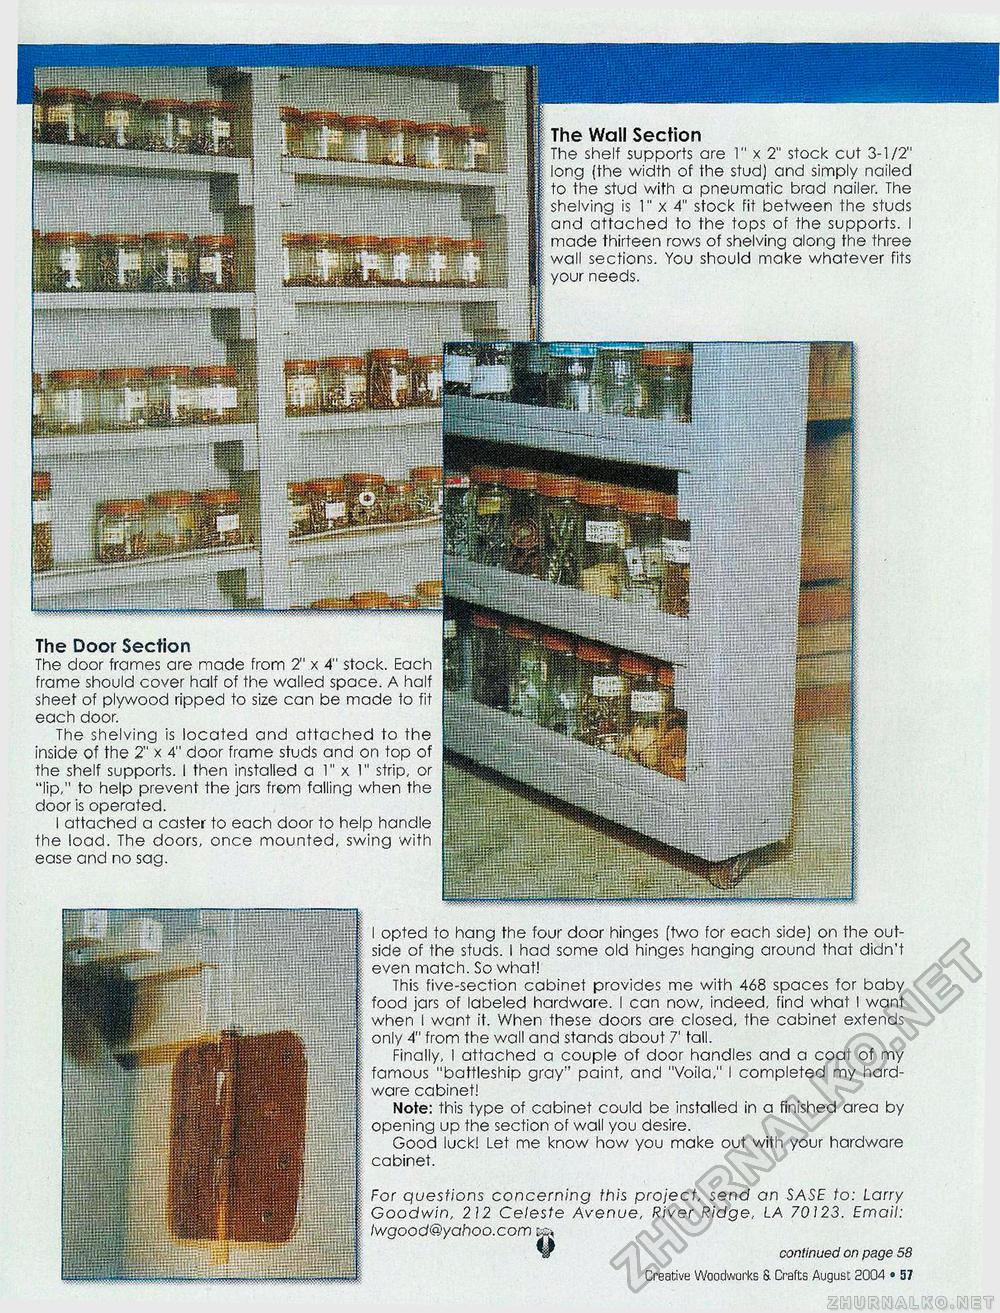
The Wall Section shelf supports are 1" x 2" stock cut 3-1/2" long (the width of the stud) and simply nailed to the stud with a pneumatic brad nailer. The shelving is 1" x 4" stock fit between the studs and attached to the tops of the supports. I made thirteen rows of shelving along the three wall sections. You should make whatever fits needs. The Door Section The door frames are made from 2" x 4" stock. Each frame should cover half of the walled space. A half sheet of plywood ripped to size can be made to fit each door. The shelving is located and attached to the inside of the 2" x 4" door frame studs and on top of the shelf supports. I then installed a 1" x 1" strip, or "lip," to help prevent the jars from falling when the door is operated. I attached a caster to each door to help handle the load. The doors, once mounted, swing with ease and no sag. I opted to hang the four door hinges (two for each side) on the outside of the studs. I had some old hinges hanging around that didn't even match. So what! This five-section cabinet provides me with 468 spaces for baby food jars of labeled hardware. I can now, indeed, find what I want when I want it. When these doors are closed, the cabinet extends only 4" from the wall and stands about 7' tall. Finally, I attached a couple of door handles and a coat of my famous "battleship gray" paint, and "Voila," I completed my hardware cabinet! Note: this type of cabinet could be installed in a finished area by opening up the section of wall you desire. Good luck! Let me know how you make out with your hardware cabinet. For questions concerning this project, send an SASE to: Larry Goodwin, 212 Celeste Avenue, River Ridge, LA 70123. Email: lwgood@yahoo.com W continued on page 58 Creative Woodworks 3. Crafts August 2004 • 18 |


