Creative Woodworks & crafts 2004-09, страница 12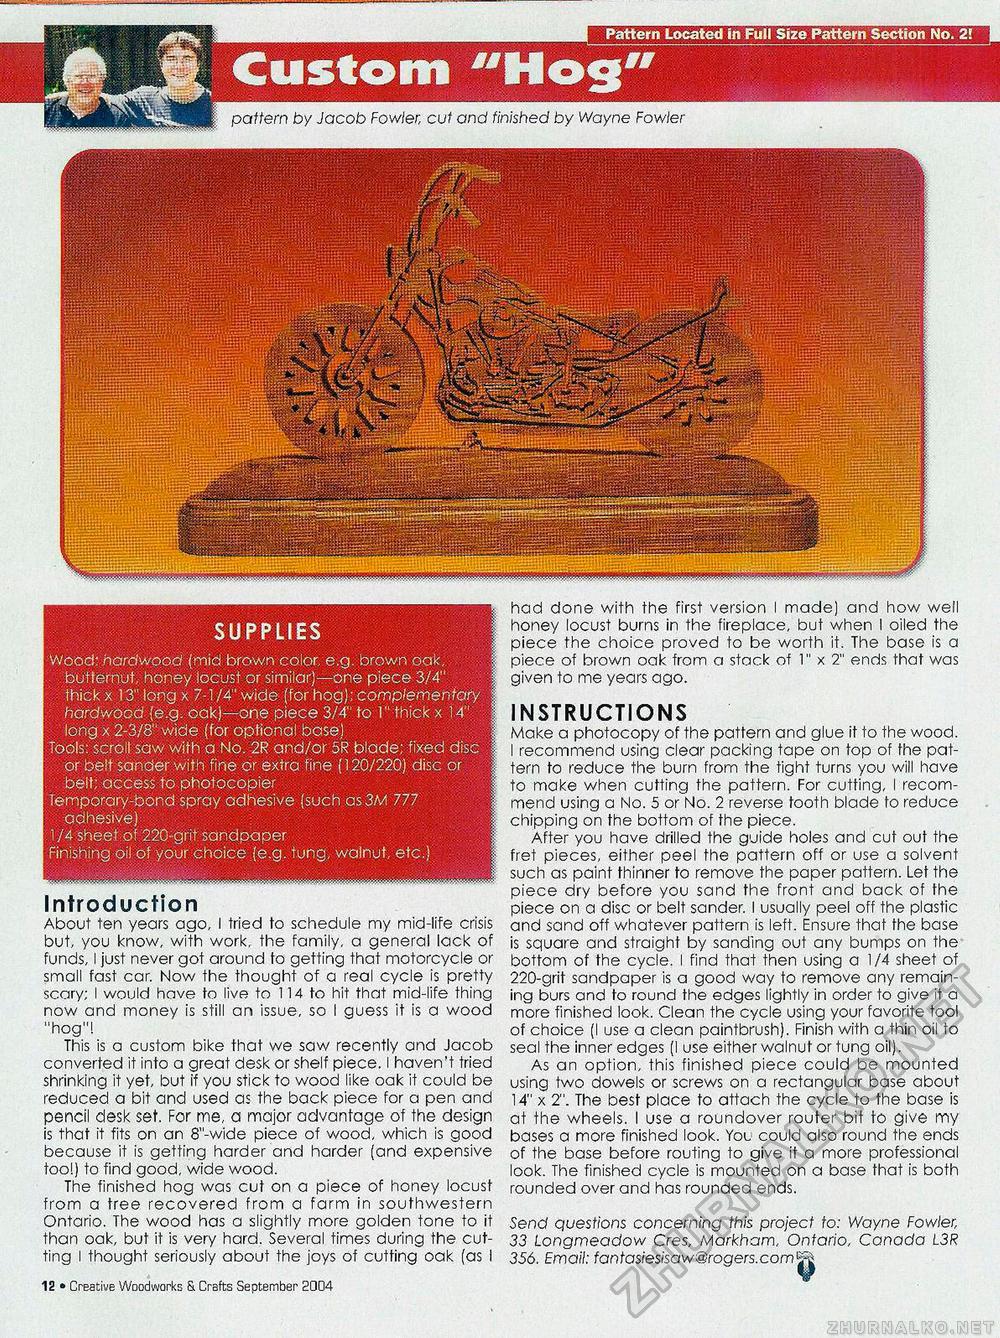
pattern by Jacob Fowler, cut and finished by Wayne Fowler SUPPLIES Wood: hardwood (mid brown color e.g. brown oak, butternut,: honey locust or similar)—one piece 3/4" thick x 13" long x 7-1 /4" wide "(for hog); complementary hardwood (e.g. oak)—one piece 3/4" to 1" thick x 14" long x 2-3/8" wide (for optional base) Tools: scroll saw with a No. 2R and/or 5R blade; fixed disc or belt sander with fine or extra fine (120/220) disc or beit; access to photocopier Temporary-bond spray adhesive (such as3M 777 adhesive) 1 /4 sheet of 220-grit sandpaper Finishing oil of your choice (e.g. tung, wainut, etc.) Introduction About ten years ago, I tried to schedule my mid-life crisis but, you know, with work, the family, a general lack of funds, I just never got around to getting that motorcycle or small fast car. Now the thought of a real cycle is pretty scary; I would have to live to 114 to hit that mid-life thing now and money is still an issue, so I guess it is a wood "hog"! This is a custom bike that we saw recently and Jacob converted it into a great desk or shelf piece. I haven't tried shrinking it yet, but if you stick to wood like oak it could be reduced a bit and used as the back piece for a pen and pencil desk set. For me, a major advantage of the design is that it fits on an 8"-wide piece of wood, which is good because it is getting harder and harder (and expensive too!) to find good, wide wood. The finished hog was cut on a piece of honey locust from a tree recovered from a farm in southwestern Ontario. The wood has a slightly more golden tone to it than oak, but it is very hard. Several times during the cutting I thought seriously about the joys of cutting oak (as I fit • Creative Woodworks S. Crafts September 2004 had done with the first version I made) and how well honey locust burns in the fireplace, but when I oiled the piece the choice proved to be worth it. The base is a piece of brown oak from a stack of l" x 2" ends that was given to me years ago. INSTRUCTIONS Make a photocopy of the pattern and glue it to the wood. I recommend using clear packing tape on top of the pattern to reduce the burn from the tight turns you will have to make when cutting the pattern. For cutting, I recommend using a No. 5 or No. 2 reverse tooth blade to reduce chipping on the bottom of the piece. After you have drilled the guide holes and cut out the fret pieces, either peel the pattern off or use a solvent such as paint thinner to remove the paper pattern. Let the piece dry before you sand the front and back of the piece on a disc or belt sander. I usually peel off the plastic and sand off whatever pattern is left. Ensure that the base is sguare and straight by sanding out any bumps on the bottom of the cycle. I find that then using a 1/4 sheet of 220-grit sandpaper is a good way to remove any remaining burs and to round the edges lightly in order to give it a more finished look. Clean the cycle using your favorite tool of choice (I use a clean paintbrush). Finish with a thin oil to seal the inner edges (I use either walnut or tung oil). As an option, this finished piece could be mounted using two dowels or screws on a rectangular base about 14" x 2". The best place to attach the cycle to the base is at the wheels. I use a roundover router bit to give my bases a more finished look. Yol could also round the ends of the base before routing to give it a more professional look. The finished cycle is mounted on a base that is both rounded over and has rounded ends. Send questions concerning this project to: Wayne Fowler, 33 Longmeadow Cres, Markham, Ontario, Canada L3R 356. Email: fantasie$isaw@rogers.com<j?& |


