Creative Woodworks & crafts 2004-09, страница 22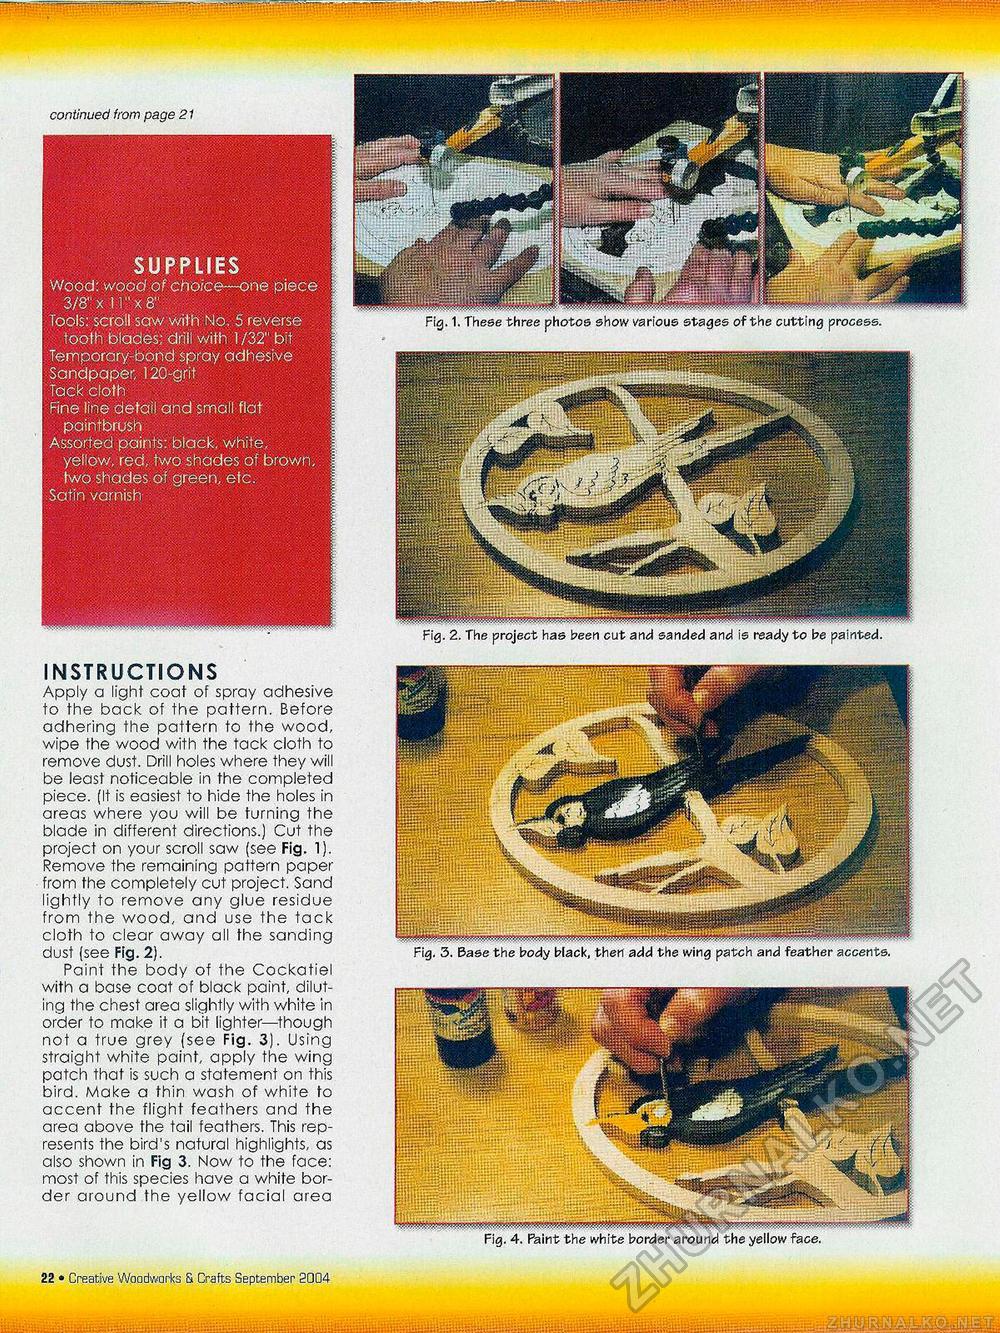
SUPPLIES Wood: wood of choice—one piece 3/8" x 1!" x 8" Tools: scroll saw with NO. 5 reverse tooth blades; drill with 1/32" bit Temporary-bond spray adhesive. Sandpaper, 120-grit Tack ciofh Fine line detail and small flat paintbrush Assorted paints: black, white, yellow, red, two shades of brown, two shades of green, etc. Satin varnish continued from page 21 Fig. 1. These three photos show various stages of the cutting process. INSTRUCTIONS Apply a light coat of spray adhesive to the back of the pattern. Before adhering the pattern to the wood, wipe the wood with the tack cloth to remove dust. Drill holes where they will be least noticeable in the completed piece. (It is easiest to hide the holes in areas where you will be turning the blade in different directions.) Cut the project on your scroll saw (see Fig. 1). Remove the remaining pattern paper from the completely cut project. Sand lightly to remove any glue residue from the wood, and use the tack cloth to clear away all the sanding dust (see Fig. 2). Paint the body of the Cockatiel with a base coat of black paint, diluting the chest area slightly with white in order to make it a bit lighter—though not a true grey (see Fig. 3). Using straight white paint, apply the wing patch that is such a statement on this bird. Make a thin wash of white to accent the flight feathers and the area above the tail feathers. This represents the bird's natural highlights, as also shown in Fig 3. Now to the face: most of this species have a white border around the yellow facial area Fig. 2. The project has been cut and sanded and is ready to be painted. fit • Creative Woodworks S. Crafts September 2004 Fig. 4. Paint the white border around the yellow face. |


